DIY Origami Tulips: A Step-by-Step Guide
Key Summary:
- Origami is the art of paper folding that originated in Japan and has become a popular craft worldwide.
- This article will provide a step-by-step guide on creating DIY origami tulips, perfect for crafting enthusiasts.
- Key findings will cover the history of origami, materials needed, step-by-step instructions, tips and tricks, variations, and real-world use cases.
Origami is a traditional Japanese art form that has evolved into a beloved craft around the globe. In this article, we will explore the world of DIY origami tulips, offering a detailed guide for creating beautiful paper flowers. Whether you're a beginner or an experienced crafter, this step-by-step tutorial will help you master the art of folding and assembling origami tulips. From the history of origami to customization options and real-world use cases, this comprehensive guide will inspire you to unleash your creativity and craft stunning paper tulips for any occasion.
History of Origami
Origami, which means "paper folding" in Japanese, has a long and rich history dating back to the 17th century. Initially used for ceremonial purposes, origami has since evolved into a popular art form enjoyed by people of all ages around the world. In Japan, origami is deeply rooted in tradition and is often associated with themes of peace, harmony, and creativity.
Origins in Japan
The art of origami is believed to have originated in Japan during the Edo period (1603-1868). Paper folding was initially used in religious ceremonies and formal events, with intricate designs symbolizing good luck and prosperity. Over time, origami became more accessible to the general public, leading to the development of various folding techniques and styles.
Materials Needed
To create DIY origami tulips, you will need a few simple materials that are easy to find at any craft store or online. These materials include colored paper, scissors, glue, and a flat surface to work on. You can choose from a variety of paper colors and patterns to customize your origami tulips to suit your personal style or the occasion.
Choosing the Right Paper
When selecting paper for your origami tulips, it's essential to choose a type that is sturdy yet easy to fold. Origami paper, also known as kami, is the most popular choice for origami projects due to its lightweight and colorful nature. You can also use decorative paper, wrapping paper, or even recycled materials to create unique and eco-friendly origami tulips.
Step-by-Step Instructions
Creating DIY origami tulips is a fun and rewarding craft project that anyone can enjoy. Follow these step-by-step instructions to fold and assemble your own paper tulips:
Folding the Tulip Petals
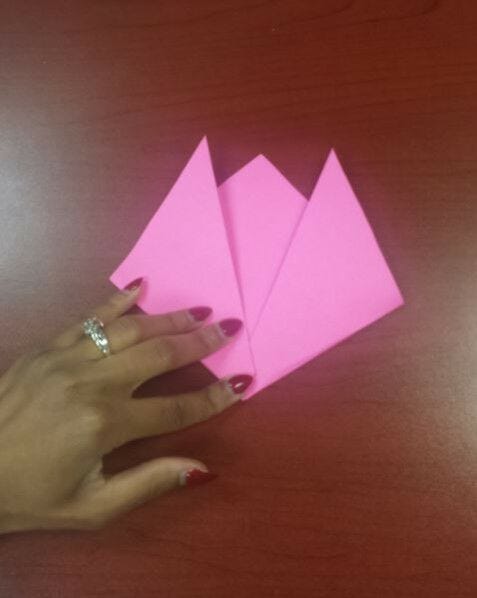
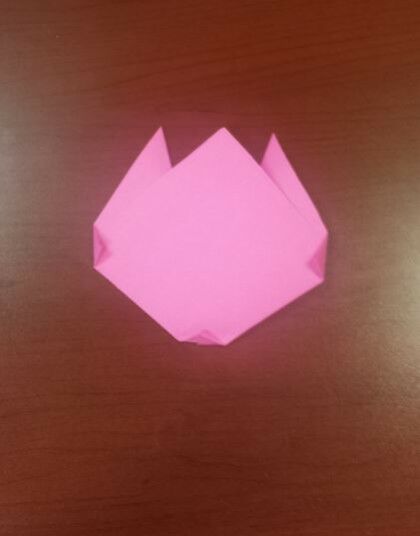
Start by folding a square piece of paper in half diagonally to create a triangle. Then, fold the two bottom corners of the triangle up to the top point to form a smaller triangle. Next, fold the two side corners of the triangle towards the center to create the tulip petals. Repeat this process with additional squares of paper to make multiple tulip petals.
Tips and Tricks
For beginners looking to master the art of DIY origami tulips, here are some helpful tips and tricks to ensure successful folding and assembly:
Practice Makes Perfect
Don't be discouraged if your first few attempts at folding origami tulips don't turn out perfectly. Like any craft, origami requires practice and patience to master. Take your time, follow the instructions carefully, and don't be afraid to make mistakes along the way.
Variations and Customization
One of the best things about DIY origami tulips is the endless possibilities for customization. You can experiment with different paper colors, sizes, and patterns to create a unique bouquet of paper flowers that reflect your personal style. Here are some ideas for customizing your origami tulips:
Adding Details
Enhance your origami tulips by adding details such as glitter, sequins, or beads to the petals. You can also use markers or paint to create intricate designs on the paper before folding. Get creative and let your imagination run wild with different embellishments to make your origami tulips truly one-of-a-kind.
Who Should Try DIY Origami Tulips
DIY origami tulips are perfect for:
- Crafting enthusiasts looking for a new project
- People who enjoy working with their hands
- Individuals who appreciate handmade gifts
- Anyone interested in exploring the art of origami
- Those looking to add a touch of beauty to their home
When to Create DIY Origami Tulips
You can make DIY origami tulips:
- During a rainy day indoors
- As a creative break from work or study
- For a relaxing evening activity
- As a thoughtful gift for a friend or loved one
- When you want to add a handmade touch to a special occasion
Use Case Scenarios for DIY Origami Tulips
Here are some examples of how you can use DIY origami tulips:
Table Centerpiece
- Create a beautiful arrangement of origami tulips to decorate your dining table for a special dinner party or holiday gathering.
- Use different colors and sizes of tulips to create a stunning centerpiece that will impress your guests.
- Pair the origami tulips with candles or other decorative elements to enhance the overall look of your table setting.
Bouquet
- Make a bouquet of origami tulips to give as a unique and long-lasting gift for a friend, family member, or loved one.
- Choose paper colors that hold special meaning or significance to the recipient to make the gift even more personal.
- Wrap the bouquet in decorative paper or ribbon for a polished and professional presentation.
Handmade Card
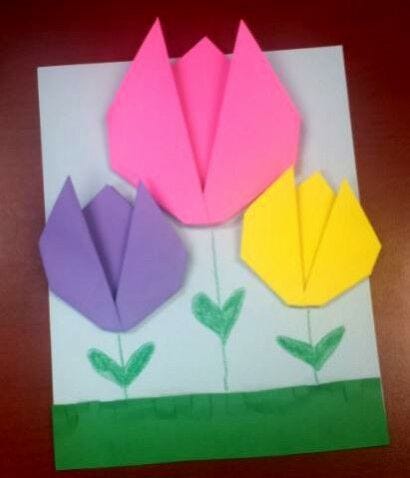
- Attach an origami tulip to a handmade card to create a personalized and thoughtful greeting for a birthday, anniversary, or other special occasion.
- Write a heartfelt message inside the card to complement the beauty of the origami tulip and show your appreciation for the recipient.
- Experiment with different card designs and origami tulip colors to create a unique and memorable keepsake.
What Sets Our Product Apart
Our DIY origami tulips stand out from the rest due to their high-quality materials and detailed step-by-step instructions. We provide a comprehensive guide that caters to both beginners and experienced crafters, ensuring a successful and enjoyable crafting experience. Additionally, our product offers endless customization options, allowing you to create unique and personalized paper flowers that reflect your individual style and creativity.
Quality Materials
Our DIY origami tulip kits include premium colored paper, sharp scissors, and strong glue to ensure durable and long-lasting paper flowers. The materials are carefully selected to make the folding process smooth and enjoyable, resulting in beautifully crafted tulips every time.
Potential Use Cases for Our Product
Our DIY origami tulips can be used in a variety of settings and occasions, making them a versatile and practical craft project for anyone. Whether you're looking to add a touch of elegance to your home decor or create a unique gift for a loved one, our product is perfect for:
Home Decor
Enhance your living space with a bouquet of DIY origami tulips displayed in a vase or as a centerpiece on your dining table. The vibrant colors and intricate designs of the paper flowers will brighten up any room and add a whimsical touch to your decor.
Gift Giving
Create a personalized and heartfelt gift by crafting a bouquet of DIY origami tulips for a friend, family member, or special occasion. The handmade paper flowers are a thoughtful and unique present that will be cherished for years to come, showcasing your creativity and attention to detail.
Maximizing Your Crafting Experience
To get the most out of your adventure with our DIY origami tulips, follow these tips and tricks to ensure a successful and enjoyable crafting experience:
Set Up a Crafting Station
Designate a clean and well-lit area in your home as your crafting station, complete with all the necessary materials and tools for creating DIY origami tulips. Having a dedicated space for crafting will help you stay organized and focused on the task at hand.
Final Flourishes:
DIY origami tulips are not just a craft project; they are a way to express creativity, share beauty, and spread joy. By following the step-by-step guide provided in this article, you can create stunning paper flowers that will brighten any space and make a lasting impression. Whether you're a seasoned crafter or a beginner looking to try something new, DIY origami tulips are a fun and rewarding craft that anyone can enjoy. So grab your colored paper, scissors, and glue, and let your imagination bloom with these beautiful paper tulips!
