How to Make Paper Roses
- By Andrew Jacobs
- Jan 12, 2018
How to Make Paper Roses
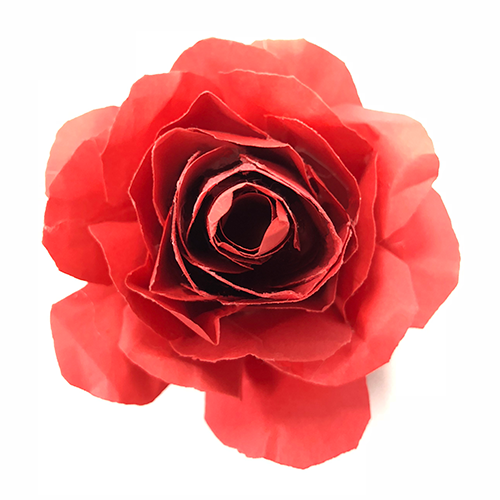 Valentine's Day: the holiday of love. In reality, the holiday of roses, chocolates, and sappy cards. Now, I could've totally went the route of chocolate but I would've ate it all. As for the sappy cards, just look at my Christmas printables (been there, done that). So I decided to go with how to make paper roses. More importantly, paper roses, out of JAM Paper. Literally.
Getting started is the easy part.
Supplies:
- JAM Paper - color of choice
- Hot Glue Gun
- Scissor
- Binder Clip (not mandatory)
- JAM Template
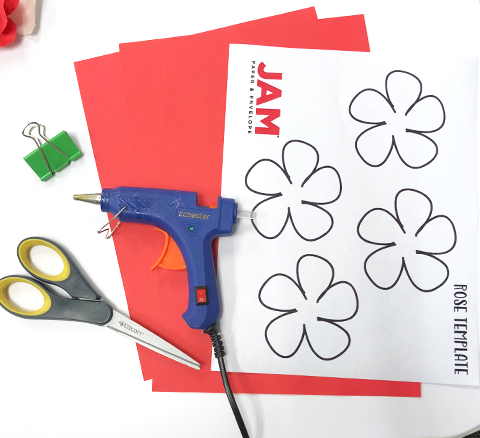 You are going to start by downloading our wonderful and FREE printable. You can click here [media-downloader media_id="26009" texts="Paper Rose Template"] or scroll to the bottom when you're done reading. It'll be there too!
Next is to CUT. Now I personally tried 3 different ways to make the rose, with 3 different number of petals.
My favorite was, of course, the most work. But it definitely came out the best. So here's my recommended number.
- 4 "First" or inner flowers
- 2 "Last" or outer flowers
- ALL TOGETHER: six sheets of paper
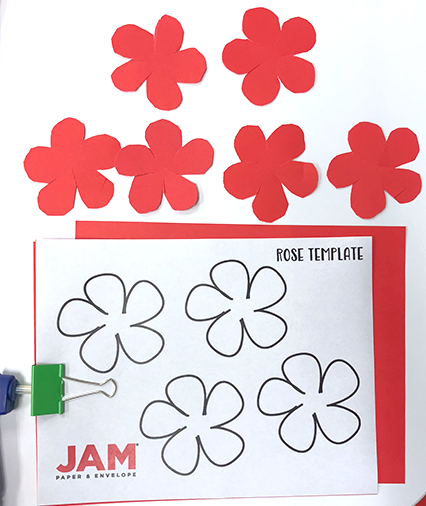 The "first" flowers are the four inner flowers and there is a certain way to bend each of these and a certain way to hot glue them to the other petals. Same goes with the outer, which is why I wanted to differentiate them.
Layer 6 pieces of paper onto the template, and cut out! The template will make four 3D roses if you layer 6 pieces of JAM paper on top of each other.
Next: Start Your Hot Glue!
When you start hot gluing, the first thing you want to do is make the first 'petal' (or piece of the shape) to be glued together. This is your 'bud'.
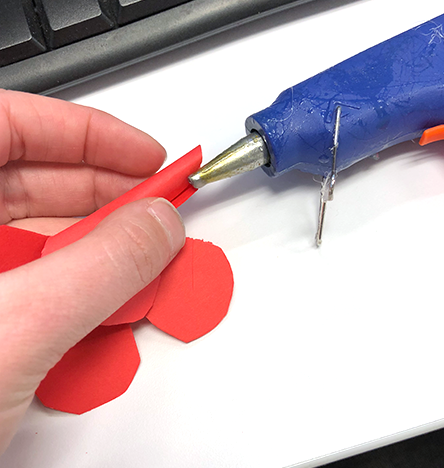 Then, your hot gluing really begins. Each 1D flower is its own layer of the 3D flower.
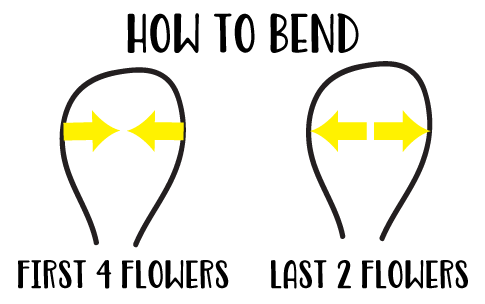
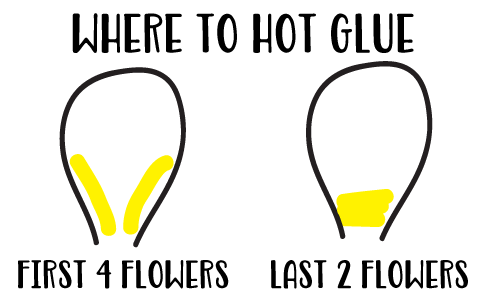
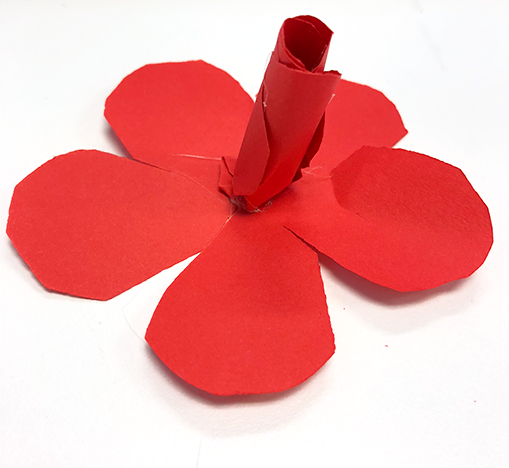 When you are working with the first flowers (flower one through four), you want to start by bending inward. When you are hot gluing them, you want to hot glue the two sides of the petal, so that each will attach to the flower that has already begun to bloom.
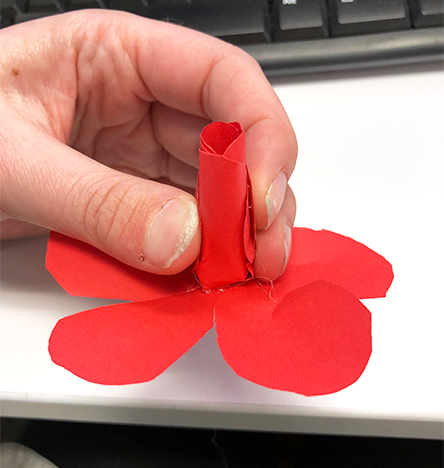 Once you get four layers in there, all bending inward, all glued on the sides, you will start your 2 outer flowers (flower five and six). Now this is when everything changes!
You are now bending outward, basically in the opposite direction of how bending usually goes. And you want to kind of wrinkle it up. This is the difference between the two:
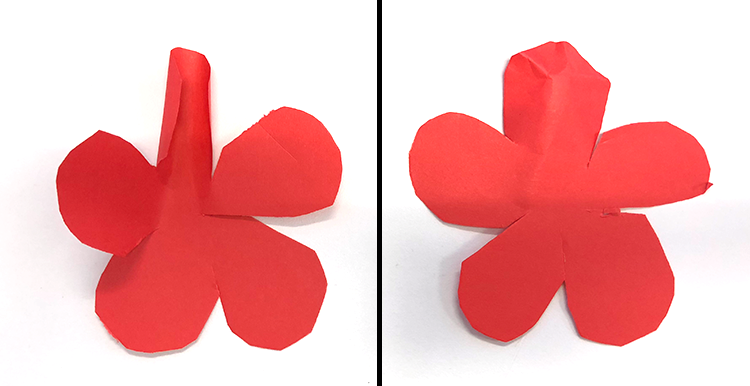 Then when you are hot gluing, you are gluing the bottom part of the petal to the 3D flower. NOT the sides.
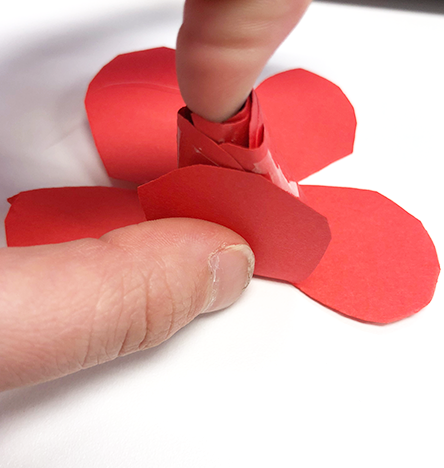 *** Remember this change ***
So let's go over it. This is how you bend both inner and outer flowers:
 And this is how you hot glue them:
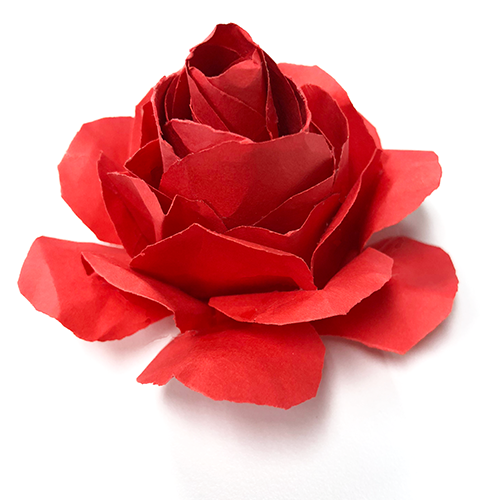
 Once you are satisfied, you may even want another outer layer, you are done! Here's how mine came out:
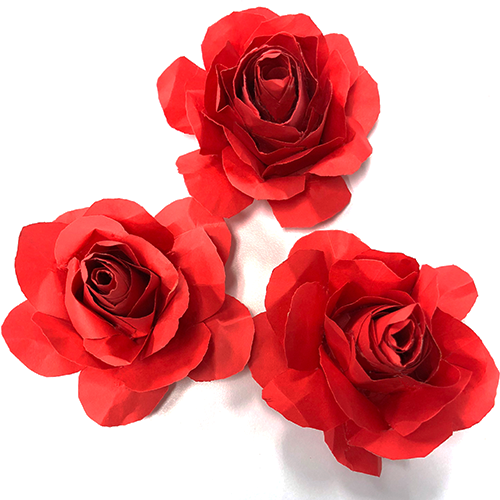
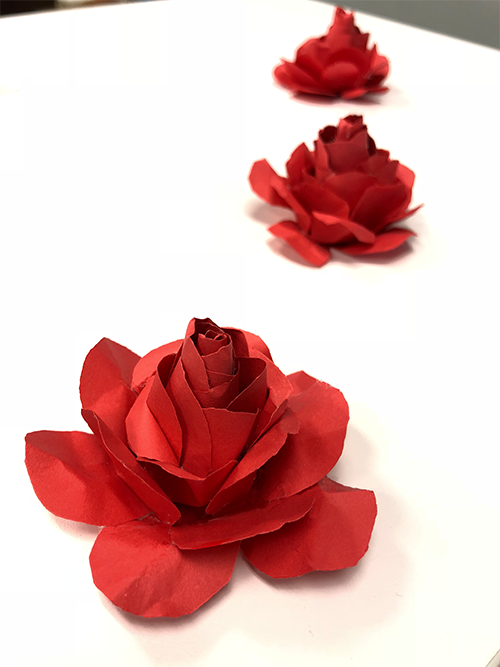 I really hope you enjoyed this blog. I know it's kind of confusing but once you have everything set up, it will make more sense. Make sure to comment on your own paper flower creations! We'd love to see them and post them to the blog!
[media-downloader media_id="26009" texts="Paper Rose Template"]
Creating Beautiful Paper Roses: A Step-by-Step Guide
Learning how to make paper roses is a fun and creative way to add a personalized touch to any occasion. Whether you're looking to decorate for a special event or simply want to add a unique flair to your home decor, paper roses are a versatile and cost-effective option. With just a few simple materials and a bit of patience, you can create stunning paper roses that look just like the real thing. Not only are paper roses a beautiful and long-lasting alternative to fresh flowers, but they also make for a thoughtful and handmade gift for loved ones. In this guide, we'll walk you through the step-by-step process of creating your own paper roses, providing tips and tricks along the way to ensure your success.
The Benefits of Making Paper Roses
One of the main benefits of making paper roses is the ability to customize them to fit any color scheme or style. Unlike real flowers, paper roses won't wilt or die, making them a long-lasting and low-maintenance option for decorations or gifts. Additionally, creating paper roses is a budget-friendly alternative to purchasing fresh flowers, allowing you to save money while still achieving a beautiful result. Whether you're a crafting novice or an experienced DIY enthusiast, making paper roses is a rewarding and enjoyable activity that can be tailored to suit any skill level.
Use Cases for Paper Roses
Paper roses can be used in a variety of ways, from embellishing gift wrap and greeting cards to creating stunning centerpieces and bouquets. They are a popular choice for weddings, parties, and other special events, adding a touch of elegance and charm to any occasion. Additionally, paper roses can be displayed as a permanent decoration in your home, brightening up any room with their timeless beauty. With endless possibilities for customization, paper roses offer a versatile and creative way to enhance any environment.
Alternatives to Paper Roses
While paper roses are a popular choice for DIY decorations, there are alternative materials that can be used to create similar floral designs. Fabric, felt, and foam are all viable options for crafting handmade flowers, each offering its own unique texture and appearance. Depending on the desired aesthetic and level of durability, exploring different materials can provide inspiration for creating one-of-a-kind floral arrangements.
Tips for Making Paper Roses
When making paper roses, it's important to choose high-quality paper that is both sturdy and pliable. Experimenting with different types of paper, such as crepe paper or cardstock, can yield varying results and textures. Additionally, using a hot glue gun or craft adhesive can help ensure that your paper roses are securely assembled and long-lasting. Taking the time to carefully shape and layer each petal will result in a more realistic and visually appealing finished product. Lastly, don't be afraid to get creative and add personal touches, such as glitter or metallic accents, to make your paper roses truly unique.
Adding a Personal Touch with Handmade Paper Roses
Whether you're looking to elevate your event decor, create a heartfelt gift, or simply enjoy a relaxing crafting activity, learning how to make paper roses is a valuable skill with endless possibilities. By following this step-by-step guide and incorporating your own creativity, you can produce stunning paper roses that are sure to impress. With the ability to customize colors, sizes, and styles, paper roses offer a versatile and budget-friendly option for adding a touch of beauty to any occasion.


