Simple and Colorful DIY Centerpieces with Wrapping Paper and Ribbon
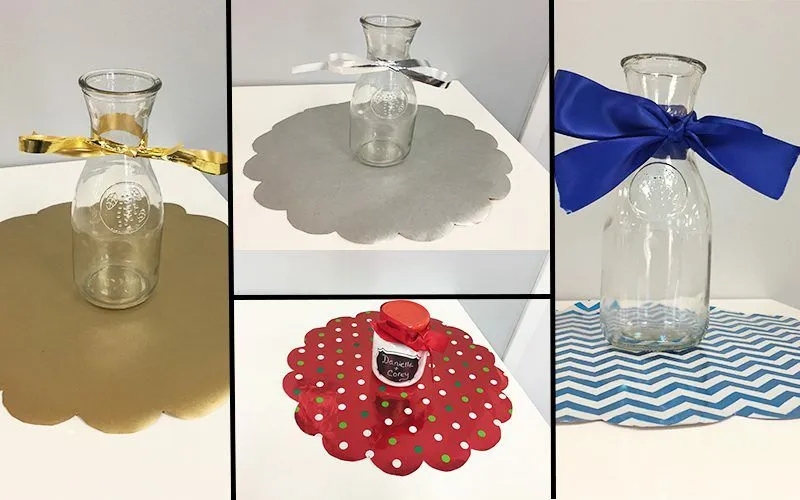
If you're looking for an easy an colorful way to decorate the tables at your next event, these centerpieces just might be your answer! All you need to make these easy DIY centerpieces is:
The base of the centerpiece will consist of a flat, round scalloped mat made from wrapping paper. First, I will show you how to create these mats!
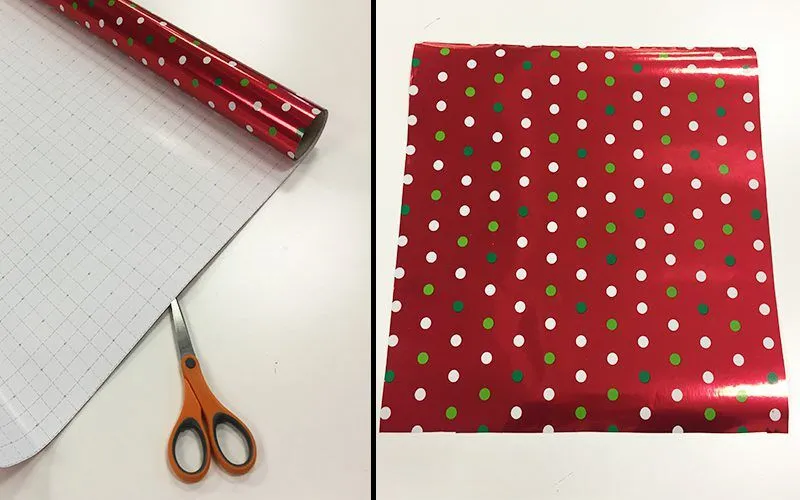
Step 1:
First, you will make a mat that will serve as the template for the rest of your mats. Take wrapping paper of any color and cut out a large square. For my centerpiece mats, I used 19 x 19 inch squares.
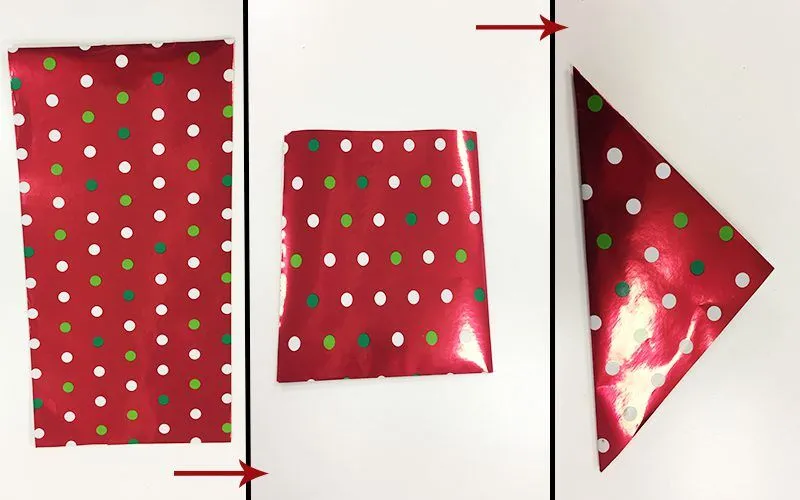
Step 2:
Fold your square of wrapping paper in half, and then fold it in half again (so that the full square is folded into fourths). Then, fold it in half a third time so that a triangle shape is formed.
Step 3:
Place your triangular shape in front of you so that the longest side is on the bottom. Bringing the top corner down, fold it diagonally as shown below.
Step 4:
Fold diagonally again in the same direction.
Step 5:
Now, take your marker and draw a curved line on the upward facing layer of the paper over the spot where all of the layers overlap. Use your scissors and cut along this line.
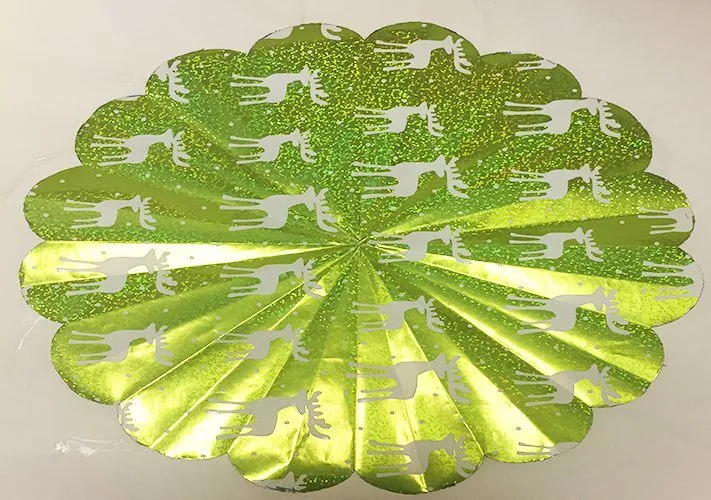
Step 6:
Now you will unfold the paper. When unfolded, you should have a large flower-like shape as shown below.
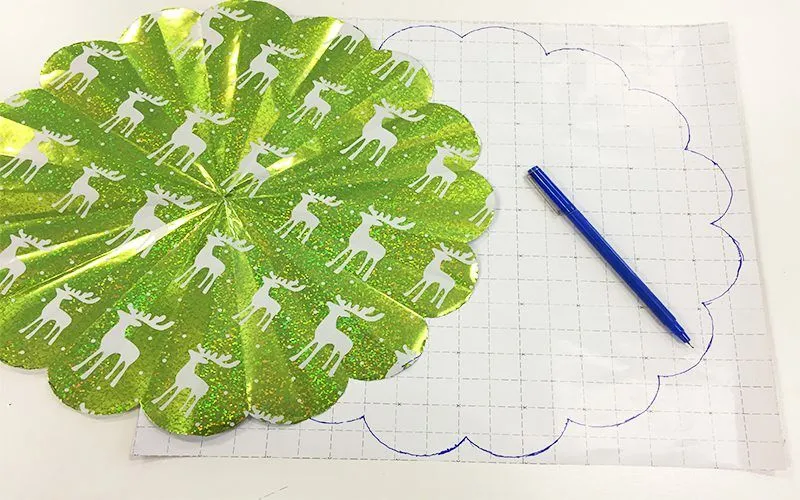
Step 7:
To avoid putting creases in the rest of your centerpiece mats, use the first one as a template by tracing its with your shape with your pen onto the back of all other wrapping papers that you would like to decorate with and cutting the shape out with your scissors! Once you have all of your mats cut out, the hard part if already over!
Step 8:
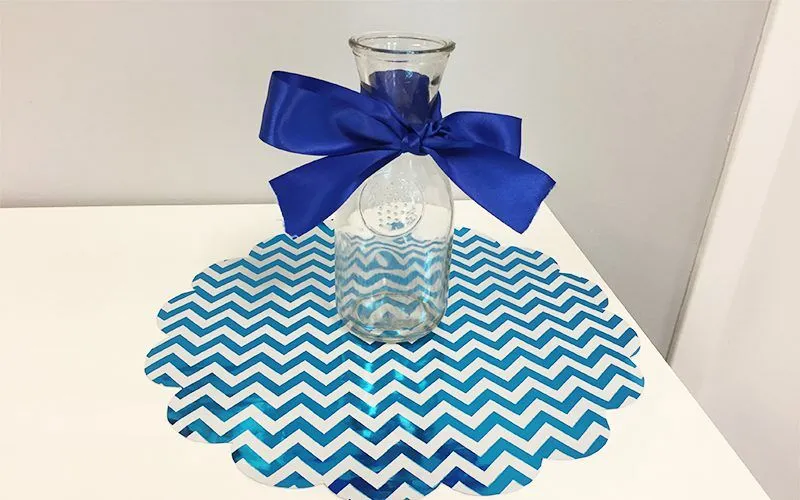
This is where your glass containers and ribbon come in! Take the glass container of your choice at place in the center of one of your mats. Then, choose a ribbon that matches the mat and tie a bow around the container! Wrap and style the ribbon around the container in any way you wish.
Your centerpiece is now essentially complete, but here are some tips to further personalize and dress up your simple centerpiece.
TIP 1:
Fill your container with candies, mints, sand, pebbles, or other small items! Don't be afraid to go classic and stick a candle in the bottom of an empty container. Depending on the size and shape of the container you use, you can also fill it with water and add a floating candle.
TIP 2:
If you don't mind guests taking the centerpieces apart during the meal, use bottles of wine that you want to serve or other bottled beverages instead of empty glass containers. If you want already planned to provide every table with a bottle, go ahead and make it decorative!
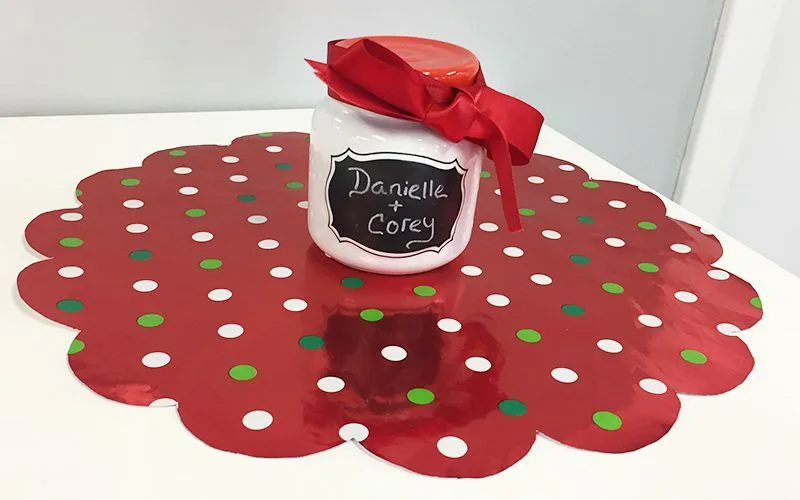
TIP 3:
Use a container with a full or partial chalkboard surface and use chalk or chalk markers to customize them with words, names, or initials that are relevant to your event!
Whether you're planning for a wedding shower, a fancy brunch, a reception, or another type of celebration that calls for decorative tables, make this craft your own and create some DIY centerpieces that reflect the theme and the mood of the occasion!
This article will explore creative and colorful DIY centerpieces using wrapping paper and ribbon.
Readers will learn how to make unique and eye-catching centerpieces for various events and occasions.
Centerpieces play a crucial role in event decor, setting the tone and ambiance for any occasion. In this article, we will introduce the idea of using wrapping paper and ribbon to create stunning DIY centerpieces that are both cost-effective and customizable. By following our step-by-step instructions and tips for success, you'll be able to craft beautiful centerpieces that add a personal touch to your events.
Benefits of DIY Centerpieces
DIY centerpieces offer a range of benefits, including being cost-effective as you can use materials you already have at home. Additionally, they are highly customizable, allowing you to tailor the design to suit your event perfectly. By creating your own centerpieces, you can add a personal touch that reflects your style and creativity.
Materials Needed
When creating DIY centerpieces with wrapping paper and ribbon, you will need a few key materials. These include wrapping paper in your chosen design, a variety of ribbons for embellishment, scissors for cutting, glue to secure the paper, and vases or containers to hold the centerpiece.
Step-by-Step Instructions
1. Choose a theme or color scheme: Before starting your centerpiece, decide on a theme or color scheme to guide your design choices. 2. Measure and cut wrapping paper: Measure the height and circumference of your vase, then cut the wrapping paper to fit. 3. Wrap vase with wrapping paper: Secure the wrapping paper around the vase using glue, ensuring a smooth and even finish. 4. Add ribbon for embellishment: Use different ribbons to add texture and visual interest to your centerpiece. 5. Arrange flowers or decorative elements: Fill the vase with flowers or other decorative elements to complete your centerpiece.
Tips for Success
When creating DIY centerpieces with wrapping paper and ribbon, consider mixing and matching patterns and colors for a dynamic look. Experiment with different textures to add depth to your design, and always keep proportions in mind to ensure a balanced and visually appealing centerpiece.
Who Can Benefit from This Product
Whether you are a party planner, event coordinator, or simply someone looking to add a personal touch to your home decor, DIY centerpieces with wrapping paper and ribbon are perfect for:
DIY enthusiasts who enjoy crafting and creating unique pieces
Individuals on a budget who want to save money on event decorations
People who value customization and want to tailor their decor to suit their style
Event planners looking for creative and eye-catching centerpieces for their clients
Anyone who enjoys adding a personal touch to their events and celebrations
When to Utilize This Product
DIY centerpieces with wrapping paper and ribbon are versatile and can be used for a variety of events and occasions. Consider utilizing this product for:
Weddings
Baby showers
Birthday parties
Holidays such as Christmas, Easter, or Thanksgiving
Corporate events and office parties
Examples of DIY Centerpiece Applications
There are endless possibilities for using DIY centerpieces with wrapping paper and ribbon. Some use case examples include:
Creating elegant and sophisticated centerpieces for a wedding reception
Designing playful and colorful centerpieces for a child's birthday party
Crafting festive and seasonal centerpieces for a holiday gathering
Customizing centerpieces to match a specific theme or color scheme for a corporate event
Adding a personal touch to a baby shower with unique and eye-catching centerpieces
What Sets Our Product Apart
Our DIY centerpieces with wrapping paper and ribbon stand out from the rest due to their cost-effectiveness, customizability, and personal touch. By using materials that are easily accessible and affordable, you can create stunning centerpieces that are tailored to your event's theme and style. The ability to add a personal touch through unique designs and color combinations sets our product apart and ensures that your centerpieces will be one-of-a-kind.
List of Event Types for Our Product
Our DIY centerpieces with wrapping paper and ribbon are perfect for a wide range of events and occasions. Consider using our product for:
Weddings
Baby showers
Birthday parties
Holidays such as Christmas, Easter, or Thanksgiving
Corporate events and office parties
How to Maximize Your Experience with Our Product
Experiment with Different Designs
Get creative and experiment with different wrapping paper patterns, ribbon colors, and vase shapes to create unique and eye-catching centerpieces. Mix and match textures and colors to add depth and visual interest to your designs.
Personalize Your Centerpieces
Add a personal touch to your centerpieces by incorporating elements that reflect your style and personality. Consider adding personalized details such as monograms, photos, or special mementos to make your centerpieces truly unique.
Adapt Designs to Fit Your Theme
Whether you're planning a formal wedding or a casual birthday party, our DIY centerpieces can be adapted to fit any theme or style. Consider incorporating elements that match your event's color scheme, decor, or overall aesthetic to create a cohesive look.
Bringing Your Events to Life with DIY Centerpieces
By utilizing wrapping paper and ribbon, you can create stunning and personalized centerpieces that are not only cost-effective but also reflect your unique style and creativity. From weddings to birthdays to holidays, these DIY centerpieces are versatile and perfect for any occasion. So, get creative, follow our step-by-step instructions, and add a touch of elegance to your next event with these eye-catching centerpieces.