DIY Shiny Kirigami Stars for New Year's Decorating
- By Andrew Jacobs
- Dec 29, 2017
It's that time again. With only three days left of 2017, many of us are scrambling to make last minute plans for that New Year's eve party! You may think you have waited too long to create any DIY decorations for your celebration, but have no fear! Thanks to this quick and easy craft, you can make your party shine like a star, and express your glowing optimism for the coming year! These shiny kirigami stars can be used to decorate your home or party venue in a number of ways! To begin, I will answer a quick question that some of our readers may be asking. What is kirigami? It is similar to origami (the art of paper folding), except for the fact that it involves cutting the paper at some point during the process of producing a finished product. All you need for this craft is:
Gold Metallic Paper
Silver Metallic Paper
A ruler
Scissors
Your hands
Step 1:
To make your first star, you will start with an 8.5 inch square piece of gold or silver metallic paper.

Fold this square piece of paper in half so that the closed side is at the top and the open side is at the bottom.
Step 2:
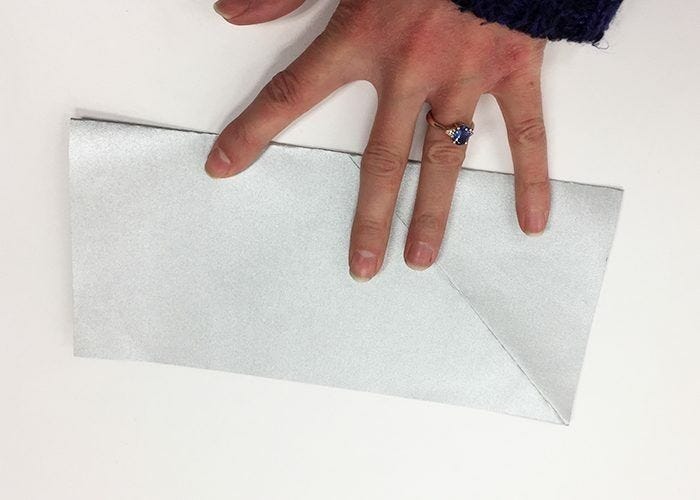
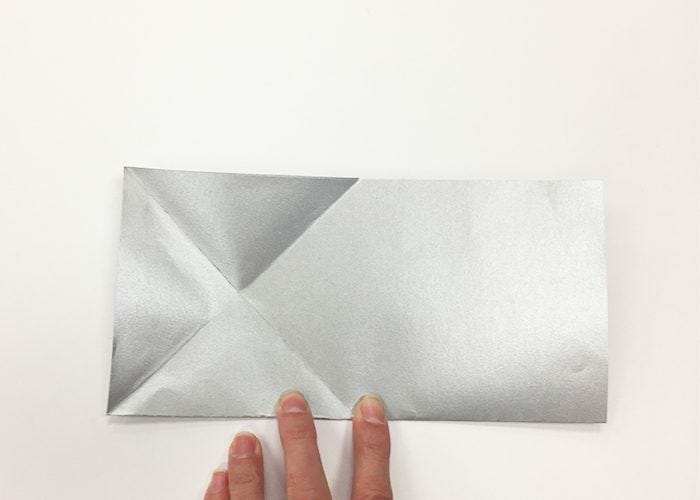
Next, take the bottom right corner of your paper and fold it upward so that is aligns with the paper's upper edge.

Now undo this fold and fold the top left corner downward to align with the paper's bottom edge.
Now undo this fold. Your paper should look as shown below with an X appearing on the left side.
Step 3:
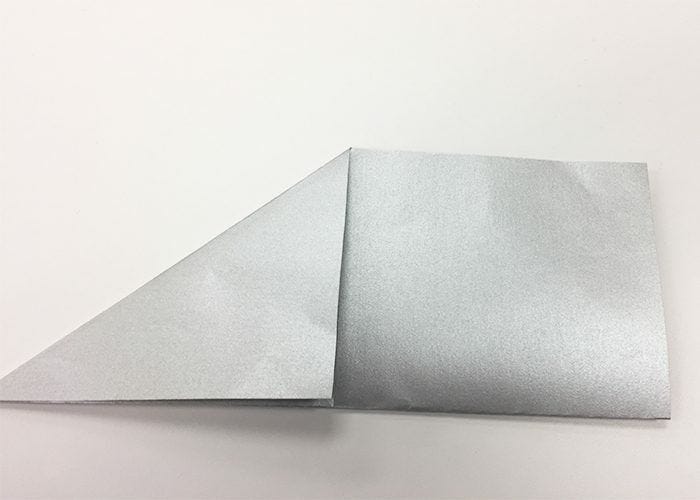
This is where the project becomes a bit tricky. But, once your beyond this step, the rest is a breeze! Fold the top right corner of your paper down so that it lines up with the middle of the X on the left side.
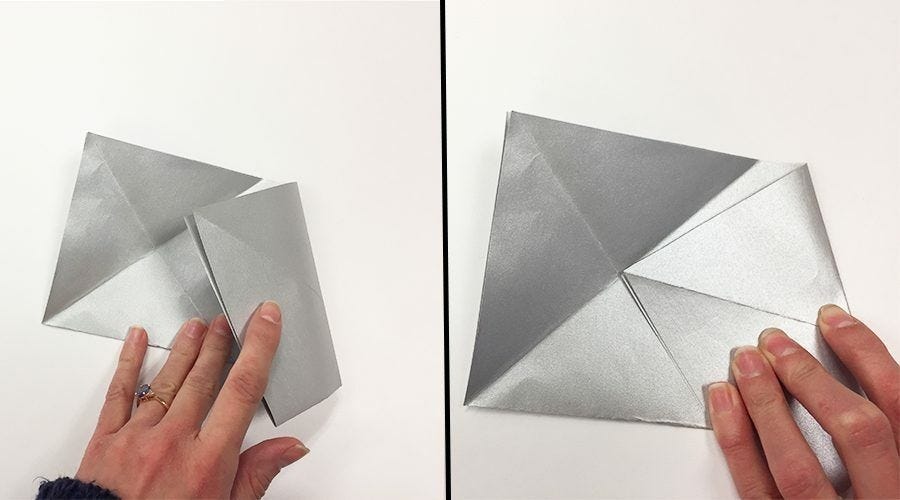
Step 4:
Now you will take the corner that your just placed in the middle of the X and fold it backwards to the right so that it aligns with the closed edge on the right side. It will look like this:
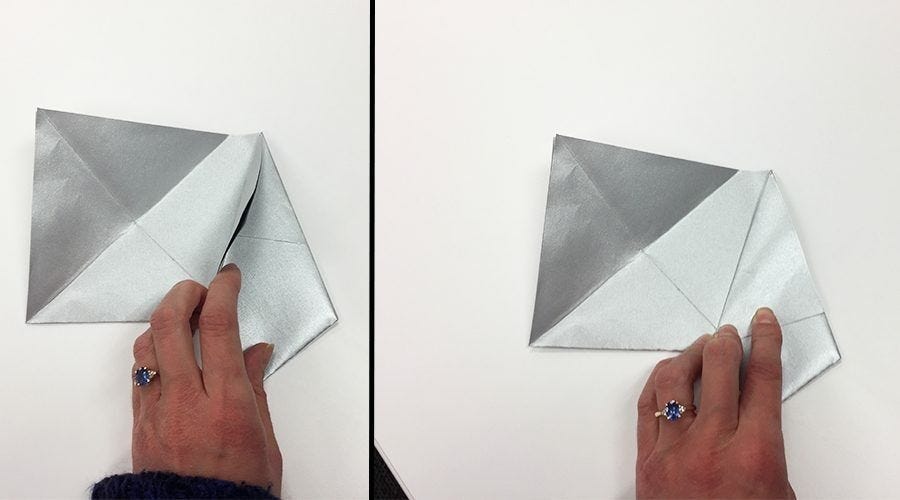
Step 5:
Next you will take the top left corner of the paper and fold it downwards so that the middle edges of the left and right folds meet. See the image below.
Step 6:
Take the folded shape you have created and fold it in half at the crease.

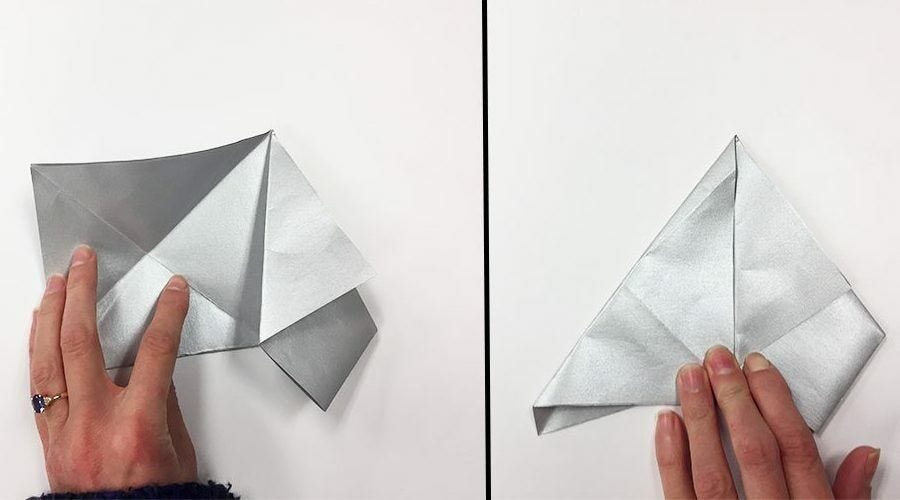
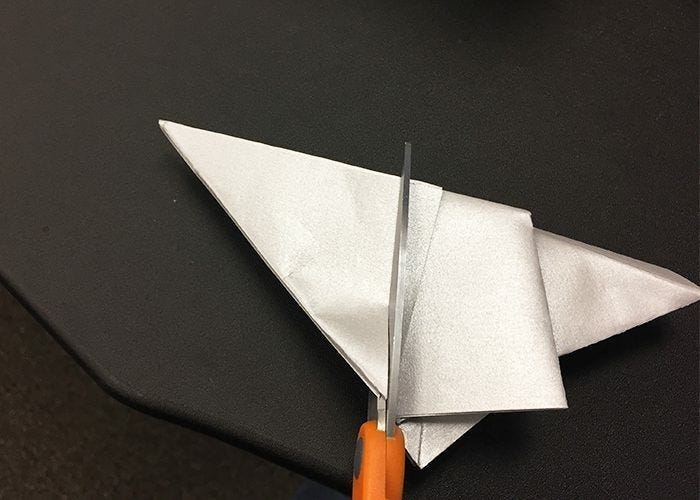
Step 7:
Your paper should look like the folded shape shown in the last frame. Take this shape and turn it so that the straight edged side is upward. You will small triangle at the bottom. Beginning at the bottom right corner of this triangle, use your scissors to make a straight angled cut that meets the top of the triangle (making a smaller triangle). The sharper of an angle at which you make your cut, the sharper the points of your star will be! I suggest making the cut 1-2 centimeters inward from the triangles original right side.
Step 8:
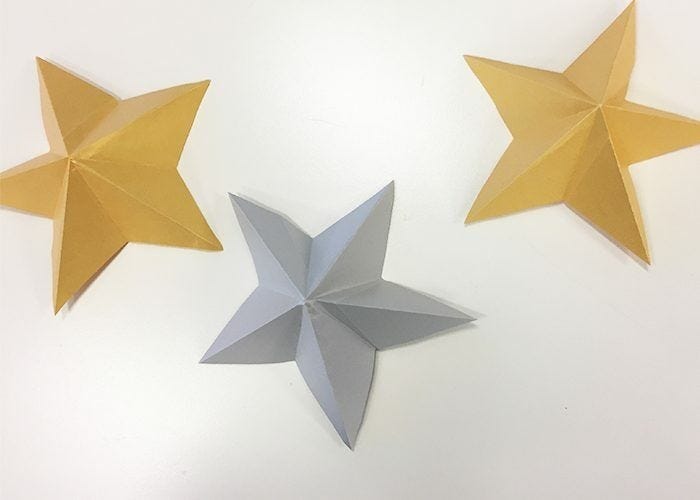
After step 7 is complete, you have cut the excess paper away from your star. All that is left to do is unfold it and reinforce the creases! Unfold your star carefully and use your fingers to crease the points of the star upward and the spaces between the points downward. After you have done this, your star will stand out in a 3D fashion when placed on flat surfaces as shown below!
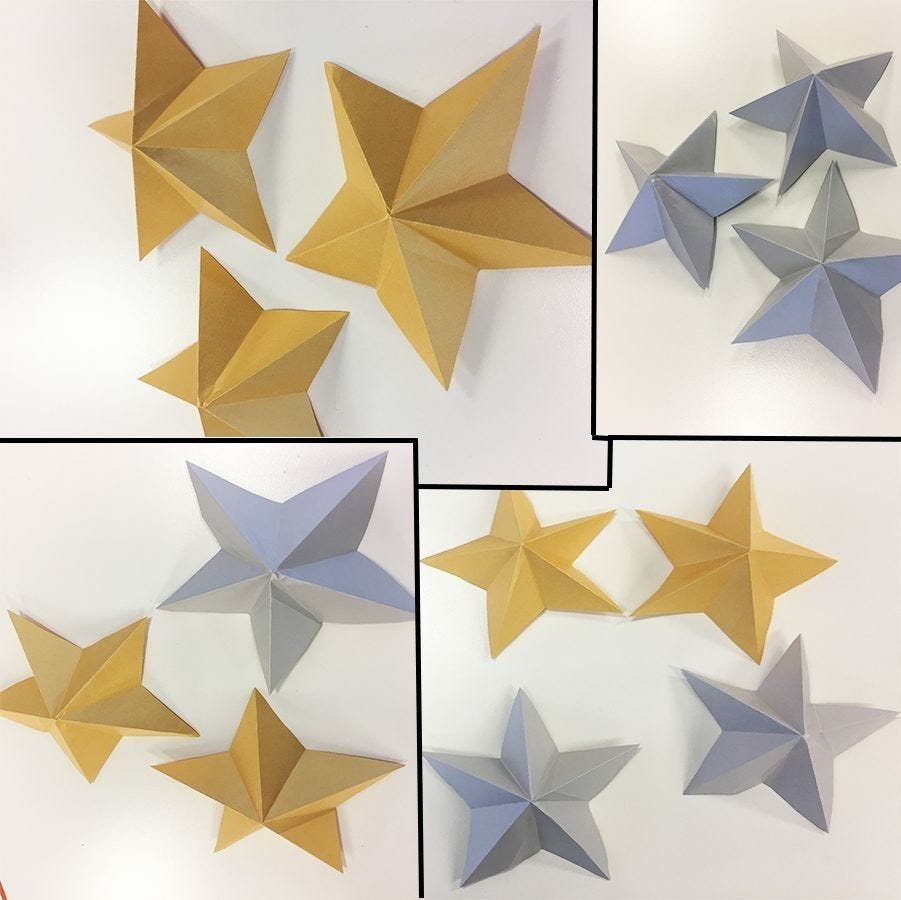
Now that your stars are ready to go, you can set them on tables, glue them to poster board in patterns to mount on the wall, or hang them from the ceiling with string or clear thread! Use your stars to decorate your party in any way you wish!