


How To Make a Paper Box - Without Glue or Tape!
- By Andrew Jacobs
- Dec 27, 2017
How To Make a Paper Box - Without Glue or Tape!
Hey Ya'll! I'm back blogging, and I couldn't be happier. I missed it mucho. Anyway, enough about me, how about this box I'm going to make appear! Without any glue or tape, I'm going to show you how to make a paper box just using your measly hands. Use the box for anything! From storage to gift wrap, you'll surely use it wherever and whenever you want. Supplies:- Your hands
- Scissors
- Ruler
- Pen/Pencil
- PAPER (where we come in)
Step 1: Make the Paper Square
Easy, make the paper a square by cutting the longer side to 8 1/2 inches. (If using letter sized paper aka your standard paper aka 8 1/2 x 11 inches paper). Using tabloid? Make it 11 x 11.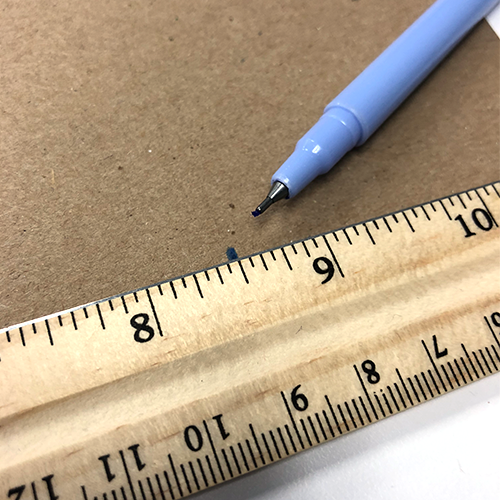
Step 2: Fold twice, making 4 squares
Fold one side then the other. Your paper should come out like this: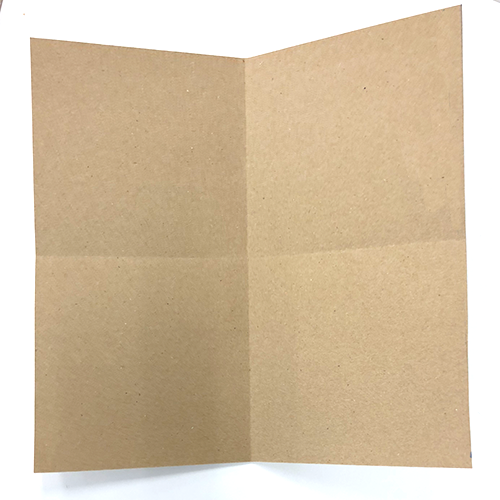
Step 3: Fold to the center
Each square should now fold into the center. When folding each should look like a triangle and when you're done it should look like this: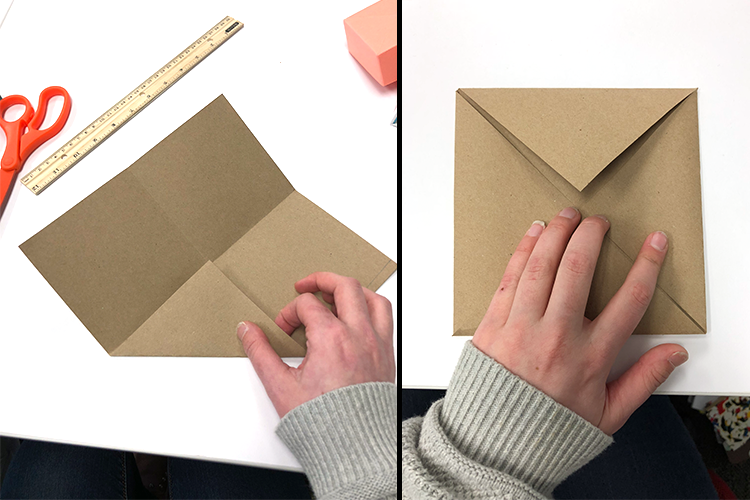
Step 4: Make it a Pamphlet
Keep the triangles folded. Then, fold each side in a thin rectangular shape so that it meets the center. Do this for each side - once opened, it should look like a pamphlet being read.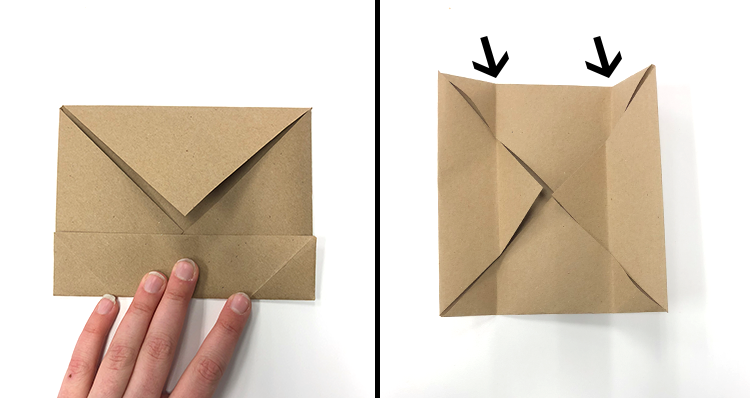
Step 5: the 'wait, what' step
Okay, so this is going to be a little difficult to explain, but just try to follow along. So you want to open up what you have so far on one side (as in the first picture). Then you want to pinch in (not out!) the two highlighted triangles. It's going to feel off at first, this is a good feeling. We like this feeling, keep folding with that feeling. Because once you pinch in and it's aligned to look like one side of a box, you're doing it right! Try to make the two parts come together like in my last picture below.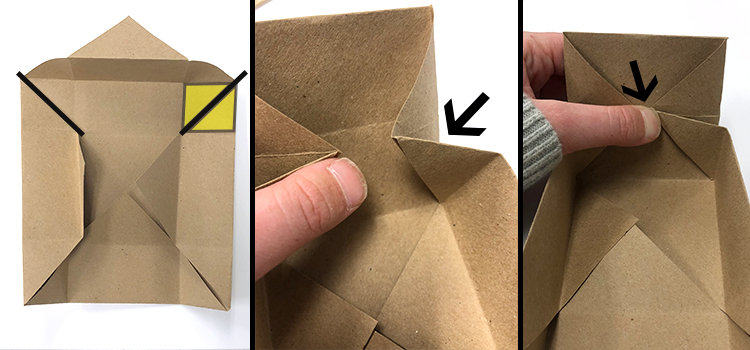
Step 6: First Part Should be able to be Folded Step
Once the step 5 wait what turns into okay got it, You want to fold in the triangle AND rectangle inside.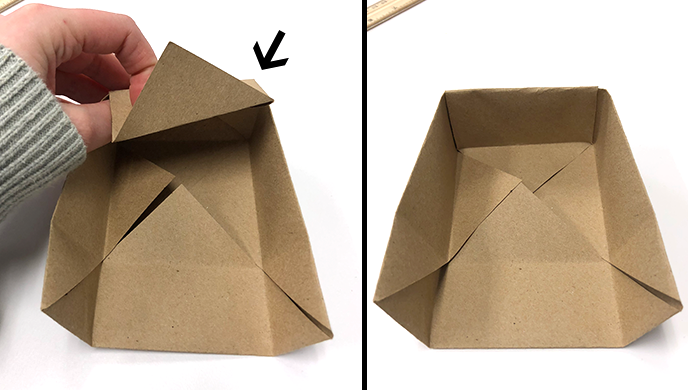
Step 7: The Other Side (oooooooo)
Now, you're just going to do everything in step 5 and 6 that you did on the first side, and do that same thing to the other side (it's not the upside down, don't worry).Step 8: Make another ... just 1/2 inch smaller!
Remember to cut BOTH sides. It has to be a square, not an almost square. Trust me, I have done this many times and made the wobbliest box there ever was. It was sad. So your paper should look like my third picture, you should have two scraps one thin, one fatter. I made this one a little more than 1/2 inch but you could totally just go with 8 inches (if your first was 8 1/2). It will make the bottom box more snug. If you want it a little looser, go with my measurements of 7 3/4 x 7 3/4. Again, using tabloid? 10 1/2 x 10 1/2 for a snug fit, 10 1/4 x 10 1/4 for a loose fit.
VIOLA!
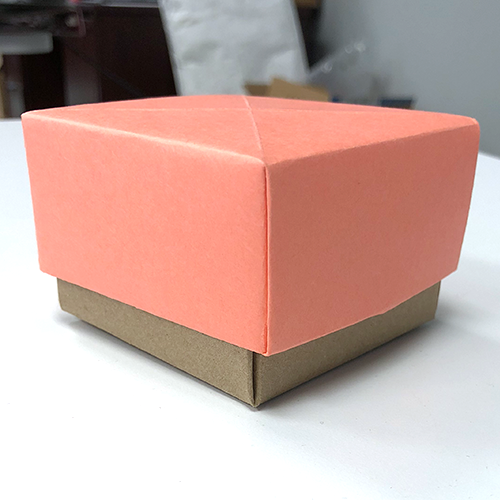
 Want to make it a little cuter? Make a color change! I used our Vellum Bristol Salmon Pink Cover.
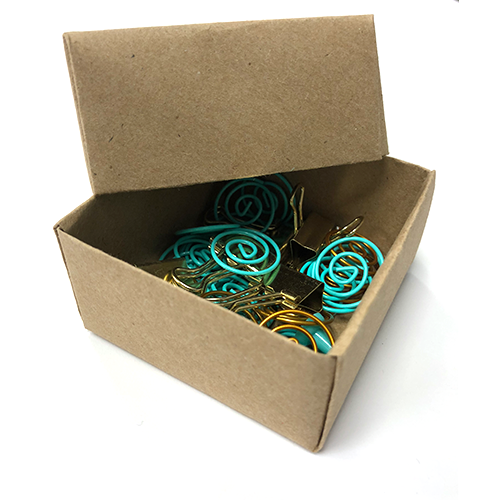
 Want it to be for storage? Store your papercloops and binder clips inside!
 Or do you just really want Toothless to have somewhere to go on top of?
 Either way, I hope you liked our How to Make a Paper Box blog! We would love to answer any questions, especially for step 5, if needed! So comment below and we'll be sure to get to you soon! Thank you guys so much for reading and folding with me. It's been fun! See you soon!
Creating a Paper Box Without Glue or Tape
Learning how to make a paper box without glue or tape can be a fun and creative activity for both kids and adults. Not only is it a great way to exercise your creativity, but it also allows you to repurpose old paper materials and reduce waste. By following simple folding techniques and precise measurements, you can create a sturdy and functional paper box that can be used for storage, gift-giving, or as a decorative item. This DIY project is not only eco-friendly but also a cost-effective way to create personalized packaging for small items.
Benefits of Making a Paper Box Without Glue or Tape
One of the main benefits of creating a paper box without glue or tape is the environmental impact. By using only paper and folding techniques, you are reducing the need for additional materials and minimizing waste. Additionally, this method allows for a more customizable and personalized approach to creating packaging or storage solutions. It also provides a sense of satisfaction and accomplishment in creating something functional and aesthetically pleasing from simple materials.
Use Cases for Paper Boxes Without Glue or Tape
Paper boxes made without glue or tape can be used for a variety of purposes, such as organizing small items like jewelry, office supplies, or crafting materials. They can also be used as gift boxes for small presents or party favors. Additionally, these paper boxes can serve as unique and eco-friendly packaging for homemade goods or products. The versatility of these boxes makes them suitable for various occasions and practical uses.
Alternatives to Glue or Tape for Paper Box Making
If you prefer not to use glue or tape for making paper boxes, there are alternative methods such as using paper clips, staples, or even sewing techniques to secure the folds. Each method offers its own unique aesthetic and functional appeal, allowing for customization based on personal preference and intended use of the paper box.
Tips for Making Paper Boxes Without Glue or Tape
When making paper boxes without glue or tape, it's important to use sturdy and thick paper to ensure the box's durability. Precise measurements and crisp folds are essential for creating a neat and secure paper box. Additionally, experimenting with different paper colors, patterns, and textures can add a creative touch to the final product. It's also helpful to practice the folding technique on scrap paper before working with the final materials.
Exploring Creative Possibilities with Paper Box Making
Learning how to make a paper box without glue or tape opens up a world of creative possibilities. Whether it's for practical storage solutions, personalized gift-giving, or eco-friendly packaging, this DIY technique offers a sustainable and enjoyable way to create functional and visually appealing paper boxes. With a little practice and imagination, you can explore various designs and sizes to suit your specific needs and preferences.