DIY Bookmarks: Summer Crafts for You and the Kids!
- By Andrew Jacobs
- Jun 7, 2016


It's time to get creative with this DIY bookmark summer craft! I don’t know about you, but summer for me is all about catching up on my reading! Soaking up the sun and cracking open a new book is my ideal lazy Sunday. Unfortunately, reading is probably not the first thing on your kid’s to-do list. School’s out for the summer and all the kids are ready to spend their days sleeping in, playing outside and sadly, probably melting their brains in front of the TV or computer for a few hours. All that hard work they put in at school to keep their brains active slowly dissipates during the summer months so the question is: How can you keep kids’ brains stimulated during the summer sans the screen in their face? DIY Bookmarks!
This craft is a great place to start! It’s easy to do, so your kids can actually participate instead of watching you complete all the steps. In the end, they’ll have a cute, creative bookmark to help mark their place when they stop reading. And these are so adorable that just looking at them will make your kids want to come back for the next chapter!
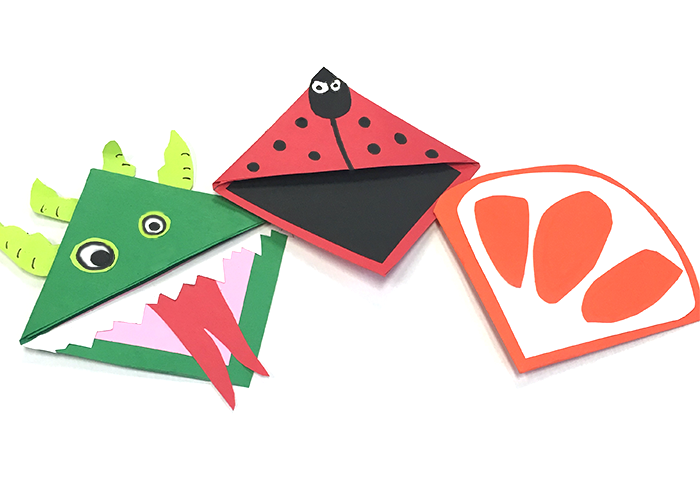
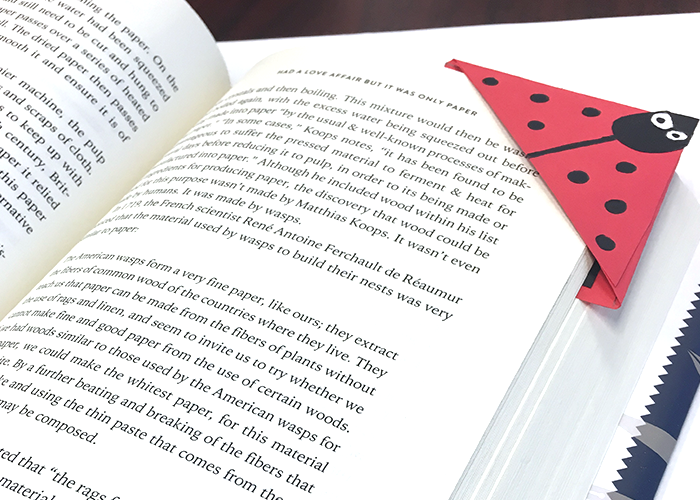
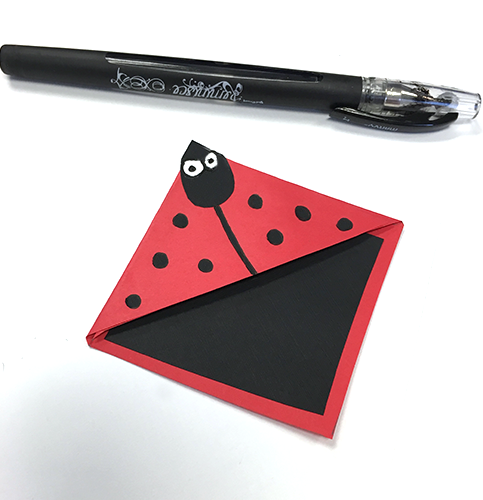
Since they are so quick and easy to whip up, you can make a bunch! They’re great for adults too. Wouldn’t you love to open up your book to your saved place and see a cute face staring back at you? Or maybe you’re reading Game of Thrones and want a dragon to hold your page. Or how about trying a slice of watermelon or an orange to mark your newest BBQ recipe? Or maybe you’re a bug lover and want to make this cute lady bug! The possibilities for DIY bookmarks are endless!
So, there are two ways to do this. The first way is the simplest, which might be better for kids. But, if you want to get a little more creative, try out the second way. It’s still super easy; it just requires a little more patience and precision. The good news is, either way uses the same materials. So, get your stuff together and bring all these supplies outside in the sunshine and have some fun! DIY bookmarks are too much fun!
Supplies
1.Paper or cardstock in various colors
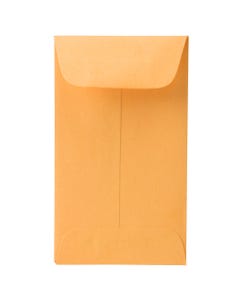
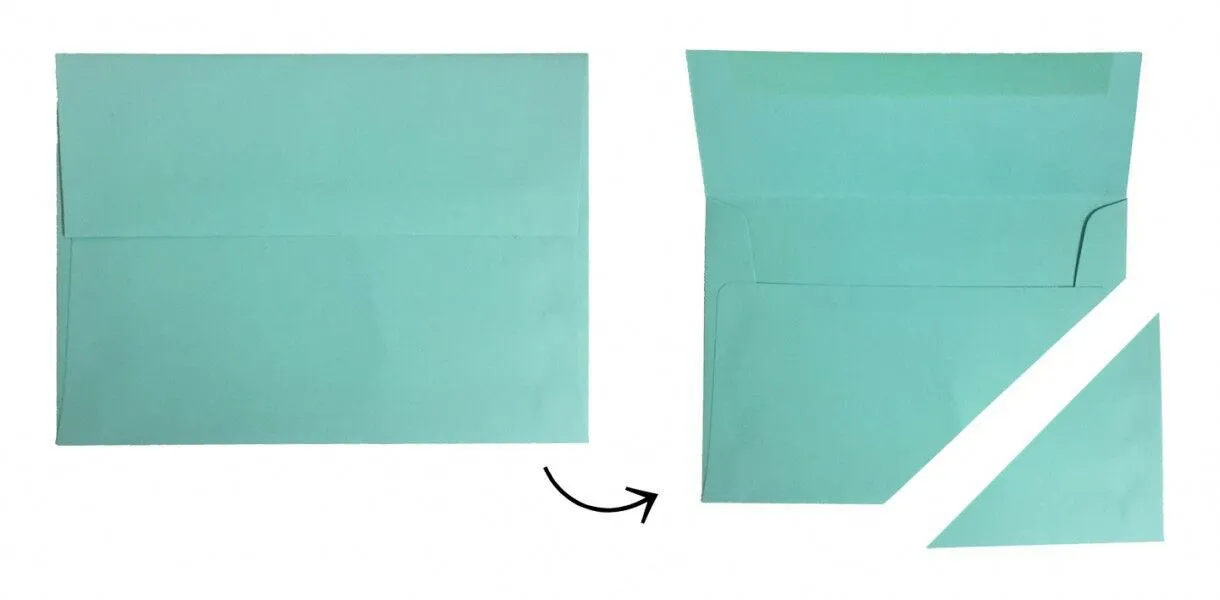
2.Envelopes in various colors
3.Scissors
4.Glue stick
5.Stuff to decorate with: such as markers, crayons, stickers, stamps, etc.
The Easy Way
So, the easiest way to make these bookmarks is to grab an envelope in your color choice. Cut a triangle making sure to include one of bottom corners and decorate as you wish--simple, quick, and perfect for kids!
Check out some of these examples that we made:

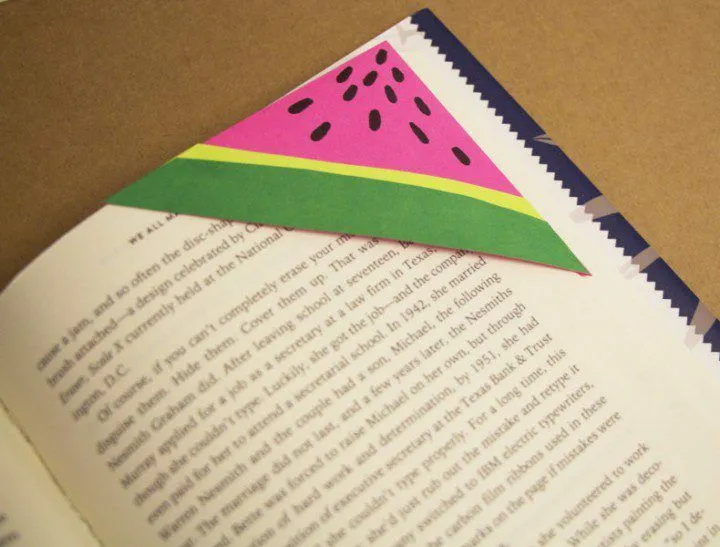
Make your page saver a slice of life! To create: Cut a corner from a pink—or red if you prefer-- envelope. Then cut a strip of light green paper for the inner part of the rind and glue to the pink. Next cut a thinner strip of darker green paper and glue on top of the light green. Finish with drawing black seeds.
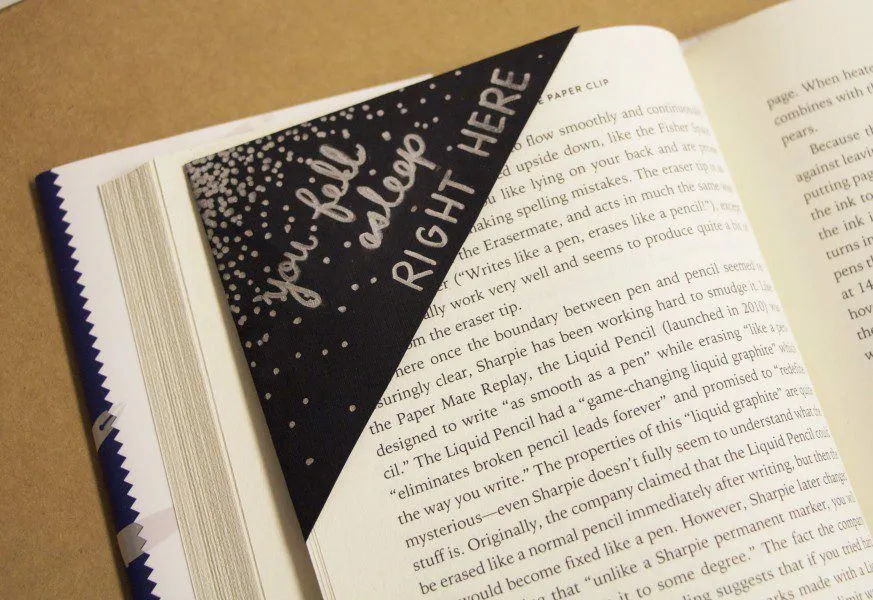
To create: Grab a black envelope and cut off the corner. Pick up a metallic Sharpie (here we used silver) and write a quick note to yourself! I use this bookmark when I read before bed because I am always falling asleep before remembering what page I was on! DIY bookmarks are a must!
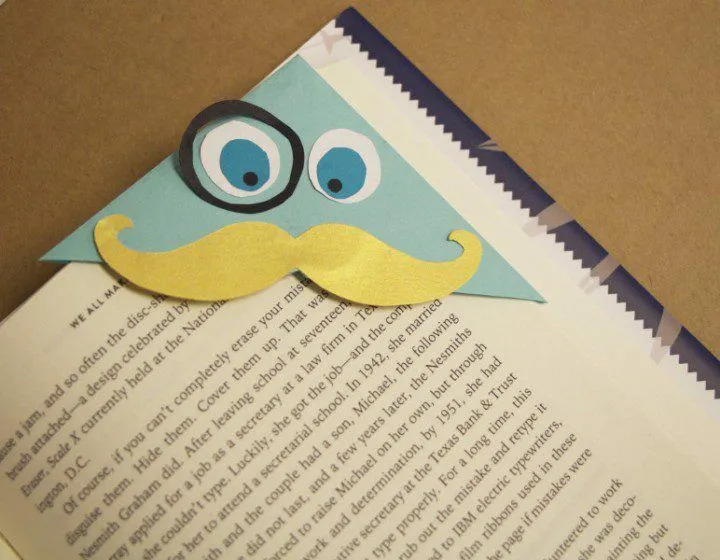
To create: Pick a colored envelope for your face. Here I choose an aqua one. Grab some scrap paper and cut out eyes, glasses, mustaches, anything to add to your face!
The Slightly More Complicated Way
Now, if you have a little more time on your hands, give this a shot because they come out seriously cute!
Step 1
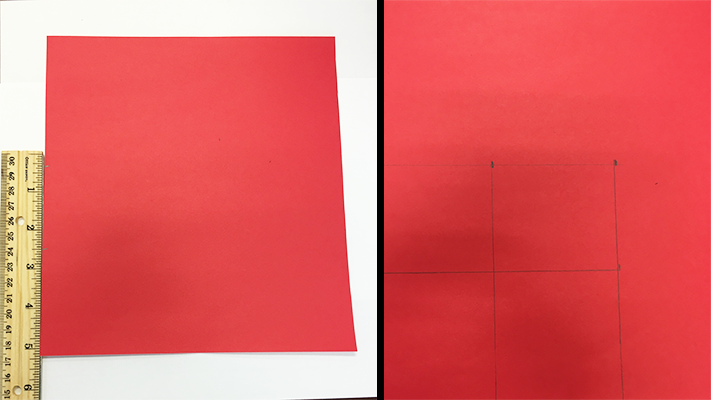
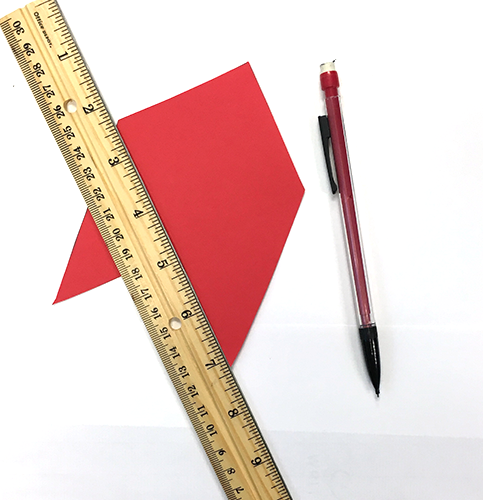
The first thing you have to do is make a template. Scrap paper is good to use for this because all you’re essentially doing is making a tracer. Take your paper and ruler and draw a 5” x 5” square. Then, you’re going to split that square into fours, so again, take your ruler and measure it out.
Step 2
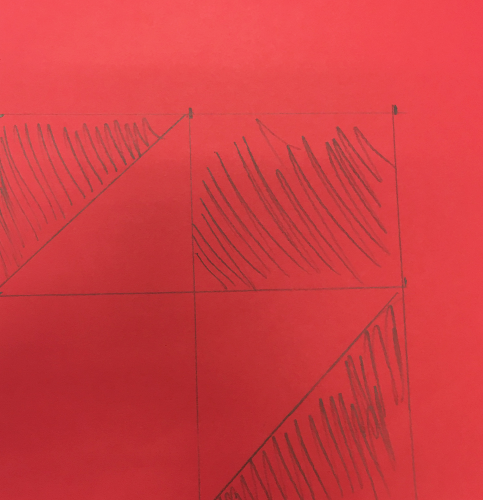
Next, get out your ruler and draw a line across the upper left corner from the top right corner to the bottom left. Scribble out the top upper half, which should now look like a triangle. Repeat this process on the bottom left corner, scribbling out the bottom triangle. Then, scribble out the top right square. You won’t be using any of the colored in portions.
Step 3
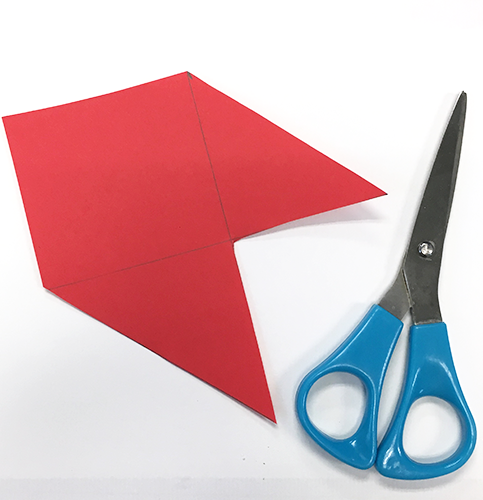
Now you’re going to need your scissors to cut out anything that’s not colored in. You will end up with a square with two triangles attached. You now have your template.
Step 4
Grab the paper you’re planning to use and trace the shape onto it. After your done tracing, cut it out. This will be the base of your bookmark.
Step 5
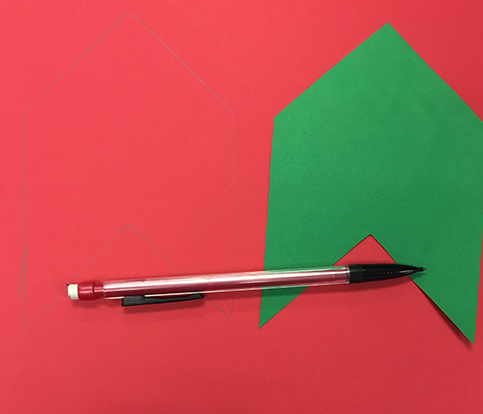
Take a pencil and lightly draw a line to connect the two triangles. Your paper will now look like your original template. These lines are going to be your folding guide.
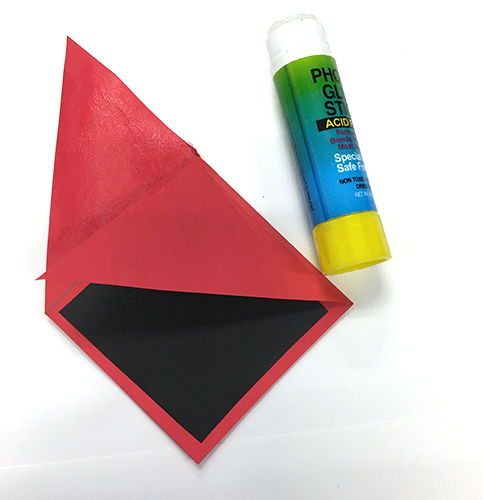
Step 6 (Optional)
If you a want to be fancy and use a different colored or patterned paper to line the inside of the bookmark, cut out a triangle that’s slightly smaller than your shape and glue it on. This is totally optional. I did it for the dragon’s mouth, the lady bug’s body, and the background of the orange.

Step 7
Fold one triangle inwards so it covers the upper half of the square.

Step 8
Then, take your glue and apply it to the top (the side that’s already facing up) of the unfolded triangle. Fold this over to cover the other triangle and glue it down.
Step 9
Time to decorate! Bust out your colored paper, crayons, markers, pens, googly eyes, rhinestones---whatever! Make it your own and have fun with it. There are so many options out there from cartoon characters to fancy, sophisticated designs- DIY bookmarks are a blast.
We hope you and your children enjoy the JAM approved DIY bookmarks. Hopefully it makes everyone want to crack open a good book this summer and get outside to read!