DIY Book Covers: Transform Your Textbooks with JAM Kraft Wrapping Paper “90s” Style
- By Rhianna Marie
- Jul 24, 2023


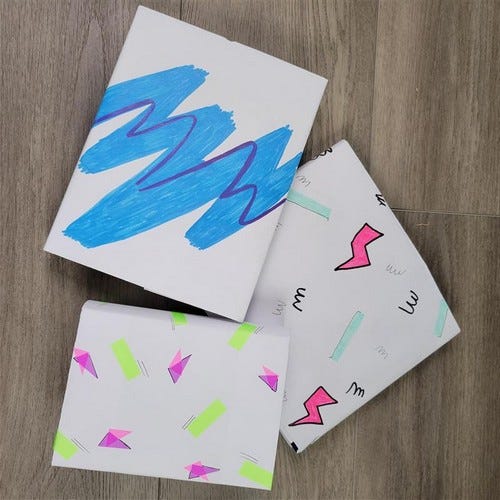

When it comes to school supplies, textbooks are an essential item that often lacks a personal touch. Those same patterned fabric book covers you buy year after year, ugh! And worse of all, you're spending $7 for each book cover, again and again, year after year. Feels a bit dull and lacking style. However, with this DIY project, we’re going to replace those ordinary book covers with eye-catching masterpieces!
In this step-by-step photo guide, you’ll be able to follow along to create an inexpensive and simple book cover just in time for Back to School. All you need is wrapping paper and some office supplies which you probably already have at home. Best part about this project, you will be able to get multiple books covered from just one roll of wrapping paper!
We’re giving our DIY Book Covers a 90s vibe. Why? Because everything 90s style rules! Why wouldn’t it? Retro patterns, vibrant colors, bold lettering….enough said! So, gather your materials, let your imagination run wild, and embark on the journey of revamping your textbooks with our step-by-step guide for DIY Kraft Wrapping Paper Book Covers: “90s” Style!


Supplies Needed
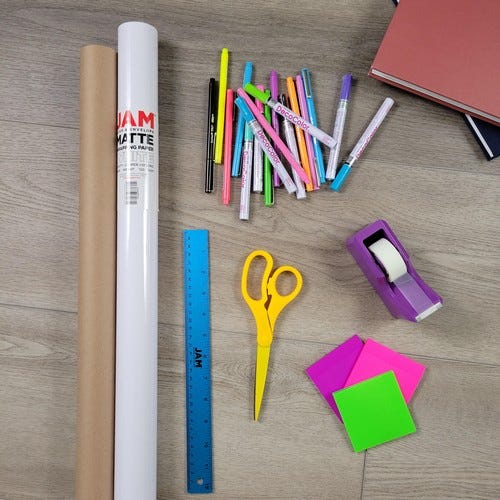

Kraft wrapping paper
Scissors
Tape
Pens & Markers (Le Pens & Acrylic Markers used in this Step-By-Step guide linked below)
Decorative Elements optional (stickers, glitter, sticky notes etc.)
All JAM BNC items used in this Step-By-Step guide are linked at the bottom.
1. CUT WRAPPING PAPER
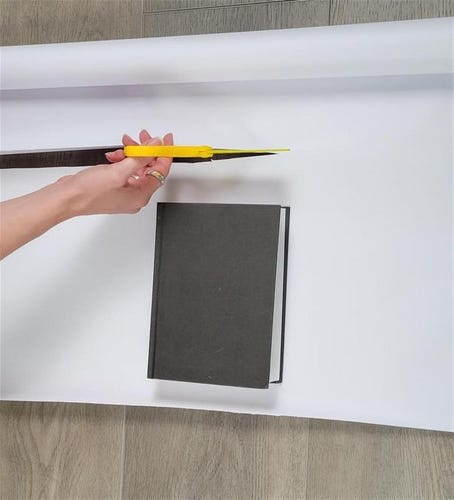

Lay your textbook closed, centered on top of the kraft wrapping paper, with about 1-inch slack on top and bottom of your book. Cut straight across wrapping paper.
2. CREATE TWO CREASES
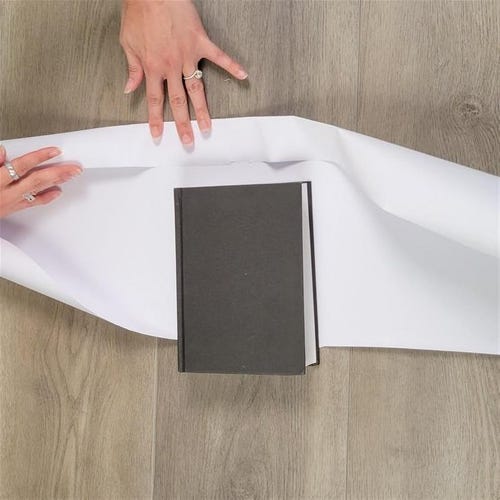

Fold about 1-Inch up from the top of the wrap to create a nice crisp, folded crease. Doesn’t have to be perfect, trust your eye it will work out. Repeat on bottom.
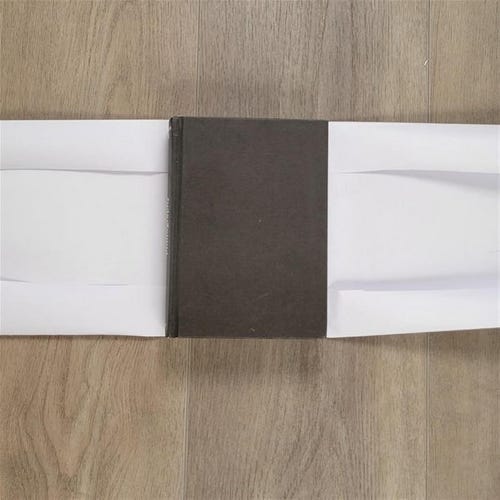

Place your textbook centered on top of your creases. If your books top & bottom edge are in line with your folds, you are good to go. If not adjust one of the folds a bit to match your books height.
3. FOLD THE EDGES
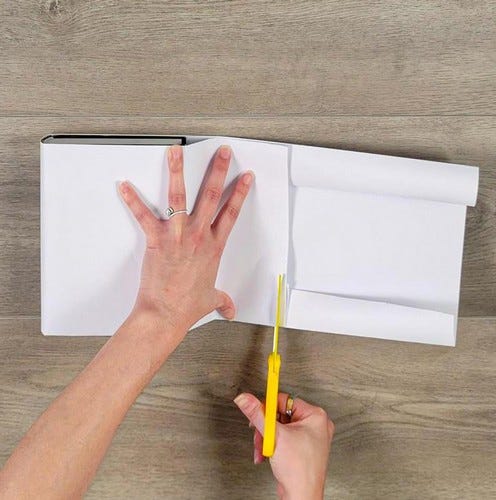

Lie your book on top of both folded edges and pull your wrapping paper over the front cover of the book to completely cover it. Have a good amount of paper slack on both ends, cut ends evenly and discard the rest.
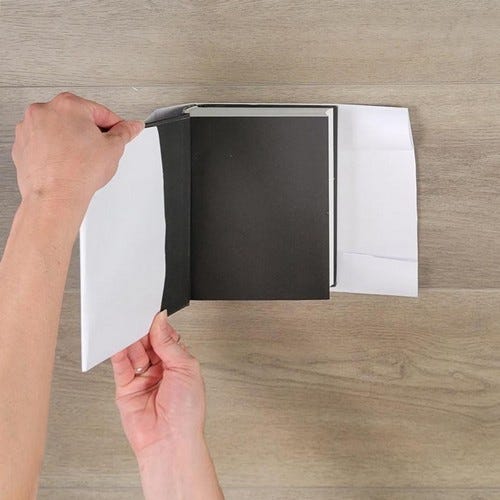

Fold the paper over the front cover, close, and crease nicely. Repeat on the bottom side.
4. SECURE
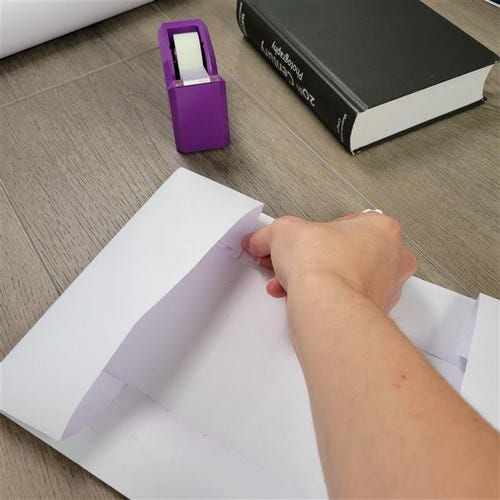

Move the textbook to the side and secure all four sides of the cover to the wrap. Use a small piece of tape to adhere the inside corner down to the paper. Repeat to all corners.
5. CUSTOMIZE


Personalize your book covers! We went with a 90s aesthetic using vibrant patterns, bold colors, and popular symbols. Adding a 90s vibe to your DIY book covers will not only ooze nostalgia but also give them a trendy look that holds a special place in our hearts!
Side Note: You could do Step 6 before 5 if you want to get the cover on your textbook first before decorating. We choose to decorate first because we didn’t want to take any chances with marking or damaging our textbooks.
6. FINISH
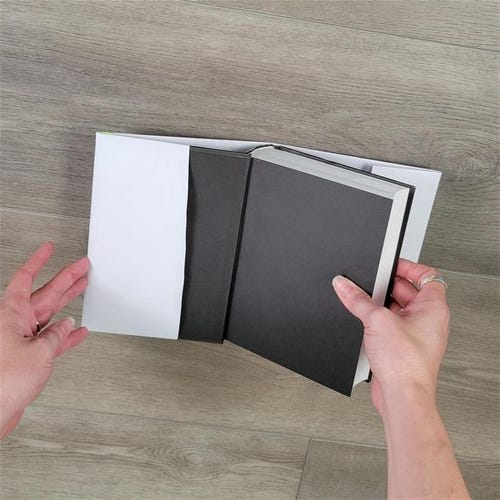

Slid the front cover of your textbook into the left side pocket, close. And now, the slightly tricky part, sliding the back cover into the right-side pocket. You got this!
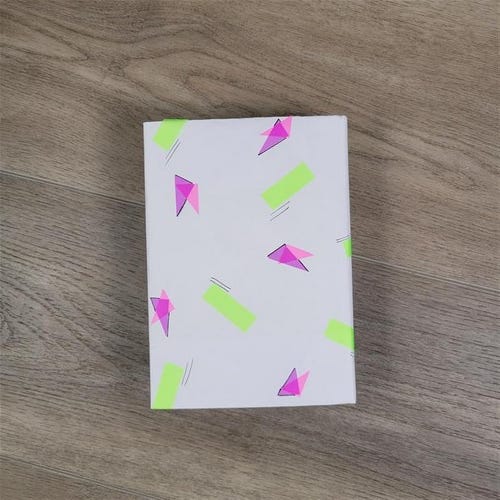

Once you've done one, why not cover them all!
Repeat the 6 steps above to the remaining of your textbooks. And the best part, in a month or two, when you’re feeling an urge for something new, simply rip off and create another one with this easy-to-follow Step by Step guide!
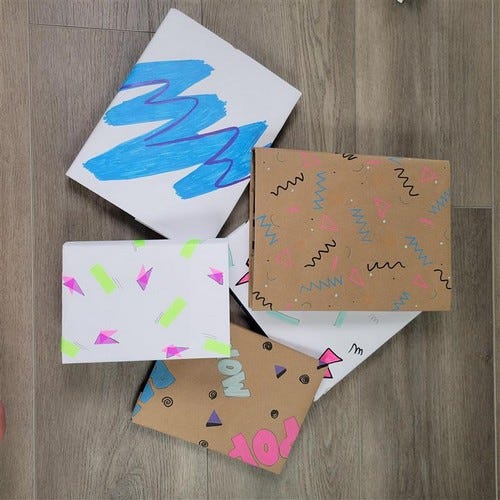

Let your creativity soar with this simple DIY Book Cover project. Get ready to make a statement with your one-of-a-kind 90s Style Back to School book covers! Happy crafting and happy studying!
All JAM BNC items used in this Step-By-Step guide linked below:
Tape Dispenser
(Not needed for project, just tape, but we do have awesome colors of these at JAMBNC and we’re obsessed!)
Head to our Instagram page and click on our Reels to check out the making of these 90s Style DIY Book Covers!


Transform Your Textbooks with DIY Book Covers Using JAM Kraft Wrapping Paper Style
Are you looking for a fun and creative way to personalize your textbooks for the upcoming school year? Look no further than DIY book covers using JAM Kraft wrapping paper style! With just a few simple materials and a little bit of creativity, you can transform your plain and boring textbooks into personalized works of art. Not only will this help protect your books from wear and tear, but it will also add a unique touch to your school supplies. Whether you're a student or a parent looking to get your kids excited about going back to school, this DIY project is a great way to add some personality to your textbooks.
Benefits of DIY Book Covers
Creating DIY book covers using JAM Kraft wrapping paper style offers a multitude of benefits. Not only does it provide a fun and creative outlet, but it also helps protect your textbooks from damage. Additionally, personalized book covers make it easy to identify your books in a sea of similar-looking textbooks, reducing the chances of mix-ups or lost items. This project also allows you to express your individuality and style, turning an otherwise mundane task into an enjoyable and rewarding experience.
Use Cases for DIY Book Covers
DIY book covers using JAM Kraft wrapping paper style can be used for a variety of purposes. Whether you're a student looking to add a personal touch to your textbooks, a teacher wanting to engage your students in a creative activity, or a parent seeking a fun project to do with your kids, this DIY endeavor is versatile and suitable for all ages. Additionally, this project can be a great way to repurpose and upcycle old wrapping paper, reducing waste and promoting sustainability.
Alternatives to DIY Book Covers
If you're looking for alternatives to DIY book covers using JAM Kraft wrapping paper style, there are several options to consider. Pre-made book covers, adhesive book covering rolls, or reusable fabric book covers are all viable alternatives that offer convenience and customization options. However, DIY book covers provide a unique and personalized touch that cannot be replicated with store-bought options, making them a standout choice for those seeking a one-of-a-kind look.
Tips for Using JAM Kraft Wrapping Paper Style
When creating DIY book covers using JAM Kraft wrapping paper style, there are a few tips to keep in mind. Measure your textbooks accurately to ensure the covers fit properly, and use adhesive or tape to secure the paper in place. Consider adding embellishments such as stickers, labels, or drawings to further personalize your covers. Additionally, be mindful of the paper's durability and choose a quality wrapping paper that can withstand daily use and handling.
Get Creative with DIY Book Covers
Transforming your textbooks with DIY book covers using JAM Kraft wrapping paper style is a fantastic way to add a personal touch to your school supplies. Whether you're looking to protect your books, express your creativity, or simply have fun with a hands-on project, this DIY endeavor offers a multitude of benefits and opportunities for self-expression. With a little imagination and the right materials, you can turn your textbooks into unique works of art that reflect your individual style and personality.
