How to Make an Origami Bunny
- By Andrew Jacobs
- Mar 26, 2014
Origami Bunny: Step by Step Guide
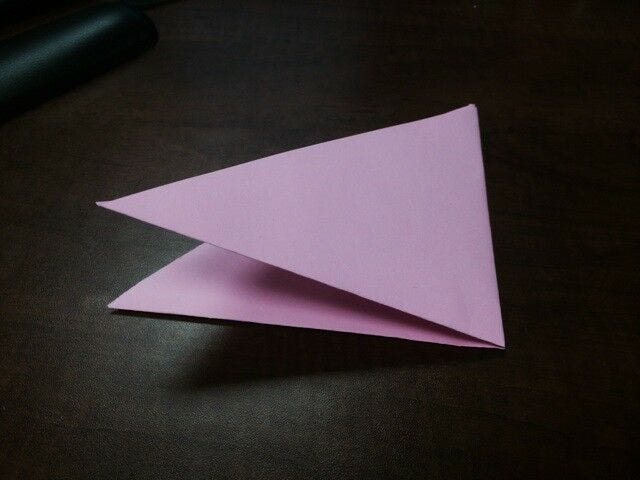
With Easter right around the corner I thought this might be a fun guide to post on the blog. The origami bunny. It doesn't require too many folds and it's pretty easy to make, just follow the directions! You'll want to pick a paper color of your choice, I used light pink. As is standard practice with origami folding, make sure the paper you are working with is a square. To do that, simply fold one of the top corners to the end of the paper, and cut off the excess. Okay! Let's get to it! STEP 1: Keeping it simple, fold the paper in half, to make a triangle.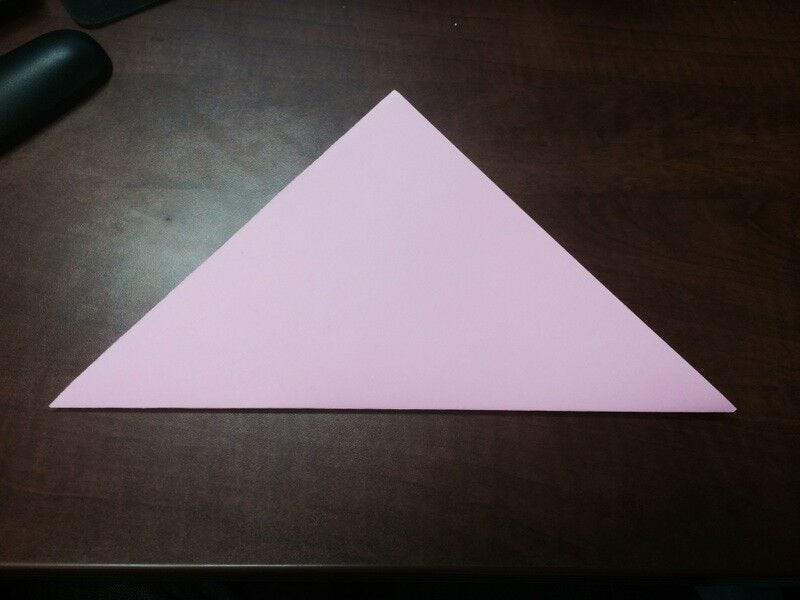 STEP 2: Again again! Fold the paper in half again, to make an even smaller triangle!
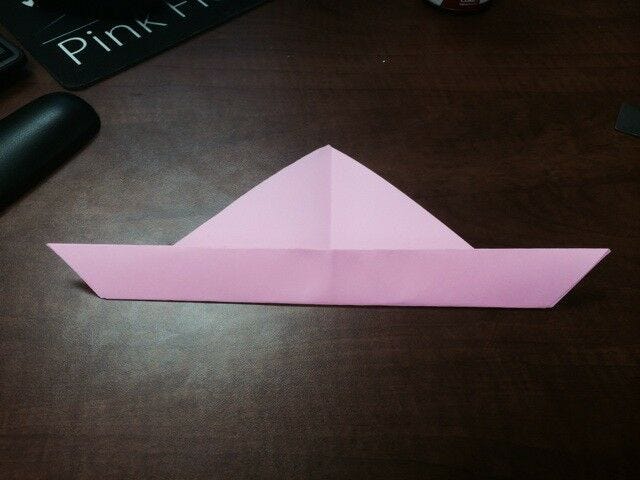
 STEP 3: Open up that smaller triangle, back to the first one, and fold up the bottom slightly.
 STEP 4: Fold both the left and right sides to meet at the center crease, like so...
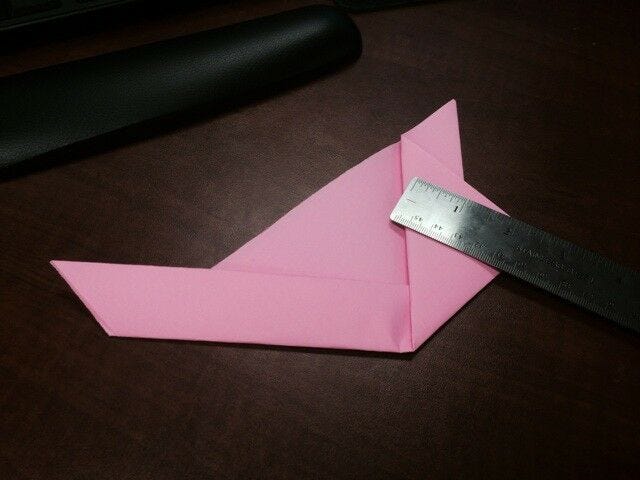
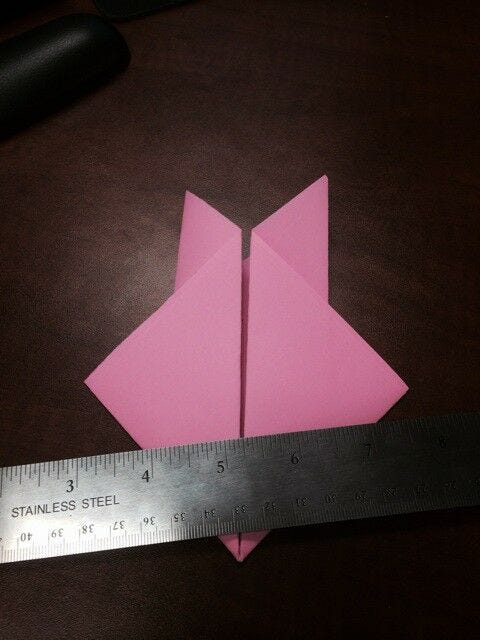 STEP 5: Fold the bottom point up slightly.
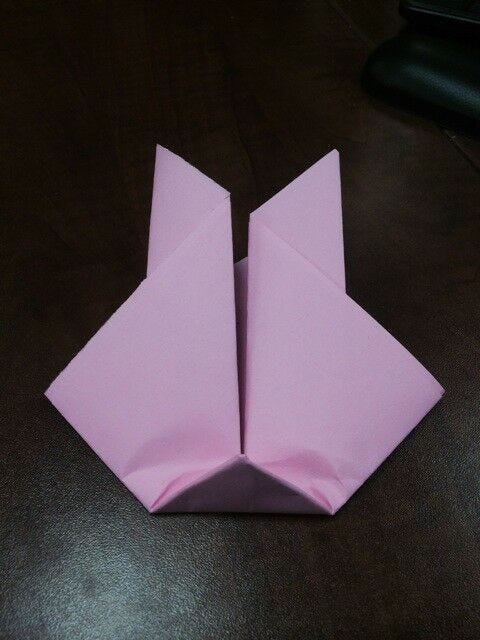 STEP 6: Flip your bunny over, and fold the top point inward slightly.
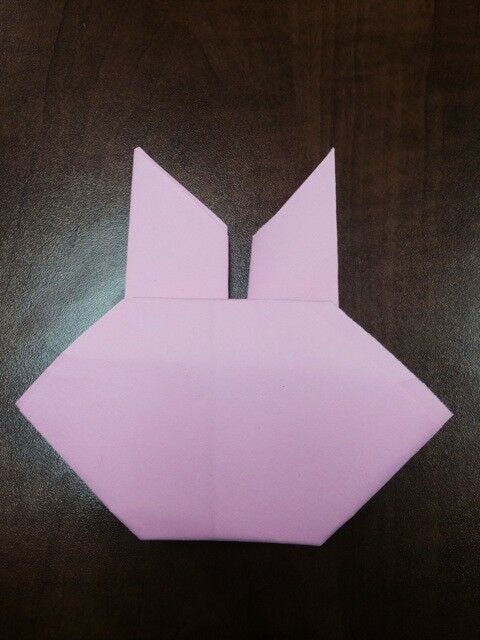 STEP 7: Draw on a face! and voila, you are done!
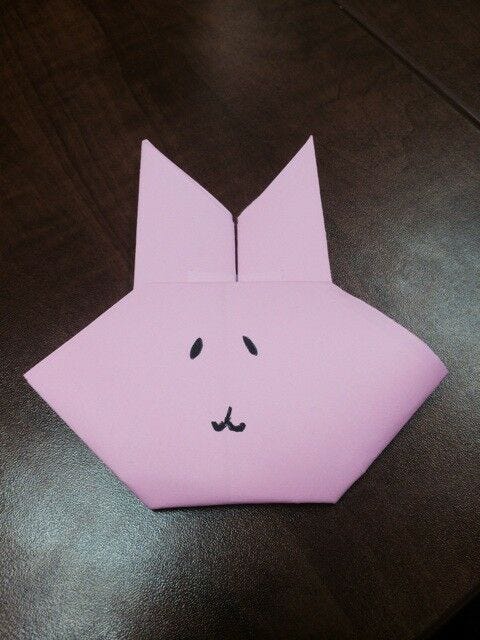
Step-by-Step Guide on How to Make an Origami Bunny
Origami, the traditional Japanese art of paper folding, has been practiced for centuries and continues to be a popular craft today. In this blog post, we will provide a step-by-step guide on how to make an origami bunny. Origami bunnies are not only adorable, but they also make for great decorations or gifts, especially during the Easter season. With just a piece of square paper and a little patience, you can create your very own origami bunny to impress your friends and family. Follow along as we walk you through the process, from folding the paper to shaping the bunny's ears and body. By the end of this tutorial, you'll have a cute origami bunny to show off!
The Benefits of Making Origami Bunnies
Aside from being a fun and creative activity, making origami bunnies offers several benefits. It can be a relaxing and meditative practice, allowing you to focus on the present moment and improve your concentration. Additionally, origami can help enhance your fine motor skills and hand-eye coordination, making it a great activity for both children and adults. Furthermore, creating origami bunnies can serve as a bonding experience for families or friends, as it encourages teamwork and collaboration. The end result is not only a cute decoration but also a sense of accomplishment and pride in your handmade creation.
Use Cases for Origami Bunnies
Origami bunnies can be used in a variety of ways, from simple decorations to more elaborate art projects. They can be displayed on shelves, desks, or mantels to add a touch of whimsy to any room. Origami bunnies also make charming additions to greeting cards, scrapbooks, and other paper crafts. For those with a flair for DIY home decor, origami bunnies can be incorporated into centerpieces, mobiles, or wall art. Additionally, they can be used as props for storytelling, puppetry, or imaginative play, making them versatile and multifunctional creations.
Alternatives to Origami Bunnies
If you're looking for alternative paper-folding projects, there are plenty of options to explore. Origami cranes, flowers, and animals are popular choices, each with its own unique folding techniques and designs. For those interested in three-dimensional origami, modular origami offers the opportunity to create intricate geometric shapes and sculptures. If you prefer a more practical approach, origami boxes, envelopes, and containers can be both useful and decorative. Regardless of your preference, the world of origami offers a wide range of possibilities for creative expression.
Tips for Making Origami Bunnies
When making origami bunnies, it's important to start with a square piece of paper, as this will ensure the best results. Use lightweight and colorful paper to add visual appeal to your bunnies. Take your time with each fold and crease, as precision is key to achieving a polished and professional-looking bunny. If you're new to origami, consider practicing with scrap paper before using your preferred material. Additionally, don't be afraid to experiment with different sizes and proportions to create a variety of bunnies. Most importantly, have fun and enjoy the process of bringing your origami bunnies to life!


