


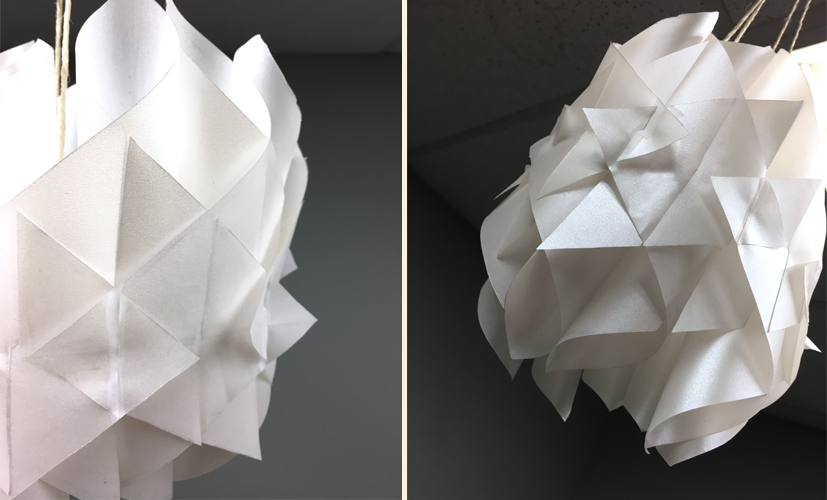
How To Make a Paper Cathedral Lantern
- By Andrew Jacobs
- Mar 23, 2017
How To Make a Paper Cathedral Lantern
The weather is warming up! Soon it will be time for those long awaited summer parties and get-togethers! Are you looking for a new and unique decoration for your warm-weather parties this year? You’ve probably seen some of those beautiful DIY paper lanterns that people hang on their back porches, or sometimes in their homes. You may be wondering how you create something like this for yourself that will outshine all of the neighbor’s decorations. You can create a unique and beautiful lantern with JAM’s shining translucent paper! How is it done? Let's shine some light on the situation!
To make it you will need:
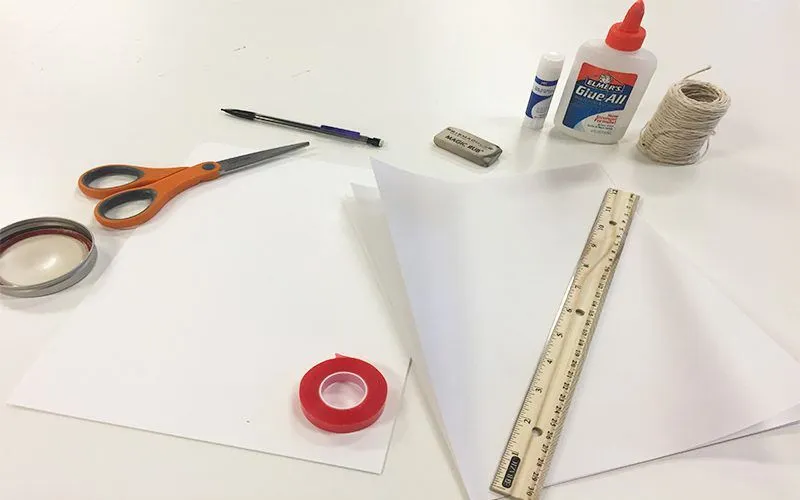
- 9 sheets of platinum translucent paper
- 9 Sheets of white 100lb cardstock
- Liquid Clear Dry Glue
- A Glue Stick
- A ruler
- A Pencil
- An craft knife or scissors
- A light source (We used a battery operated light. Light source should be 2.75 inches in diameter or smaller)
- Mason Jar lid or other 2.75 inch circular object
- Double Stick Super Tape
- String
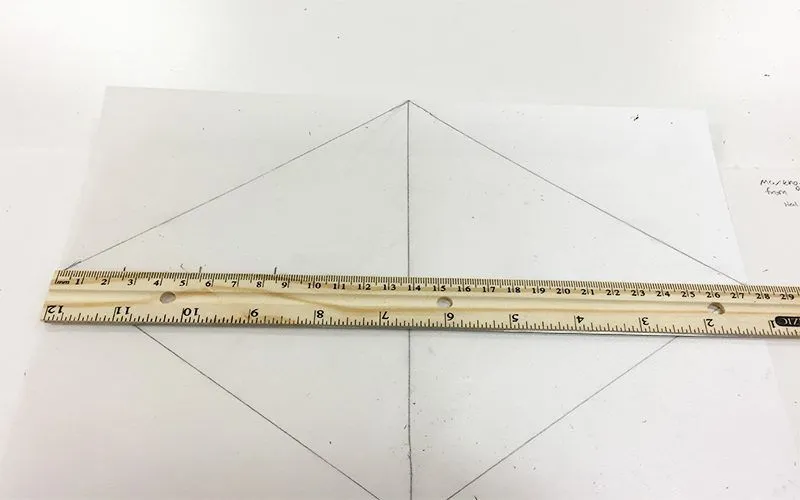
Step 1:
Place one sheet of vellum paper onto a flat surface and, using the ruler and your pencil, mark halfway points on the top, bottom, and both sides. (With 8.5 x 11 inch paper, halfway points will be 5.5 inches on the long sides and 4.25 inches on the short sides). Draw a diamond on the paper using these points. Use the ruler to keep your lines straight
Step 2:
Draw two straight lines down the middle of the diamond long ways and short ways. These lines should insect in the middle.
Step 3:
Measure 2.4 cm, 5.3cm, and 8.3cm coming from the left side on the longer line. Mark these measurements and then draw straight lines going up to the above line for each one. Flip the diamond over and repeat on the other side
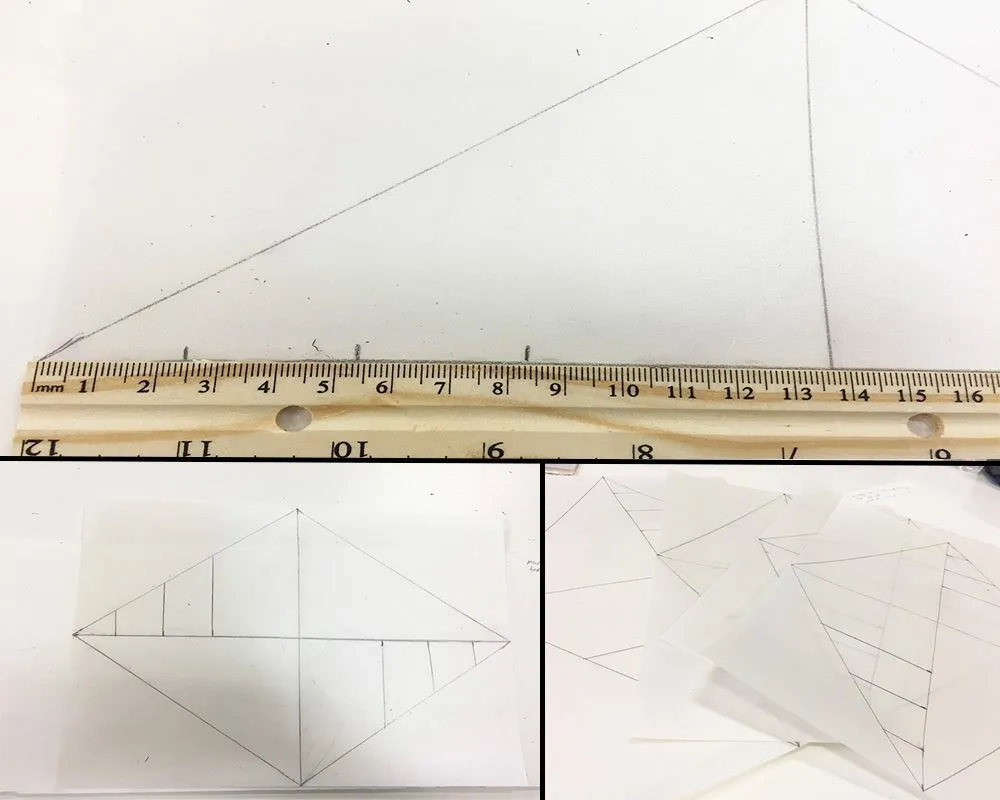
It should look like this.
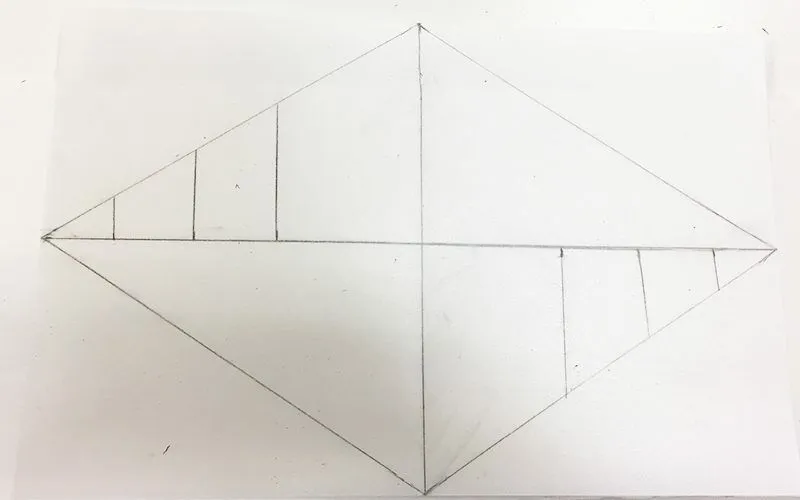
Step 4:
Using your scissors or a craft knife (on a blade-safe surface), cut out the diamond along its outer edges. . Once the diamond shape is independent of the original paper, cut along the 2.5, 5.3, and 8.3 cm lines.
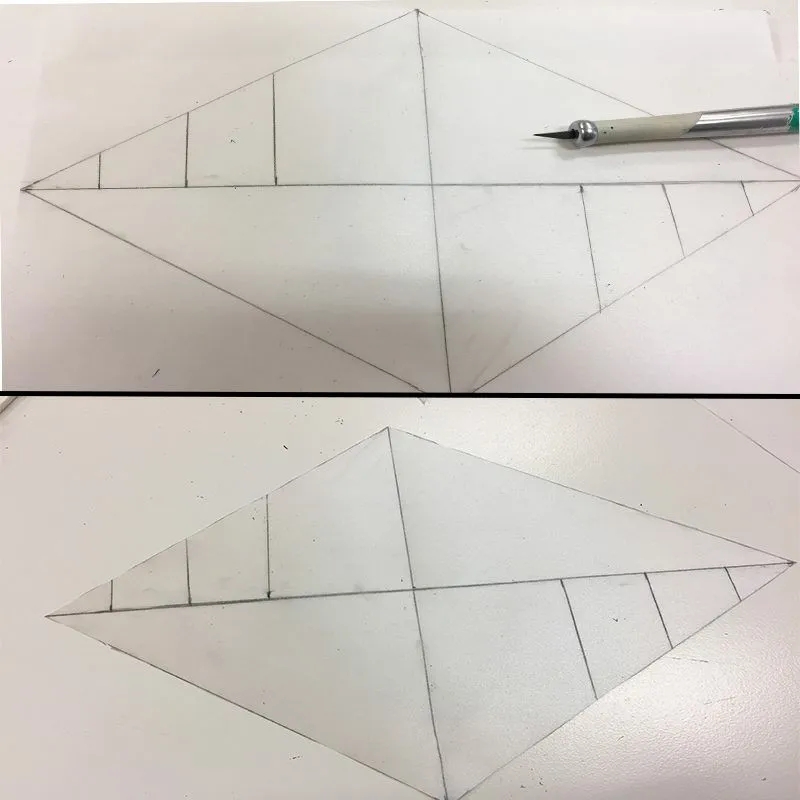
Step 5:
Repeat steps 1-4 with all other 8 sheets of paper. USE YOUR ERASER TO ERASE ALL PENCIL LINES.
Step 6:
Stack the diamonds so that they are lined up with downward and upward slits facing in the same directions. Pick up the one at the top and fold both pointed sides towards the middle and slide the two most inward slits (the longest slits) so that they overlap and keep the paper rolled into this shape.
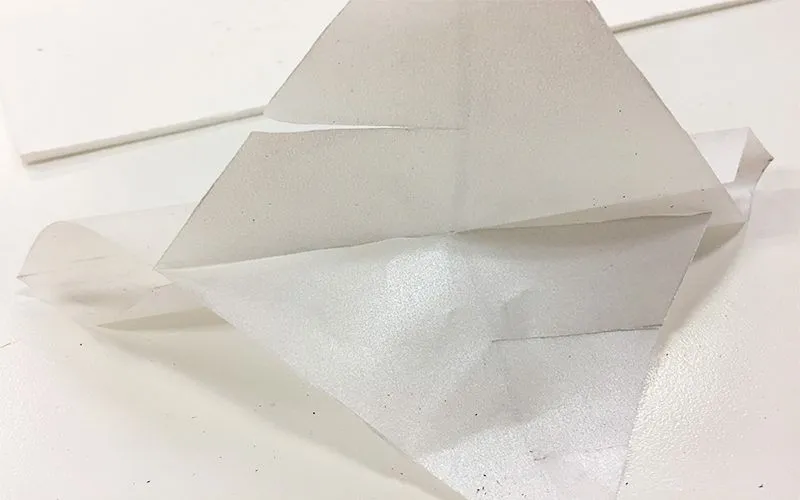
Repeat this with every piece.
Step 7:
Now you will connect the pieces to each other using the remaining notches. Start with one piece and connect another to it using the middle notches. Repeat until nine pieces are notched together in a row. Connect the smallest slits in places where they overlap. Connect the two end pieces using the middle and smallest notches so that all pieces are connected in a round shape.
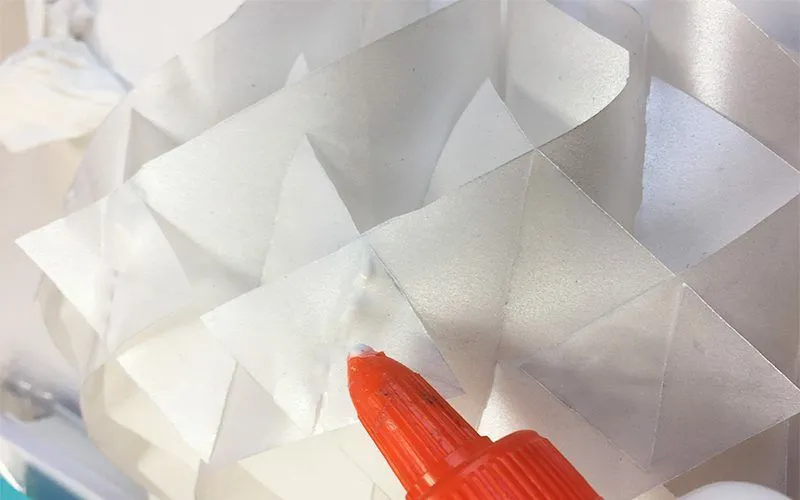
Step 8:
To reinforce the shape, use clear-dry glue on each of the cross sections along the smallest slits. Let glue dry completely.
Step 9:
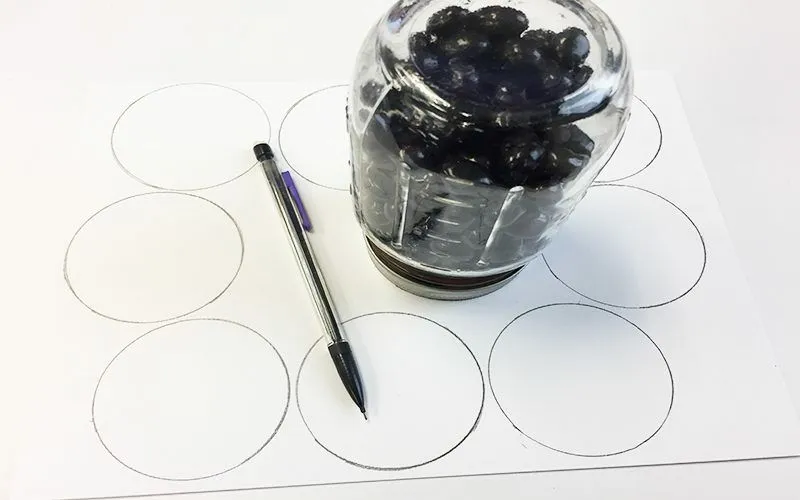
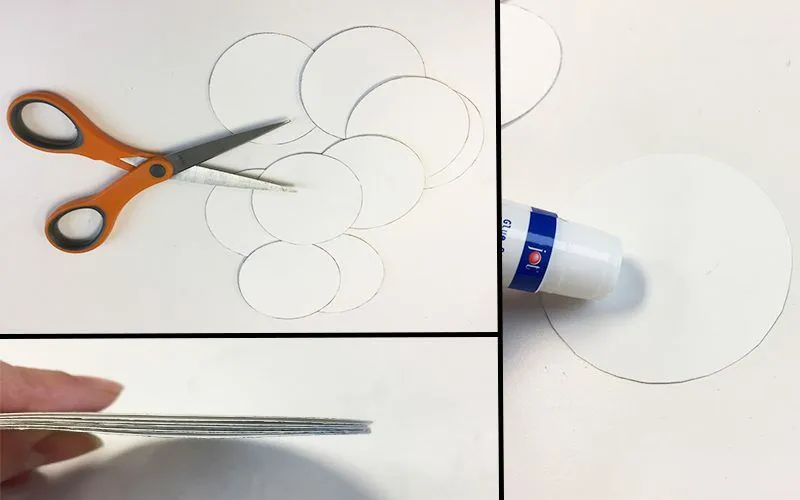
On white card stock, use the pencil to trace your Mason jar lid or circular object. You will need 9 circles. I fit them all on one sheet of 8.5 x 11 inch card stock. Cut out each circle using scissors.
Step 10:
Using a glue stick, glue all of the circles onto each other so that they form a sturdy cylinder.
Step 11:
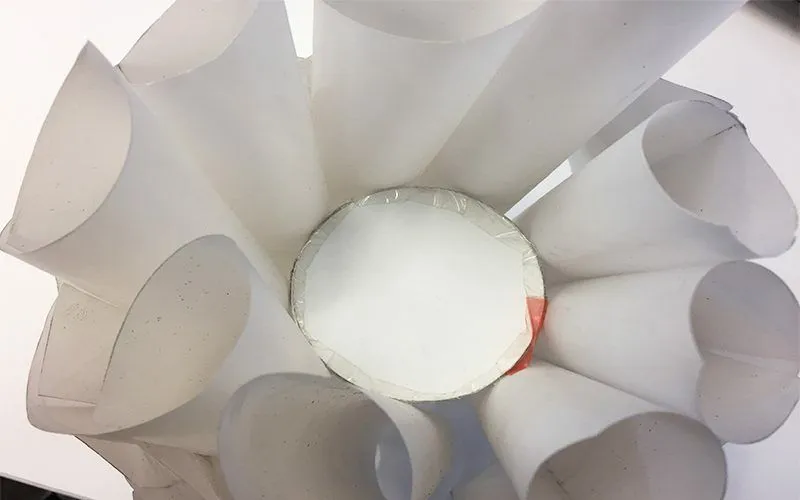
Unroll enough Super Tape to go around the entire edge of the cylinder. Carefully wrap it around it around the edge until ends meet. Remove the top red layer of tape to expose the other sticky side. Have another person hold the section on the lantern upward and apart of the table so the space in the middle is easily accessible. Place the cylinder inside so that it supports the pieces and spaces the apart. The tape along the edge should be sticking the middle inside of the pieces. It should look like this:
Step 12:
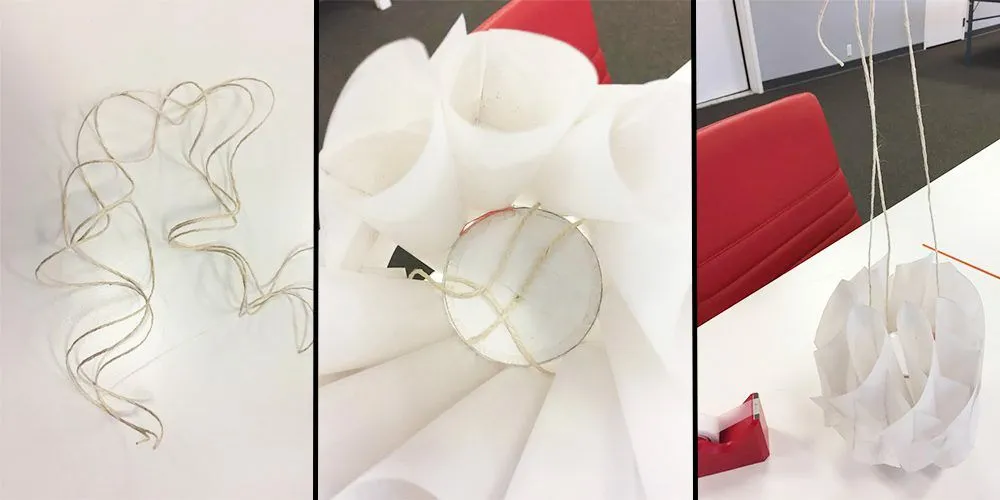
Next you will need to attached string for hanging.For this, you will need string in the color of your choice. I used our Ivory Kraft Twine . Cut four, long even lengths of the string. The exact length of your string will depend on how high or low you want your lantern to hang from the ceiling, hook or rod you hang it from. String each piece through the spaces around the card stock circle in the center and tape them with regular clear tape on the bottom. Pieces of string should be evenly placed on four sided of the circle.
Step 13:
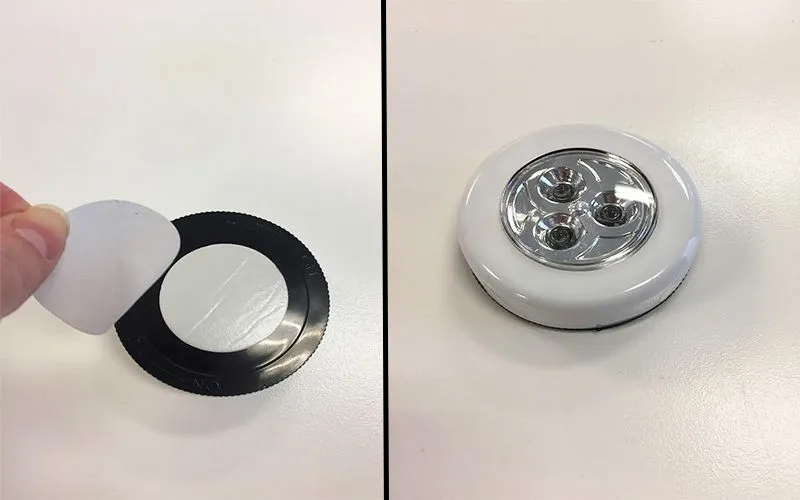
Now it's time to put your light source into the lantern! We used a round 2.5 inch battery operated push light found at a local dollar store. If you are also using a battery operated source, stick it to the top of the card stock circle. Our light has a self-adhesive backing. If yours does not, you maybe use more Super Tape to secure it in place!
Step 14:
Hang it up! We used tape to hang our lantern. You can also use the string to tie it to a hook, rod, or anything you wish to hang it from!
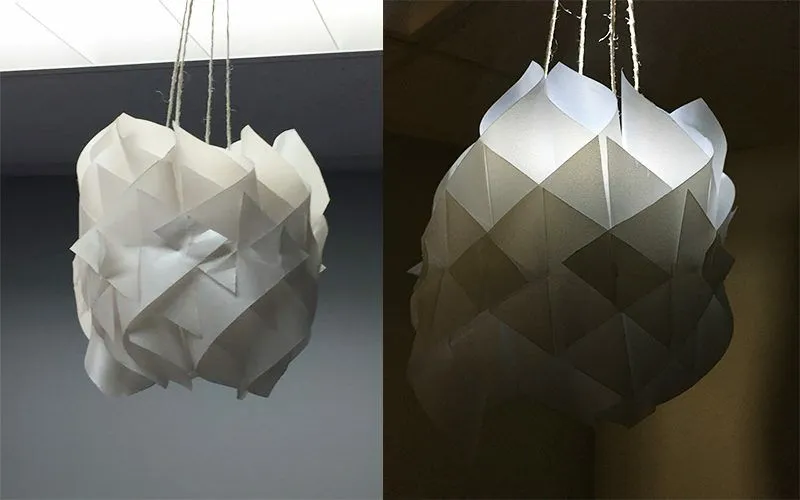
We hope your enjoy your unique homemade lantern and the elegant soft glow of light it casts on your home and social gatherings. Let us know about your experience with trying this craft in the comments below!