Harry Potter DIY Book Covers
- By Andrew Jacobs
- Mar 29, 2016


If you’re a Harry Potter fan, a true one (not the one that only watches the movies, we know who you are), then you probably have all of the books. In order. On your bookcase. First row. Lucky guess, right? Wrong. It’s normal, typical, known to every other fan out there. What isn’t normal, something that no one really sees, is this:
Your own Harry Potter DIY Book Covers
Now of course, you can make your own book covers for any series, maybe even a collection you have by one author. The only series’ that you are not allowed to create are Twilight and 50 Shades of Grey. And you should all know why.
I’m here to show you how I created this binding and how you can make it yourself with any Color Paper Bag JAM has to offer and any type of books you love (except for those that I have just banned for your own sake).
All of my supplies I used were JAM products, except of course the books.
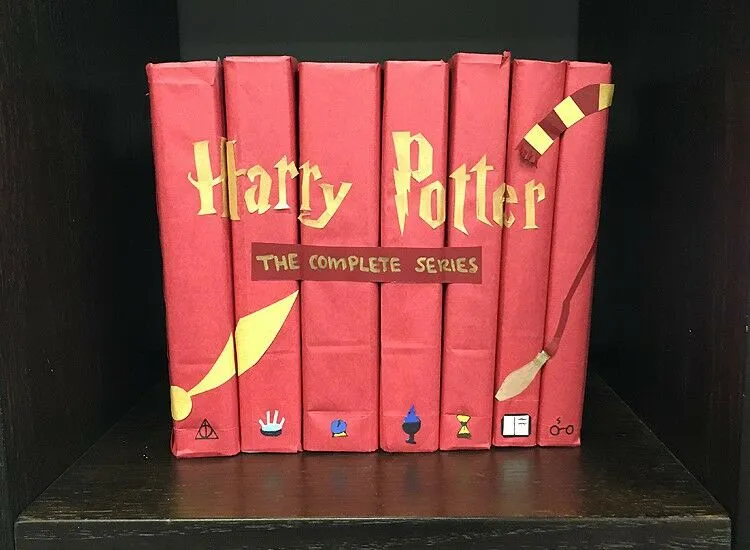
And this is what I came up with for JAM approved Harry Potter DIY Book covers:
First of course is the most tedious and unfortunately least creative task - actually making the cover. But you can get it over quickly with these steps! I know, I used a pink paper bag and a non-Harry Potter book for my steps. But this was before I created the continuous book cover! Sorry, I didn't plan well...
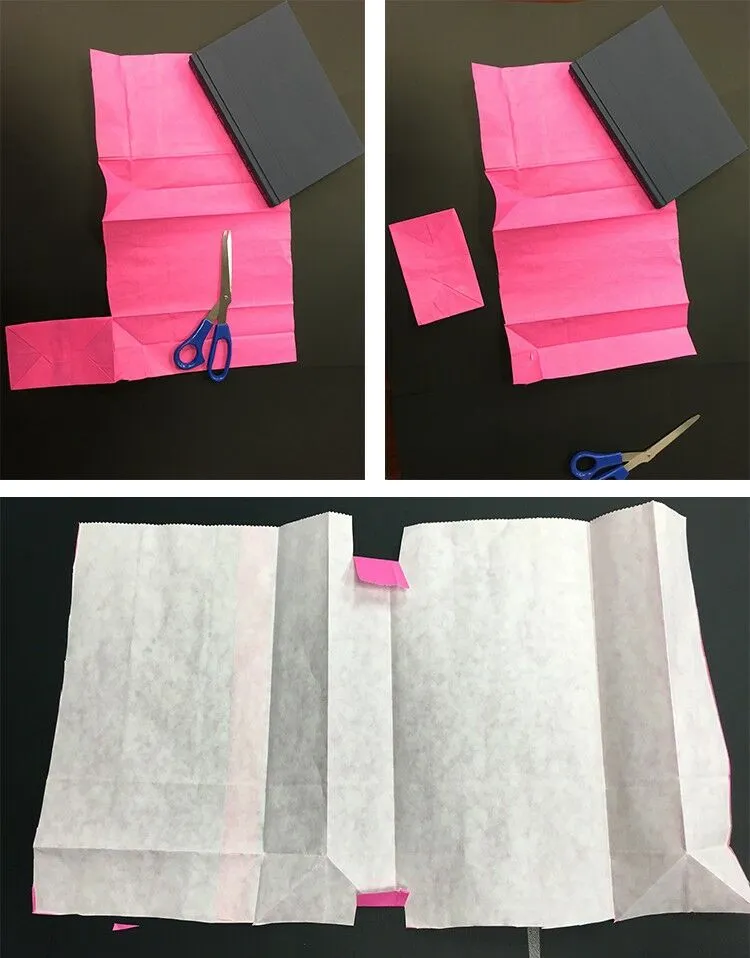
1. Open the paper bag up, cut down one of the long sides, then keep cutting along the lines on the bottom of the bag.
2. Cut the bottom completely off so you have a complete rectangle.
3. Align your book onto the soon-to-be cover and fold in what will soon be the binding.
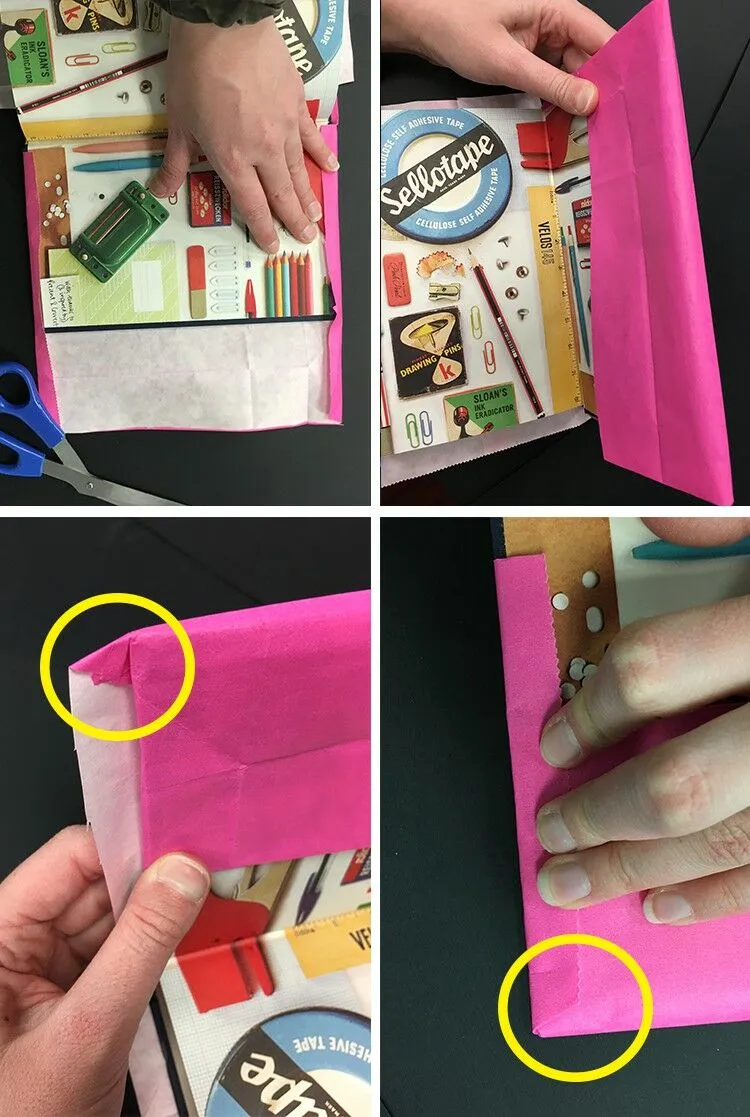
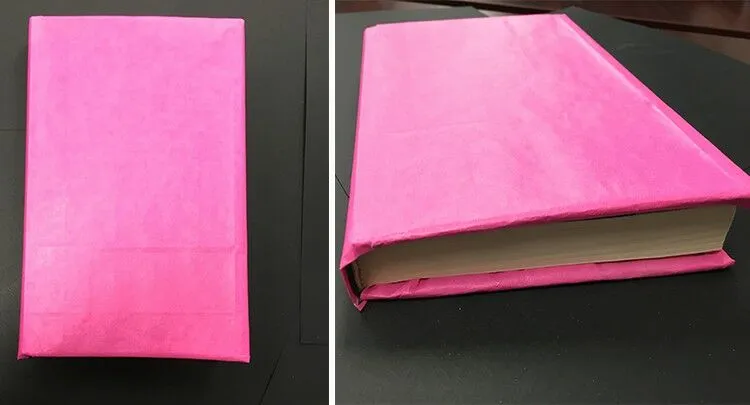
4. You want to fold down the sides of the kraft paper bag so that the cover the book tightly. Remember to keep the binding aligned! Otherwise it will be off once you start taping everything down. 5. Fold the horizontal piece so that a triangle appears (again, the folded binding has to be aligned!). 6. Once that's done, paste or glue the folded triangular piece down. 7. Repeat these steps for every side, slowly and efficiently, so that your book will soon look like this:
Now for the good stuff - decorating!
This is ALL up to you, which is of course the easy part for us creative people but the hard part for those analytical people. So I'll give you some tips on what I've done. For the creative people, maybe you can get inspiration for your own set of Harry Potter Book Covers. For the analytic type, just copy what I've done. Makes life easier, huh?
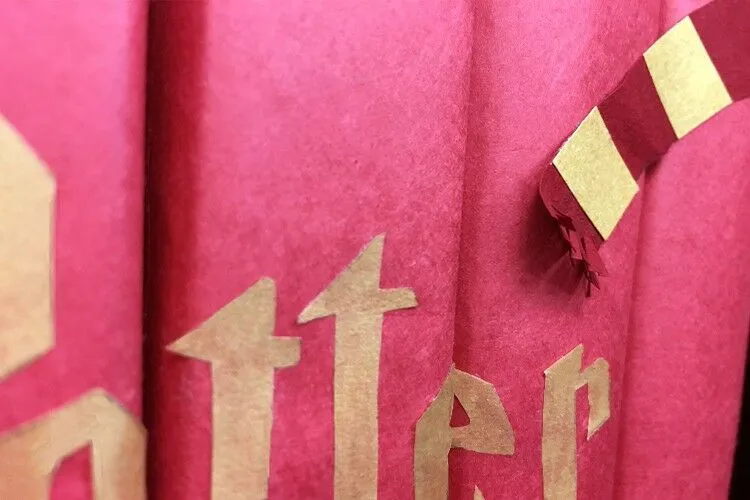
You, of course, need to start off with the perfect Harry Potter font, you know the one with the swirly 'y' and the classic lightening bolt 'P'. I searched online (it's easily found on google) and printed it out. Next I traced the font onto my Gold Translucent Paper

And then I thought ... hmm ... what do you think of when you think of Harry Potter?
Brooms.
Scarves.
and of course,
Quidditch.
For the broom, I used our Dark Red Paper for the stick and our Tan Tissue Paper for the bristles. Adding some gold to the mix with our Gold Metallic Sharpie, the broom was good to fly ... I mean go. And of course I had to add 'Nimbus 2000' on the broom. I mean, what else would I put on there?
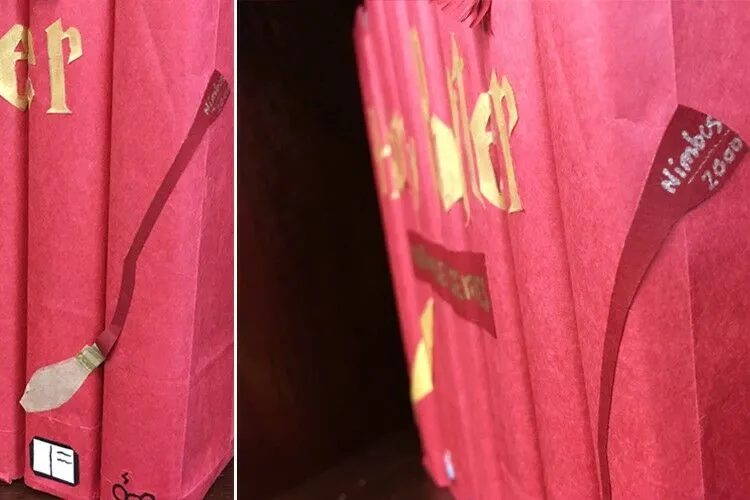
For the scarf, I used, again, our Dark Red Paper for the base (get it, it's a 'base' color - only funny for our employees and competitors [we are watching you]) and cut Gold Stardream Paper pieces on top to finish off the Gryffindor look. The last scarf piece, the one closest to the title, should be cut into vertical strips for a more textured feel.
THE GOLDEN SNITCH, the only way to win the game of Quidditch. (But really, it's like the other points don't even matter ... I never really understood that). Anyway ... what better way to show off the golden snitch than with our Gold Stardream Paper? With a 3/4 inch Circle Paper Hole Puncher, I made the snitch. Then I attached some flared wings! Harry Potter DIY book covers coming right up!

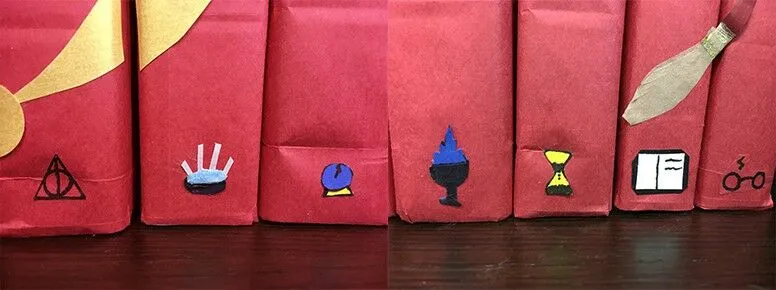
Now, for the final pieces to the Harry Potter Book Cover magic were of course labeling each book. By using different colored JAM Paper and a 2.0 calligraphy pen, I was able to create the essence of each book with a symbol. Instead of numbering them like any normal person would, I thought symbols would give each book a little more 'character'. From the classic Harry Potter glasses all the way to the symbol of the Deathly Hallows, these have to be my favorite part of the books ... so cute! And yes, it goes from 7 to 1 not 1 to 7 (again, poor planning).
Now go create your own masterpiece set! Then you can sit the Harry Potter DIY book covers on your bookshelf, just as I did mine:
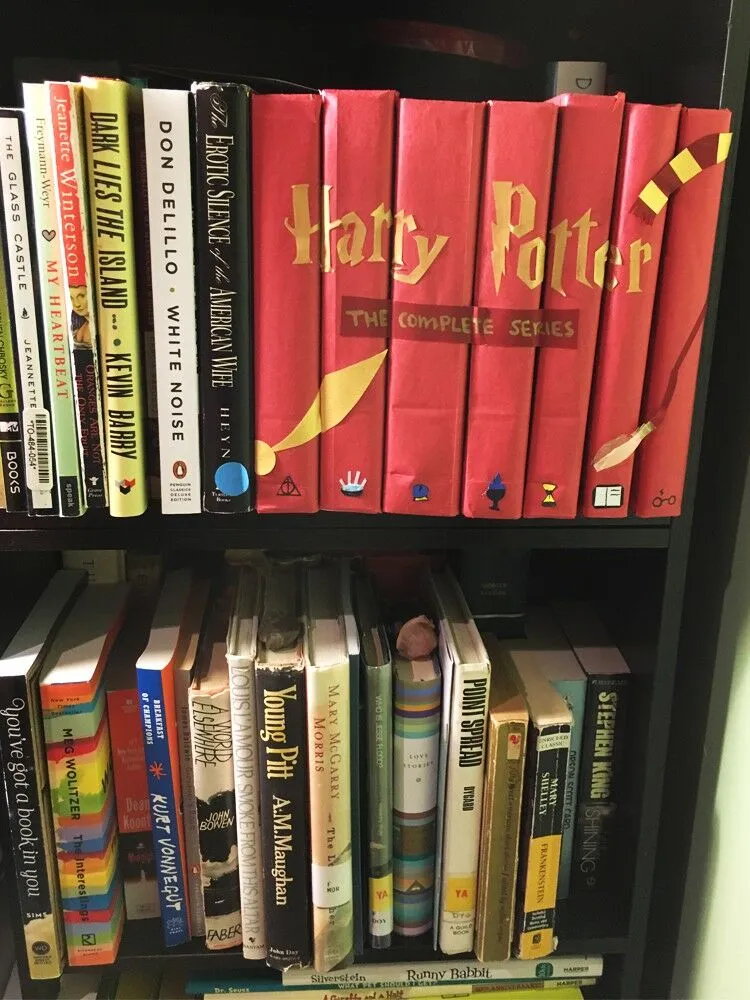
My next project I think will be John Updike's "Rabbit" series. What do you guys think of our Harry Potter DIY Book covers? If you have any other suggestions other than the two I stated earlier (those who must not be named ... get it?), comment below!