DIY Geometric Vases: A Step-by-Step Guide
Key Summary:
- This article will provide a step-by-step guide on how to create stunning geometric vases out of cardstock for home decor projects.
- Readers will learn about the materials needed, step-by-step instructions, tips and tricks, variations for customization, and real-world use cases.
- Examples of DIY geometric vases in action will be showcased to inspire readers to create their own unique home decor pieces.
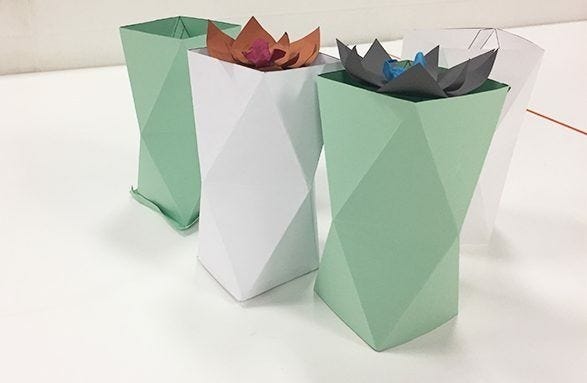
DIY geometric vases have become increasingly popular in home decor, offering a creative and cost-effective way to add a personalized touch to any space. In this article, we will guide you through the process of creating stunning geometric vases out of cardstock. From the materials needed to step-by-step instructions and tips for customization, you will learn everything you need to know to create your own unique vases. Whether you're looking to add a modern touch to your home or create a statement piece for a special event, DIY geometric vases are the perfect project for unleashing your creativity.
Detailed Information and Supporting Headings:
Materials Needed
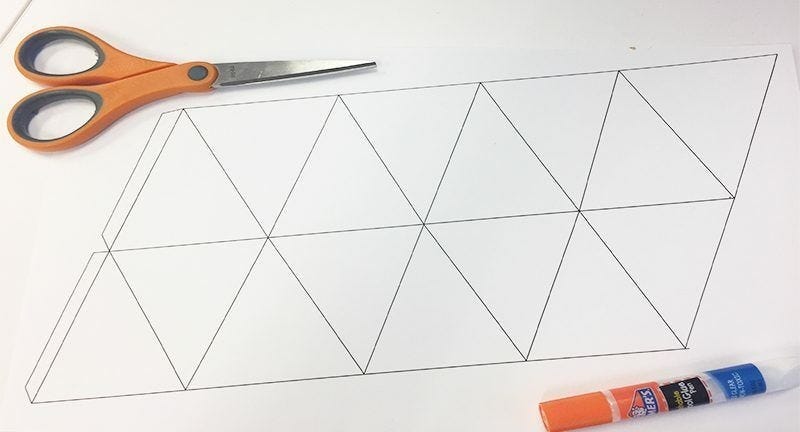
Before starting your DIY geometric vase project, gather the following materials: cardstock in various colors, scissors, ruler, pencil, glue or tape, and any embellishments you want to add. Make sure to choose sturdy cardstock to ensure your vases hold their shape.
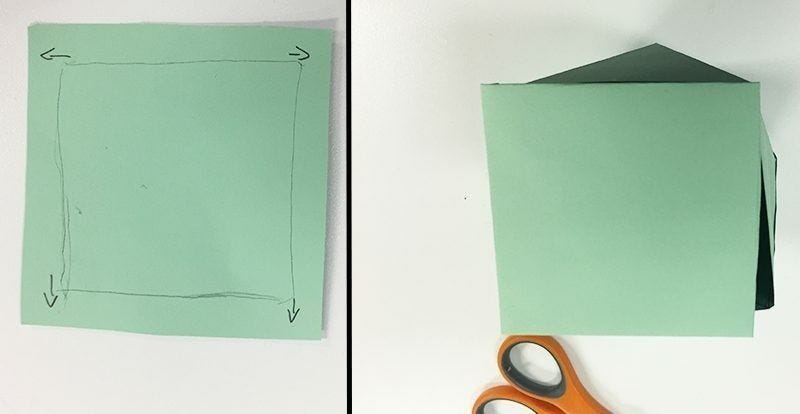
Step-by-Step Instructions
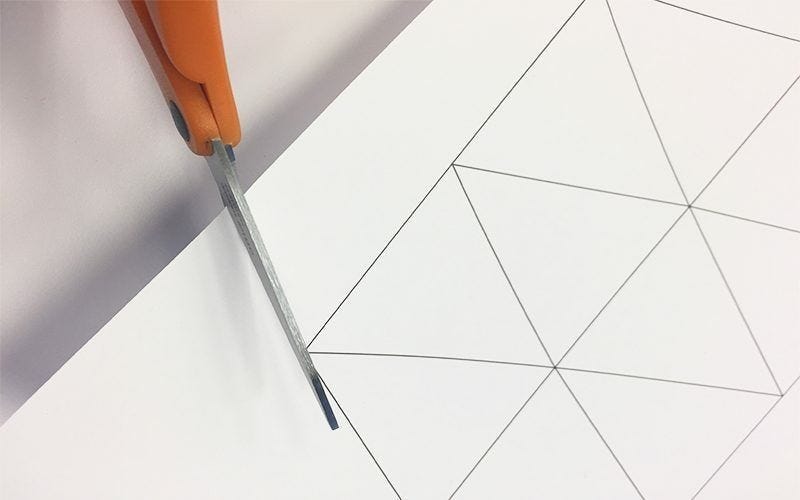
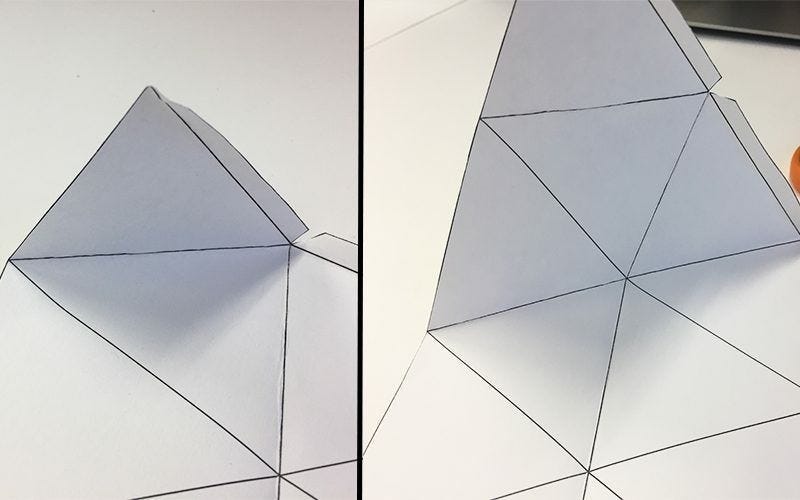
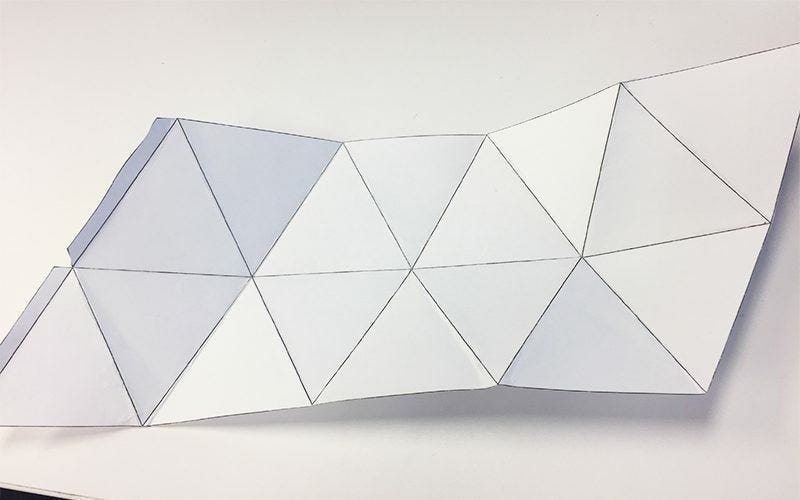
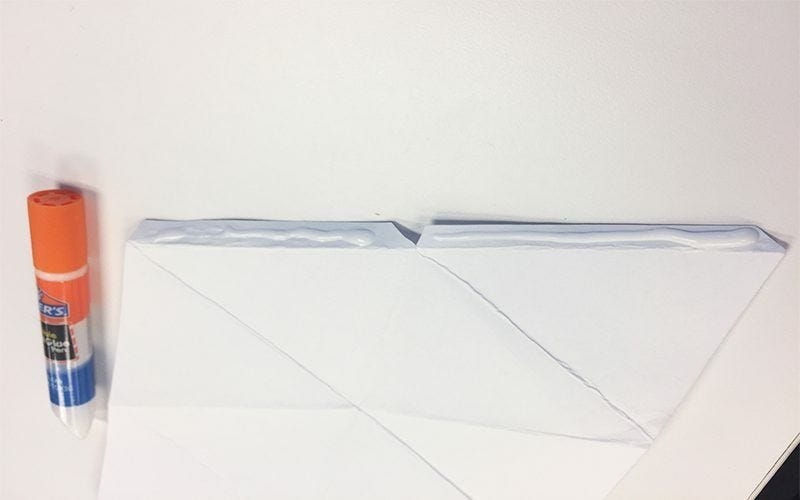
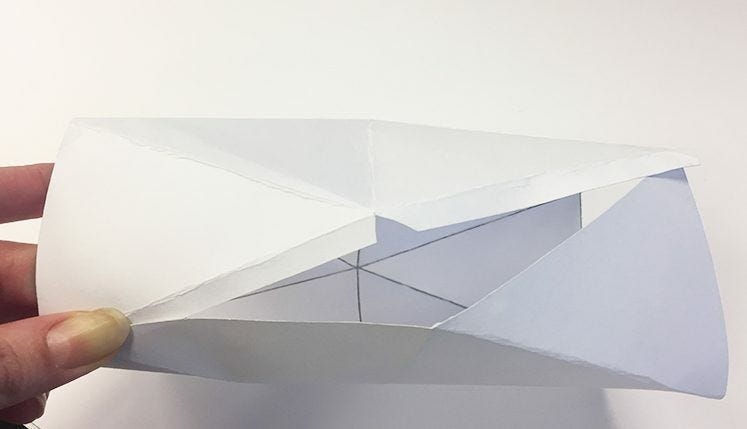
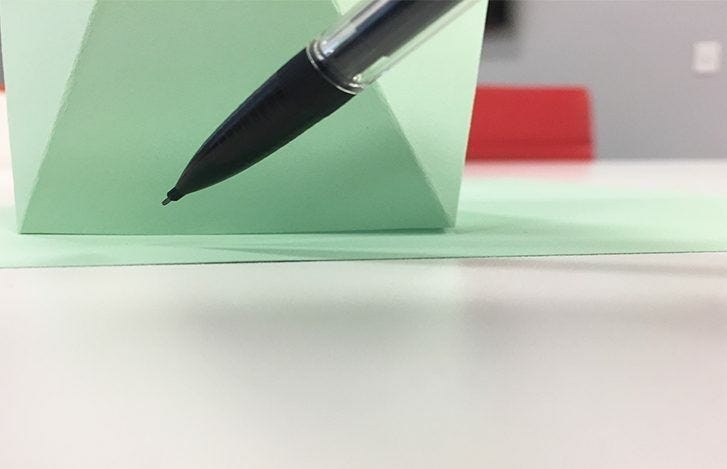
Begin by selecting the size and shape of your vase and cutting the cardstock accordingly. Use a ruler and pencil to mark the folds and edges for precise cutting. Once you have all the pieces cut out, carefully fold and glue them together to create the geometric shape of your vase.
Tips and Tricks
When choosing cardstock for your geometric vases, consider the color and pattern that will best complement your home decor. Experiment with different shapes and sizes to create a variety of vases for different spaces. For a sleek look, use metallic or monochromatic cardstock, or add a pop of color with bright patterns.
Variations and Customization
Get creative with customizing your geometric vases by adding embellishments such as beads, sequins, or ribbons. You can also experiment with different shapes like triangles, hexagons, or even irregular shapes for a more unique look. Personalize your vases to match your style and preferences.
Who Should Try This Project
DIY geometric vases are perfect for:
- Home decor enthusiasts looking to add a personal touch to their space
- Crafters who enjoy working with paper and creating unique pieces
- Individuals on a budget who want to decorate their home affordably
- People looking for a fun and creative project to do alone or with friends
- Anyone interested in exploring geometric design and shapes in their decor
When to Create Your Own Geometric Vases
You should consider making DIY geometric vases:
- When you want to add a modern and stylish touch to your home decor
- For special occasions like weddings, parties, or events as unique centerpieces
- As a personalized gift for friends or family members
- When you're looking for a creative and relaxing DIY project to unwind
- To experiment with different colors, patterns, and shapes in your decor
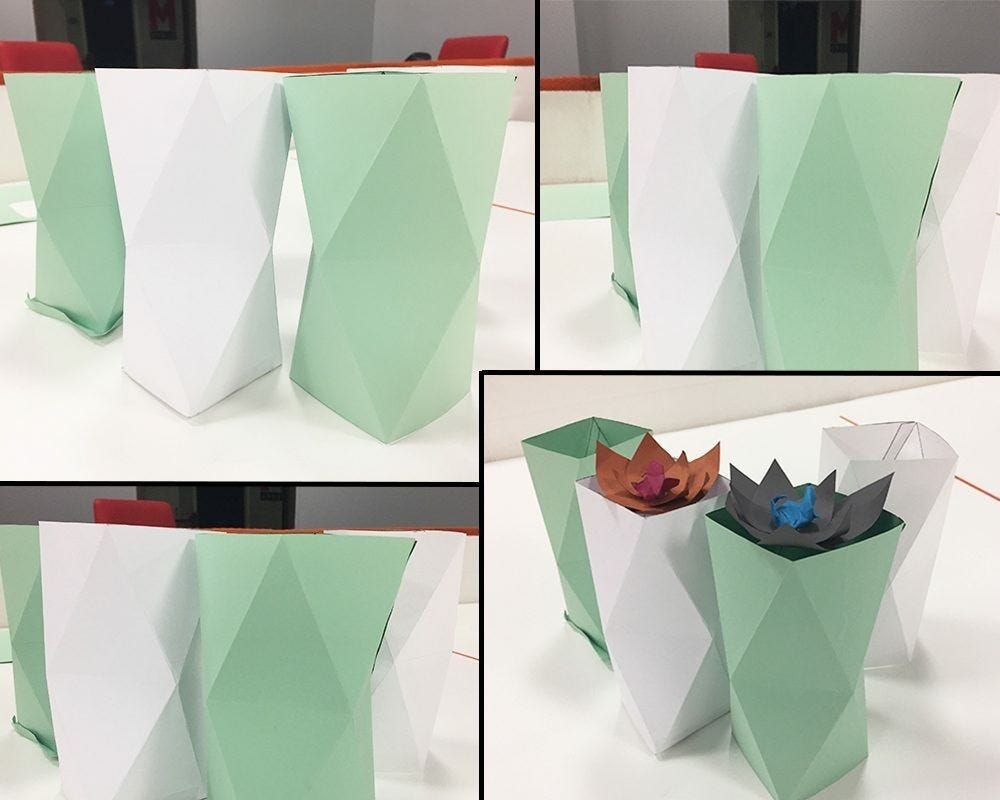
Examples of Geometric Vase Use Cases
Here are some creative ways to incorporate DIY geometric vases into your home decor:
- Use a set of geometric vases as a centerpiece on your dining table for a modern look
- Place a single geometric vase on a bookshelf or mantel as a stylish accent piece
- Create a geometric vase in a metallic finish for a touch of glamour in your living room
- Group different-sized geometric vases together on a side table for a dynamic display
- Experiment with hanging geometric vases from the ceiling for a unique decor element
What Sets Our Product Apart
Our DIY geometric vase kit includes pre-cut cardstock pieces, making it easier and quicker to assemble your vases. The high-quality cardstock ensures that your vases will hold their shape and last longer than traditional paper vases. Additionally, our kit comes with a variety of colors and patterns to choose from, allowing you to customize your vases to match your home decor perfectly.
Potential Use Cases for Our Product
Home Decor Enthusiasts
Our DIY geometric vases are ideal for individuals who love adding unique and personalized touches to their living spaces. With endless customization options, you can create vases that perfectly complement your home decor style.
Event Planners
For weddings, parties, or other special events, our geometric vases make stunning centerpieces that will impress guests. You can create a cohesive look by matching the vases to your event's color scheme or theme.
Gift Givers
Looking for a thoughtful and creative gift? Our DIY geometric vase kit is perfect for crafting personalized gifts for friends and family. You can tailor the vases to suit the recipient's taste and style, making it a truly special present.
Maximizing Your Experience with Our Product
To get the most out of your DIY geometric vase kit, consider the following tips:
Experiment with Different Shapes
Don't be afraid to try out various geometric shapes for your vases, such as triangles, hexagons, or even irregular shapes. Mixing and matching different shapes can create a visually interesting display.
Coordinate with Your Decor
Choose cardstock colors and patterns that complement your existing home decor. By coordinating your vases with your furniture and accessories, you can create a cohesive and harmonious look in any room.
Share Your Creations
Once you've completed your DIY geometric vases, share your creations on social media or with friends and family. Not only will you inspire others to get creative, but you'll also receive feedback and encouragement for your work.
Final Flourish:
DIY geometric vases offer a creative and budget-friendly way to add a personalized touch to your home decor. By following the step-by-step guide in this article, you can create stunning vases that reflect your style and creativity. Whether you're a home decor enthusiast, a crafter, or simply looking for a fun project, DIY geometric vases are the perfect choice for adding a modern and stylish flair to any space. So grab your cardstock and scissors, and start crafting your own unique geometric vases today!