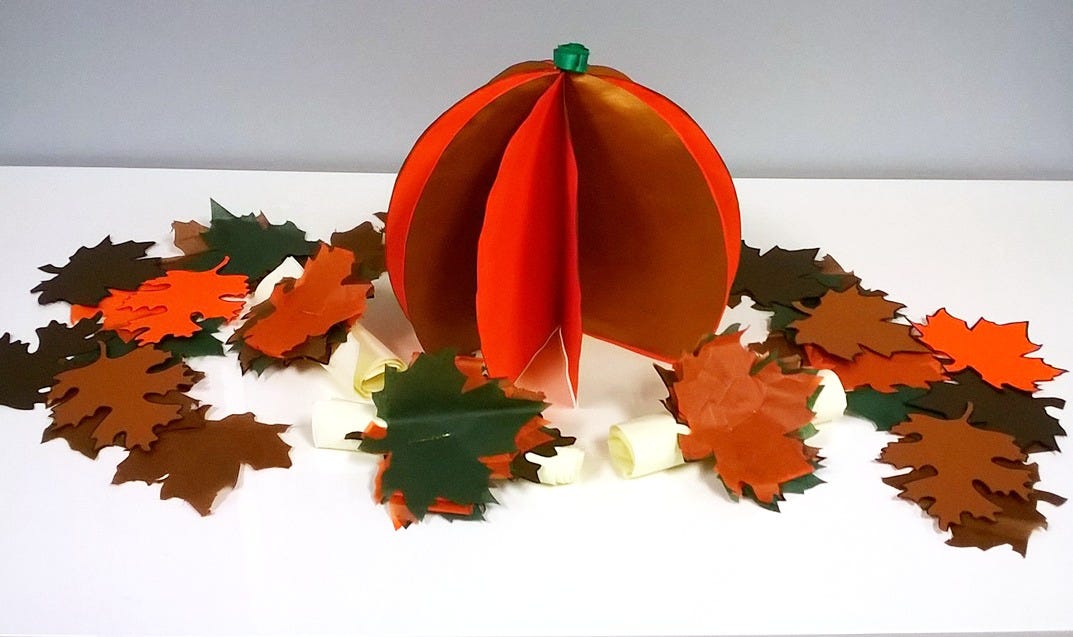
Use Colorful Paper to Create DIY Fall Table Decorations!

Fall is here! Halloween, Thanksgiving, and Harvest Parties are right around the corner. How are you getting ready for the autumn gathering in your home? Let us help you get started with these fun DIY fall table decorations. For a complete fall table, I have included the instructions for two separate crafts. The first is the Paper Pumpkin Centerpiece. This is an easy project you can do alone, with a friend, or with your kids. The second set of instructions is for creating Paper Leaf Napkin Holders. Perfect for parties with kids or families, these decorations are both festive and easy to make. Let’s begin with the Paper Pumpkin Centerpiece!


First, you will need:One pack of JAM Orange Paper
One pack of JAM Copper Stardream Paper
One sheet of JAM Green Paper
A paper plate
A pencil
Scissors
Glue
Green Ribbon


Step 1

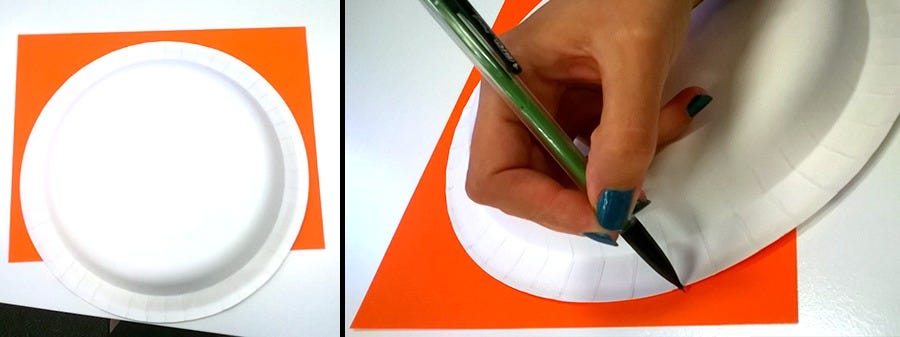
Take one sheet of orange paper and place it horizontally. Put the paper plate face down onto the paper, leaving an approximate 1” margin between the top on the plate and the top of the sheet. With the pencil, trace the full perimeter of the plate that is touching the paper. Repeat this step with the desires number of orange sheets, and then with an equal number of copper sheets. For the pumpkin size pictured here (large), 5 sheets of each color were used.

Step 2

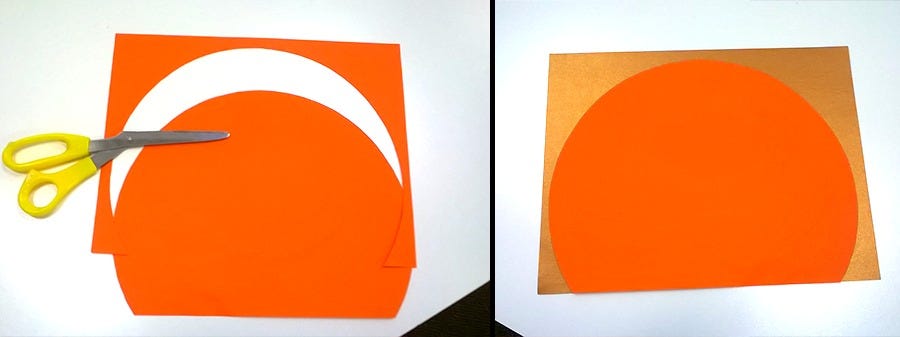
Using the scissors, cut out the rounded shapes you have just traced.

Step 3

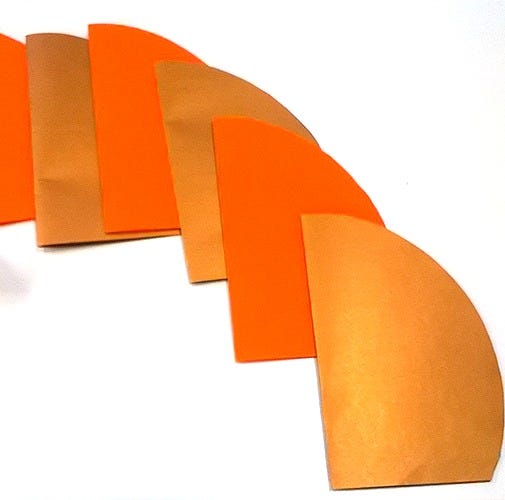
Fold each curved pieced in half short-ways.

Step 4

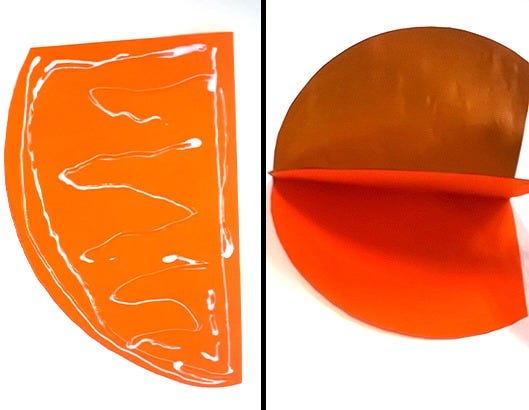
Place glue on one half of the outside of a folded piece. Place the half of the outside of a piece of the alternate color onto that piece. Keeping all pieces folded, repeated this step while alternating colors. Leave one piece out.

Step 5

Let the glued pieces sit for 10-15 minutes
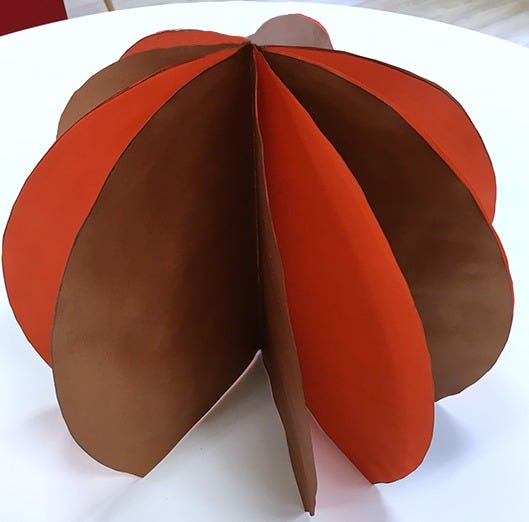
Step 6

Fan out glued together pieces, so that unglued sides are separated. Stand the pieces upright.

Step 7

Glue in that last piece in the empty gap. You now have a complete pumpkin! But wait, one thing is missing….

Step 8

The stem! Take a strip of green paper (2-3” in width) and roll it tightly. You may leave your sheet tightly rolled, or let it loosen a bit for a wider stem. Glue the loose end of your stem down.

Step 9

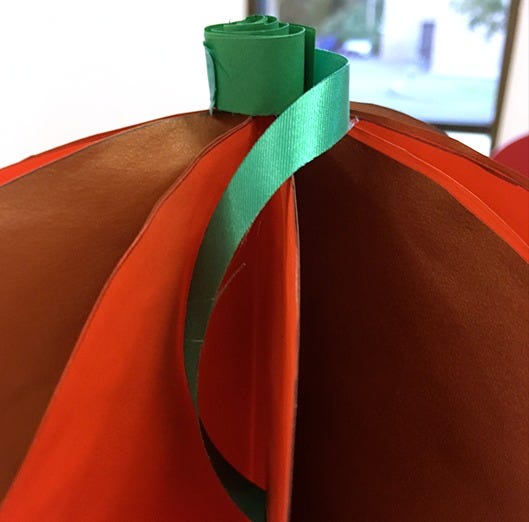
Next, take a strip of green ribbon and glue it to your stem to create a small vine. You may curl this vine or leave it straight.

Step 10


Put a small amount of glue on the bottom of the stem and them hold it down on the top middle of the pumpkin for several minutes. Then let go and let dry.

Now, your pumpkin is truly complete! (Tip: For a Halloween look, you may want to cut triangles and mouths out of JAM black paper and glue them to the pumpkin to make jack-o’-lantern faces!) You’re halfway there, but your fall table is not yet ready! Continue your adventure in DIY fall table decorations and bring a little autumn to each place-setting. Bring a little of the crisp, colorful weather from the outside in with these leafy napkin holders. You will need:One pack of JAM Bronze Paper
One pack of JAM Copper Paper
JAM Tissue Paper: Orange, Green, Brown, and Yellow
Leaf Templates ( I found mine with a simple Google search for “leaf template”. The ones I chose were very simple coloring pages shrunk down to correct size, about 5”by 3”)
Scissors
Glue
Clear Tape
Gold, Brown, or Clear thick thread
Sewing needle

Step 1

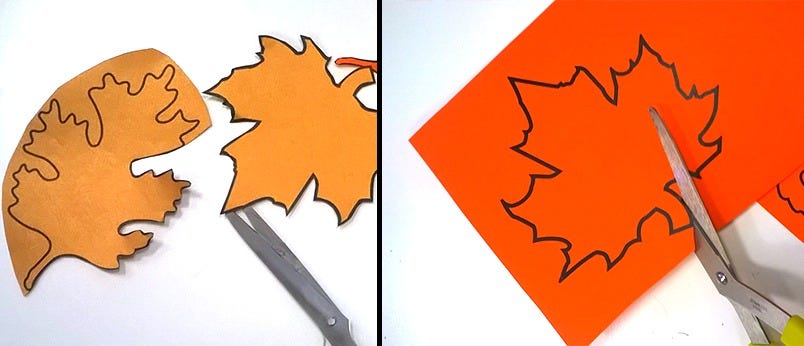
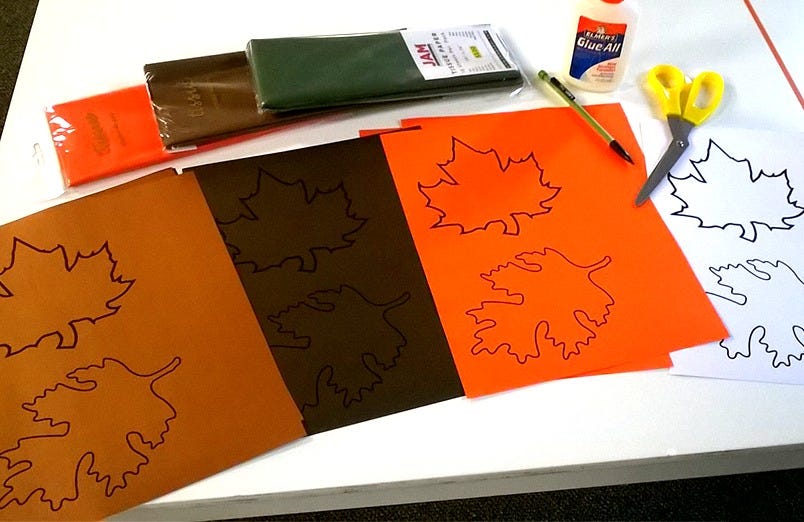
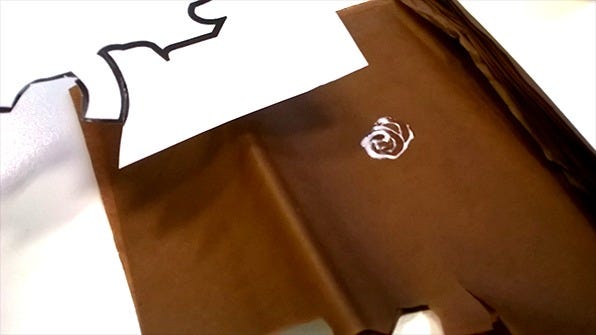
Cut out leaves from your Gold and Bronze Foil Paper with scissors. You may do this by placing the leave templates onto the foil paper and cutting around them, or by printing the templates directly onto the foil paper and cutting them out. Here, the second option was used.

Step 2

Take a stack of 7-10 sheets of tissue paper. Place leaf templates on a section of the paper and cut around them with scissors. Do this for every kind of leaf template and every color of tissue paper you are using.

Step 3

Glue the template to the top layer of tissue paper in the stack. This will prevent the template from sliding as you cut of the leaves.

Step 4

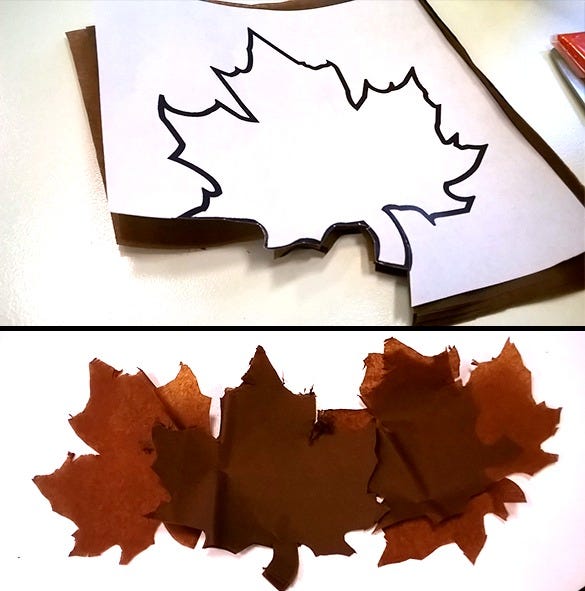
Carefully cut around each template, so that a leaf of the desired shape is cut from each of the sheets of tissue paper below. (The very first piece below the template is often too glued to use for the project. That’s okay, you have the rest and that first one’s sacrifice was not in vain if the rest turned out the way you wanted ).

Step 5

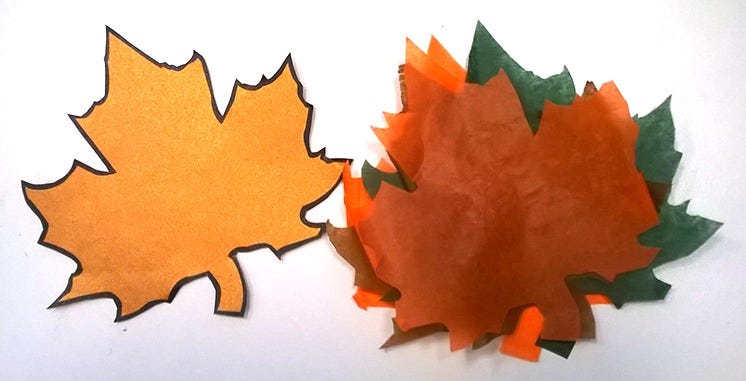
Using a Foil Paper Leaf as the base, stack a pile of your paper leaves on top of each other in any desired order. Each stack should include 1 foil leaf and about 5-6 tissue paper leaves.

Step 6

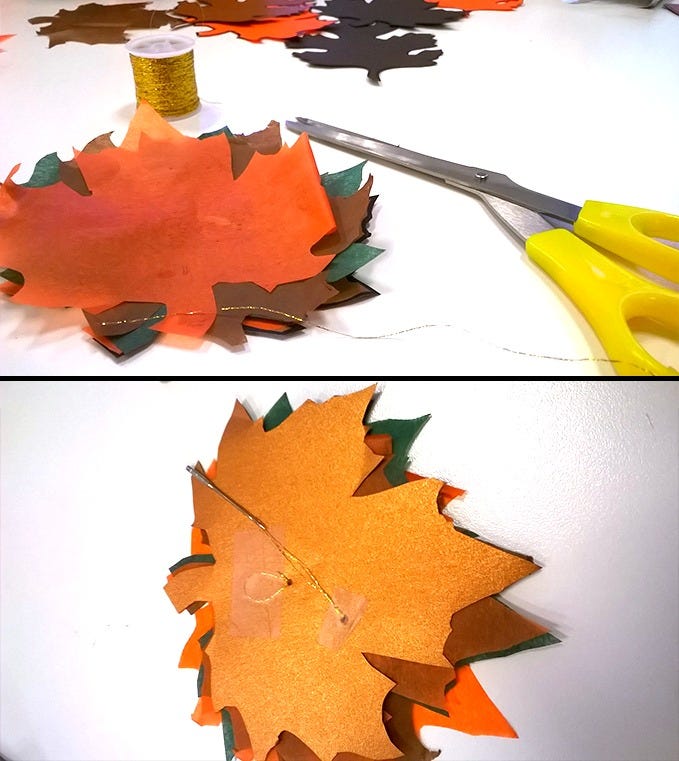
Thread the needle with your thick thread. Make a large stitch in your leaf pile to hold them together. Because paper does not behave the same way with thread and needles that fabric does, it can be helpful to fasten the thread in the back with tape instead of tying it off. Because the appearance of the tape should be subtle, use the smallest pieces you can.

Step 7

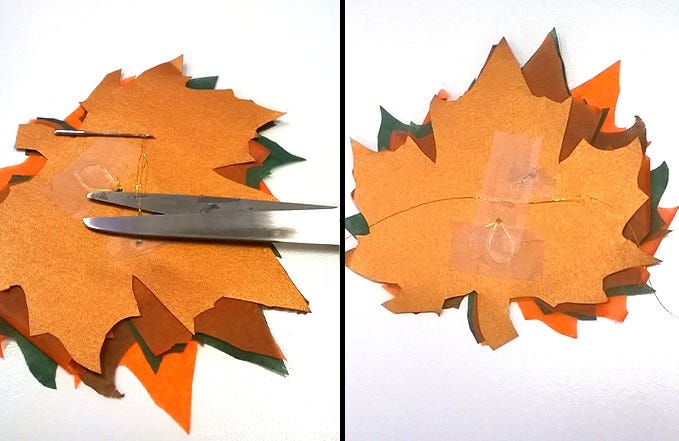
Cut a 7-9 inch length of thread and tape it to the middle back of your leaf pile with another small piece of tape.

Step 8

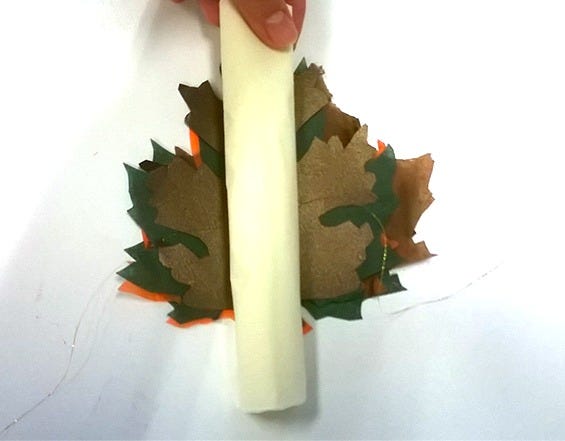
Enter neatly rolled napkin! (with or without silverware enclosed). Lie the napkin down on the holder so that the thread is near the middle.

Step 9

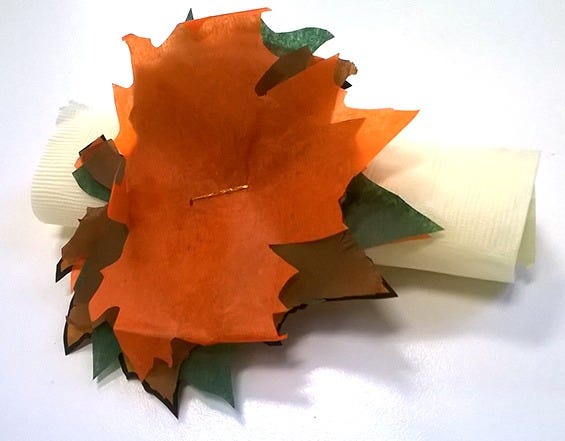
Tie the thread around the napkin with a bow. You’re done! Place ensemble on its side, with all leaves showing.

Your fall table is now ready! Go ahead and invite your guests for that pre-trick-or-treating meal or for turkey and mashed potatoes. When your friends ask where the decorations came from, claim the bragging rights you earned by making them yourself. When they ask you how you did it, show them this ! Enjoy fall for the short time it lasts, and enjoy your fall gatherings even more with these easy, DIY fall table decorations.

Share:


DIY Fall Table Decorations

Fall is a time of year when many people enjoy decorating their homes with seasonal touches. DIY fall table decorations are a fun and creative way to add a festive touch to your home. In this article, we will explore various ideas for DIY fall table decorations that are easy to make and budget-friendly.

Key Summary:

  • This article will provide readers with easy and creative ideas for DIY fall table decorations, perfect for the autumn season.
  • Readers will learn how to create beautiful and budget-friendly table decorations to enhance their fall decor.

Materials Needed

When creating DIY fall table decorations, it's important to gather the necessary materials beforehand. Some common materials include pumpkins, leaves, candles, mason jars, burlap, and twine. By having all the materials ready, you can start creating beautiful fall table decorations without any interruptions.

Creative Ideas

There are endless creative ideas for fall table decorations that can add a touch of autumn to your home. Consider creating a centerpiece using a combination of pumpkins, gourds, and fall foliage. For place settings, you can use mini pumpkins as place card holders or tie napkins with twine and a sprig of fall leaves. Table runners made of burlap or plaid fabric can also add a rustic touch to your fall table decor.

Centerpiece Ideas

One creative centerpiece idea is to hollow out a pumpkin and place a small vase inside filled with fall flowers. Another idea is to create a candle centerpiece using different sized candles in fall colors like orange, red, and brown.

Step-by-Step Instructions

Creating DIY fall table decorations is easy when you follow step-by-step instructions. Start by choosing a theme or color scheme for your fall decor. Then, gather the materials needed and set up a crafting area. Follow detailed instructions on how to create each decoration, whether it's a centerpiece, place setting, or table runner.

Table Runner Instructions

To create a burlap table runner, start by measuring the length of your table and cutting a piece of burlap to size. Use fabric paint or stencils to add fall-themed designs like leaves or pumpkins. Let the paint dry completely before placing the table runner on your table.

Who Can Benefit from These Ideas

DIY fall table decorations are perfect for:

  • Homeowners looking to add a festive touch to their homes
  • People on a budget who want to create beautiful decor
  • Crafters and DIY enthusiasts who enjoy creating seasonal decorations
  • Hosts looking to impress guests at fall gatherings
  • Anyone who wants to add a touch of autumn to their home decor

When to Incorporate DIY Fall Table Decorations

You can use DIY fall table decorations:

  1. During the autumn season to celebrate fall
  2. For Thanksgiving dinner to create a festive atmosphere
  3. At fall parties and gatherings to impress guests
  4. As everyday home decor to add a touch of warmth and coziness
  5. When hosting a dinner party or special event to set the mood

Examples of DIY Fall Table Decorations in Use

Here are some use case examples for DIY fall table decorations:

Thanksgiving Dinner

  • Create a beautiful centerpiece using pumpkins, candles, and fall foliage
  • Use mini pumpkins as place card holders for a festive touch
  • Add a burlap table runner with fall-themed stencils for a rustic look

Fall Parties

  • Set up a hot cocoa bar with fall-themed mugs and toppings
  • Decorate the table with mini gourds and twinkle lights for a cozy ambiance
  • Use fall-colored napkins and plates to tie the theme together

Everyday Home Decor

  • Place a simple candle centerpiece on your dining table for a touch of elegance
  • Add a burlap table runner with a few pumpkins and pinecones for a subtle fall look
  • Use fall-scented candles to create a warm and inviting atmosphere in your home

What Sets Our Product Apart

Our DIY fall table decorations stand out from the rest due to their simplicity, affordability, and versatility. Each idea is designed to be easy to create, using materials that are readily available and budget-friendly. Additionally, our creative ideas can be customized to suit any style or theme, making them perfect for any home decor.

List of Potential Uses

There are numerous ways to incorporate our DIY fall table decorations into your home decor:

  • Enhance your Thanksgiving dinner table with a beautiful centerpiece
  • Add a festive touch to fall parties and gatherings with creative place settings
  • Create a cozy atmosphere in your home with everyday fall decor
  • Illumine your dinner party or special event with elegant table decorations
  • Surprise your guests with a touch of autumn warmth and coziness

Maximizing Your Experience with Our Product

To get the most out of your adventure with our DIY fall table decorations, consider the following tips:

Personalize Your Creations

Put your own spin on each decoration by adding personal touches or incorporating unique elements that reflect your style.

Experiment with Different Materials

Don't be afraid to try new materials or combinations to create one-of-a-kind fall table decorations that stand out.

Share Your Creations

Share your DIY fall table decorations on social media or with friends and family to inspire others and showcase your creativity.

Rotate Decorations Seasonally

Switch up your fall table decorations periodically to keep your home decor fresh and exciting throughout the autumn season.

Get Creative with Placement

Think outside the box when placing your fall table decorations, such as using them in unexpected areas of your home for a unique touch.

Bringing Fall to Your Table

By following the creative ideas and step-by-step instructions in this article, readers can easily create beautiful and budget-friendly DIY fall table decorations to enhance their autumn decor. With a touch of creativity and a few simple materials, anyone can bring the warmth and coziness of fall to their table.

Copyrights © 2025, Jam Paper & Envelope. All rights reserved.