Make DIY Drink Coasters from Wrapping Paper Scraps
- By Andrew Jacobs
- Aug 4, 2017
Make DIY Drink Coasters from Wrapping Paper Scraps
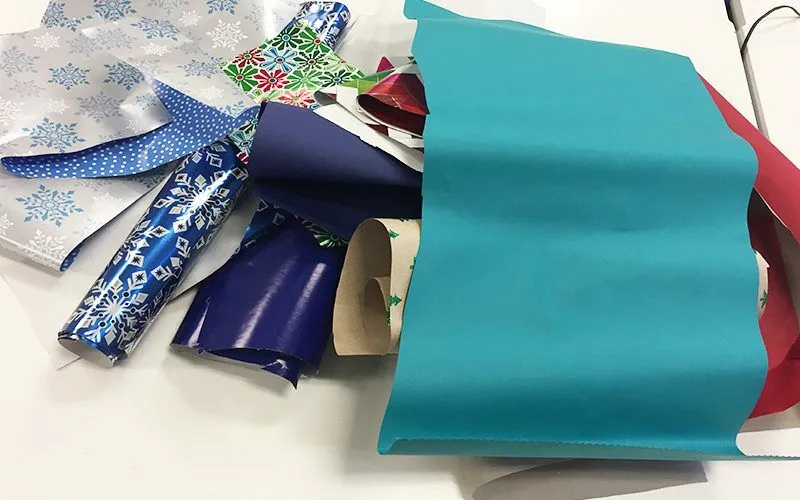
Times of gift giving are always cause for excitement, joy, and appreciation. However, if you are like many of us, after the festivities are over, you will find yourself asking what to do with the leftover wrapping paper. It seems wasteful to throw out your beautiful gift wrap. What if you could turn your used or leftover wrapping paper into a household item that you would use year round? Good news- you can! These fun and easy to make, and fully functional DIY drink coasters can be made from the leftover wrapping paper from any occasion! This craft takes some time, but when you are done, you will love the results.
Here's what you'll need: Pieces of wrapping paper large enough to be cut into 2 inch strips
- A ruler
- Scissors
- Hot glue gun (with hot glue, of course)
- Heavy card stock
- Mod Podge water based sealant
- Foam brush
- Pencil
After you've assembled your supplies, find a large flat work surface where you will feel comfortable cutting, folding, and gluing your wrapping paper.
Step 1
Begin by cutting a strip of any color wrapping paper that is 2 inches in width. Make the edged and straight and uniform as possible.

Step 2
Place this strip of paper horizontally in front of you and fold the bottom edge upward so that it reaches about halfway to the top edge.
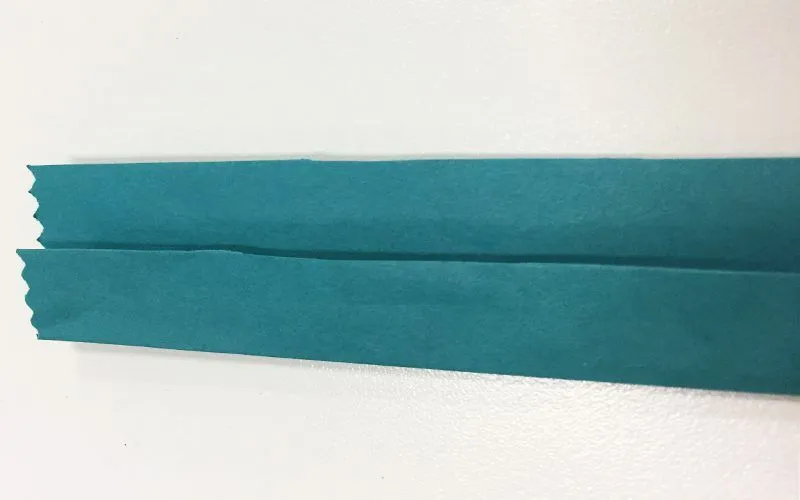
Then, fold the top edge down so that it slightly overlaps the first fold. The strip should look like this.
Step 3
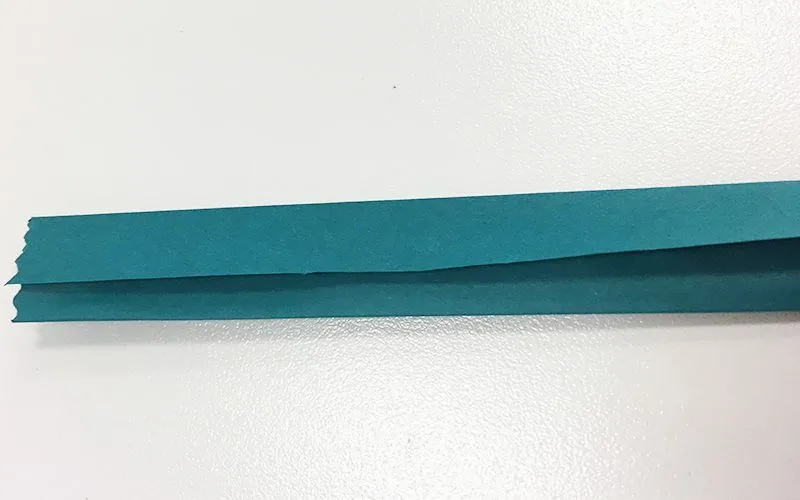
Fold the entire strip in half long ways. (You have now made a total of three fold in the strip). Press down to that all creases are secured. It should look like this.
Step 4
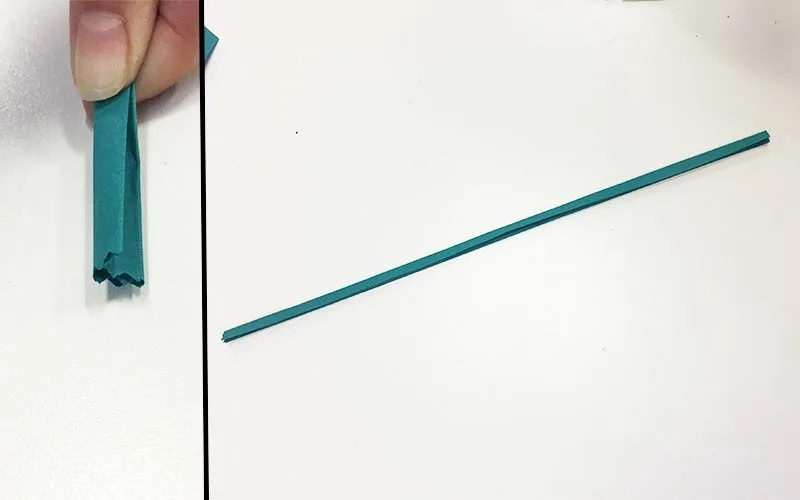
Now, from the strip you just folded, you will roll the center of your coaster! Bend the end of the strip inward and roll the rest of the strip as tightly as you can. It can be helpful, when starting this first spiral, to lay the strip of paper flat on the table and roll upward. You will also want to make sure your hot glue gun is plugged in and ready to go for the next step.
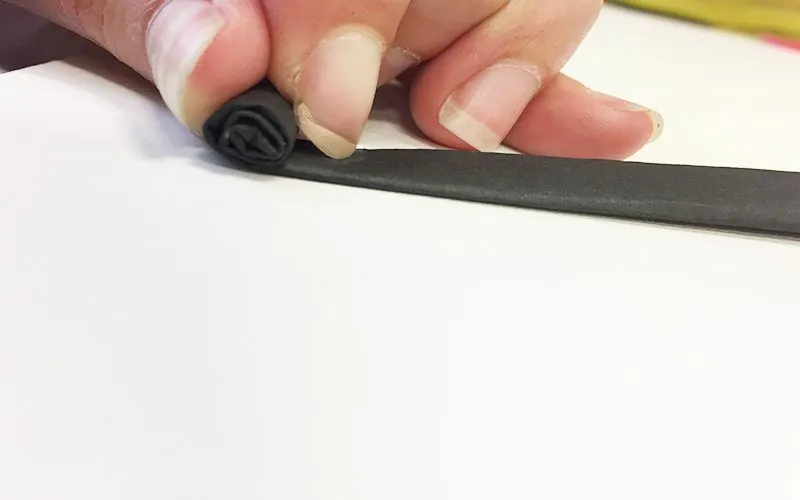
Step 5
To secure this first spiral, add a dot of hot glue to the roll to the spot where the loose end will meet the outside. After making sure your spiral has been wound as tightly as possible, press down the loose end into the hot glue dot. Hold for 10 second before releasing.
Step 6
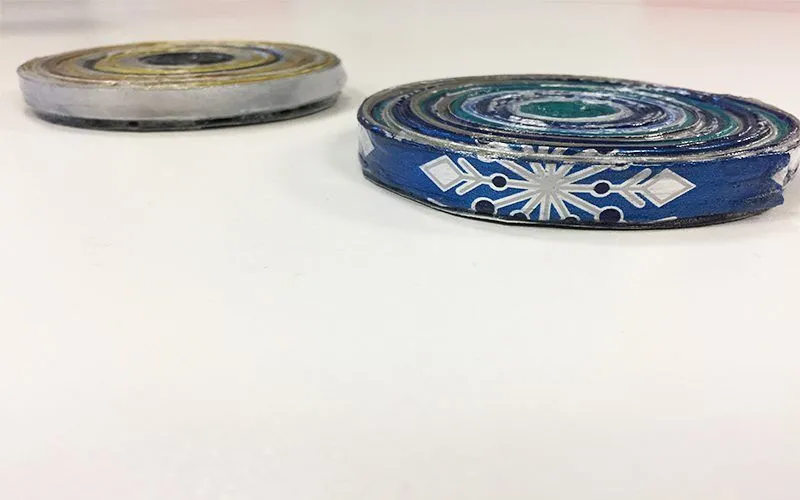
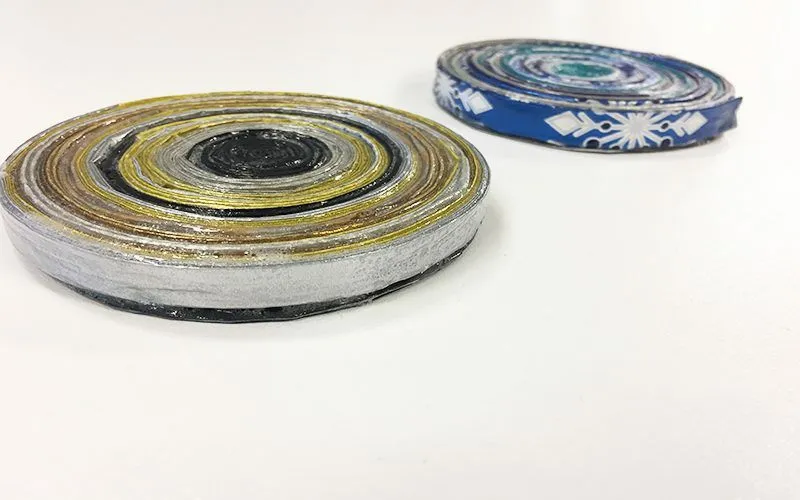
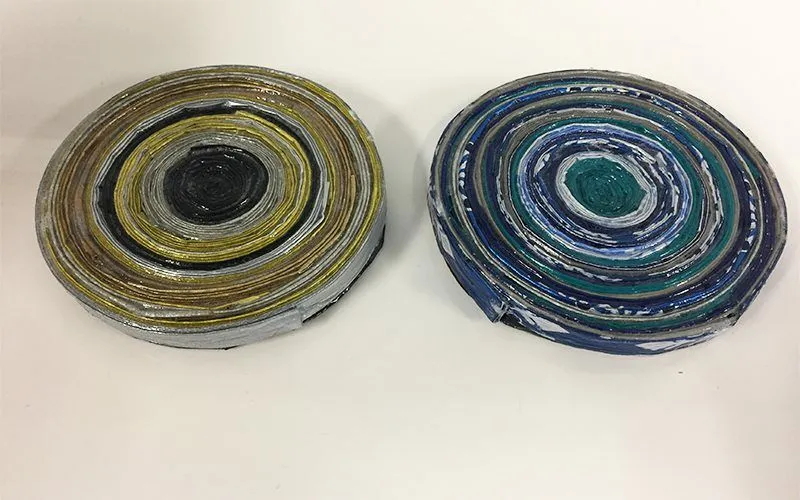
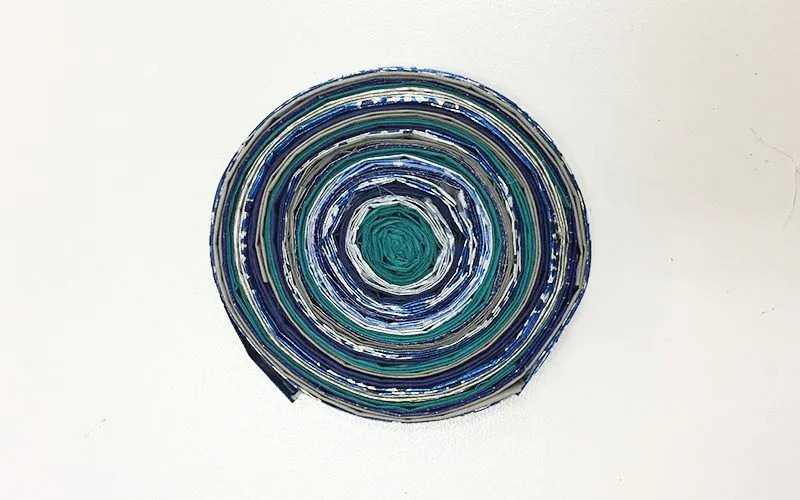
Create your next 2 inch strip of paper and repeat steps 1-3. Then, add some hot glue to your first spiral where the last strip ends. Hold down the end of the new strip into the glue for 10 seconds and then wind it tightly around the first spiral. Glue it at the end as your did in step 5. Repeat this step until your have wound a circle of gift wrap that is about 3.5 inches in diameter.
Step 7
After allowing the last bit of hot glue on your coaster to dry, you are ready to apply the first coat of Mod Podge! Take a clean foam brush and and use it to apply a smooth, even layer of Mod Podge to the upward facing surface of your coaster. Allow 30-45 minutes to dry, and then flip it over and repeat on the other side. After letting this dry, you will also want to apply Mod Podge to the outer edges of your coaster. Because you will be placing containers of liquid on your coaster, you will want to use an ample amount of sealant. For my coasters, I used 5 layers of Mod Podge. Follow directions on the jar and be sure to allow enough drying time between layers.

Step 8
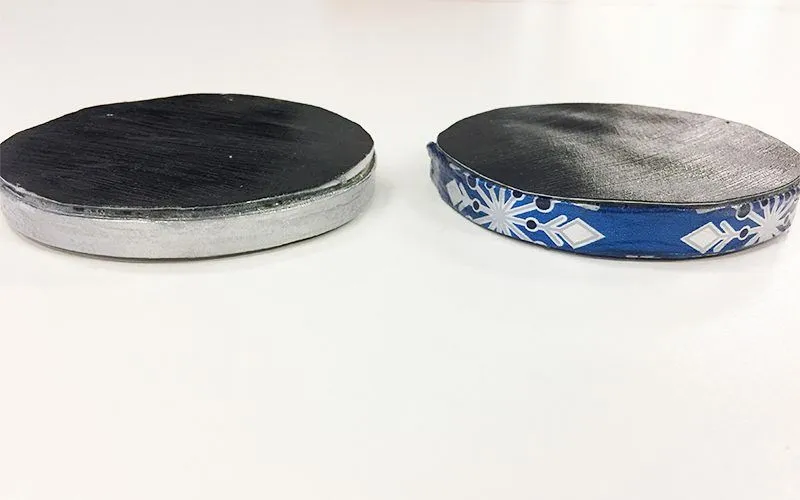
Now it's time to create the bottoms of your coasters. For this purpose you will want thick, 130 lb card stock or multiple layers of lighter card stock. For my coaster bottoms, I used three layers of 50-80 lb card stock glued together. Place your coaster on top of your card stock and trace the coaster's shape using a pencil. Cut out this shape.

Using hot glue, secure this card stock circle to the designated bottom surface of your coaster. If any edges of the card stock are visibly protruding when the coaster is viewed from above, use your scissors to trim them off. After the hot glue has dried, cover the bottom in a layer of Modge Podge while also using this sealant to fill in any gaps that may appear between the wrapping paper and the card stock.
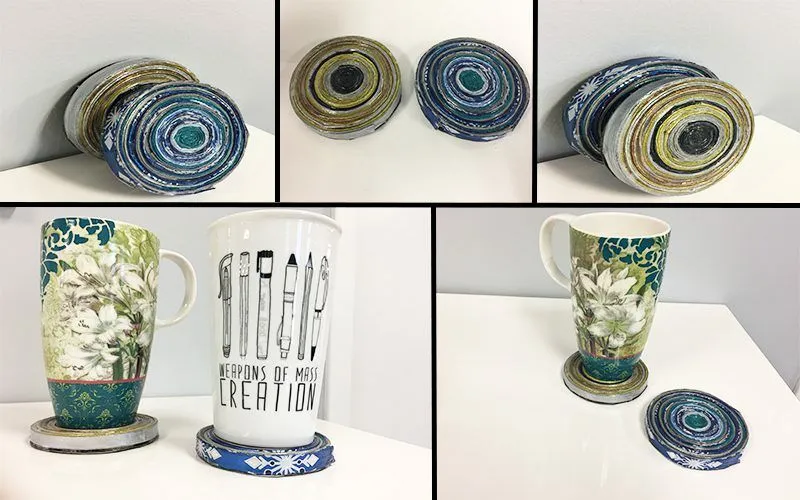
After this last layer of Mod Podge is dry, your coaster is complete! Use it on your desk in your office or for your coffee table at home. Make a couple of coasters, or make a full set! You can even take re-gifting to a new level by giving away these homemade coasters as gift to the people you gave you the gifts the wrapping paper was given to you on in the first place! This is a craft that allows you to both recycle and to create useful, furniture-protecting decor that is unique to you!