DIY St. Patrick's Day
- By Andrew Jacobs
- Mar 17, 2017
Rainbows and pots of gold! Lucky four leaf clovers and horseshoes! St. Patrick’s Day is fun for everyone from all walks of life! Young or old, Irish or not, you know that on St. Patrick’s Day you will have a blast. In my town we have annual St. Patrick’s Day parades and the “cool thing” was to go and if you were lucky enough (pun definitely intended), you were chosen to walk in the parade too!! So didn’t only get candy but also recognition!! That was back in the day – not too sure what goes on now – but we grow up. Now the “fun place” is none other than theeee….bar – or any type of nightlife, depending on what your scene is! But if you’re a homebody, like me, you’ll have a little celebration at your home with the people you love the most! DIY St. Patrick’s Day your way with hanging shamrocks for decorations and of course we had to have selfie props!!
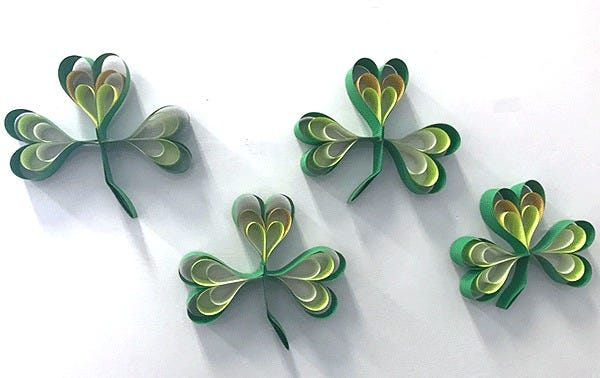
Feelin’ Lucky with Paper Strip Shamrocks
Supplies
Bright Green Paper
Stapler
Scissors
Hot Glue Gun
Thread
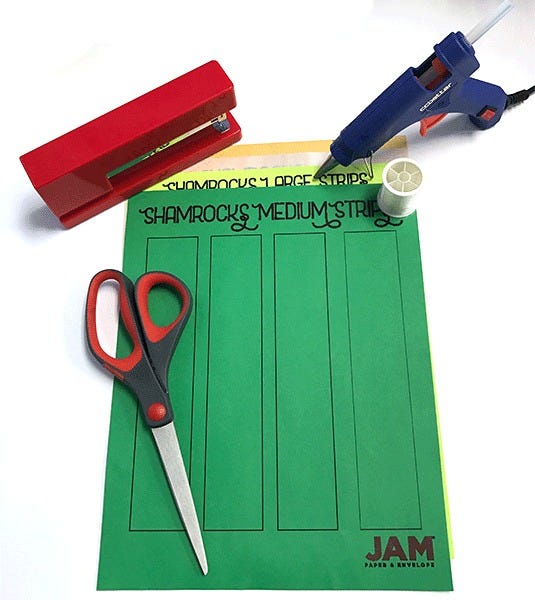
Step 1:
Pick out some brightly colored St. Paddy’s Day colored paper. I used Green Brite Hue, Ultra Lime Brite Hue, Gold Stardream Metallic, and Platinum Translucent Vellum. Make sure you don’t use cardstock for this one – it’s not as flexible and harder to staple. Download the small, medium, and large paper strip templates then cut!
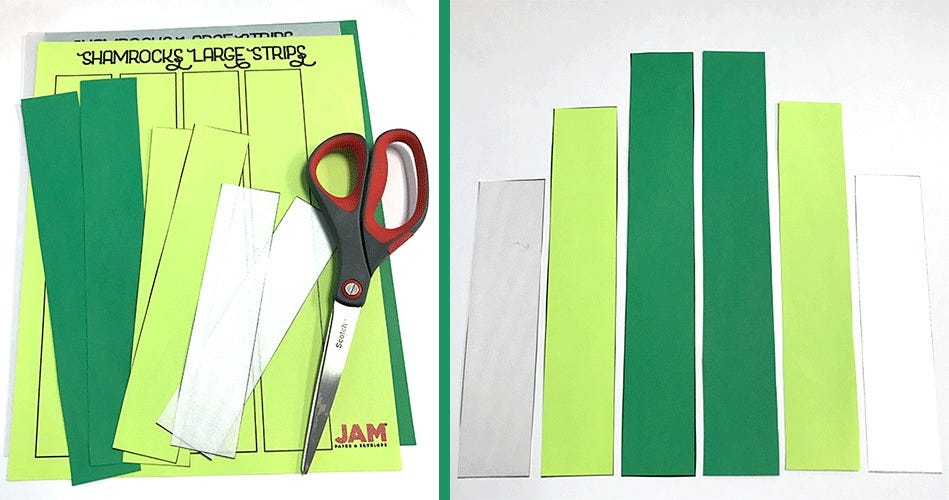
Step 2:
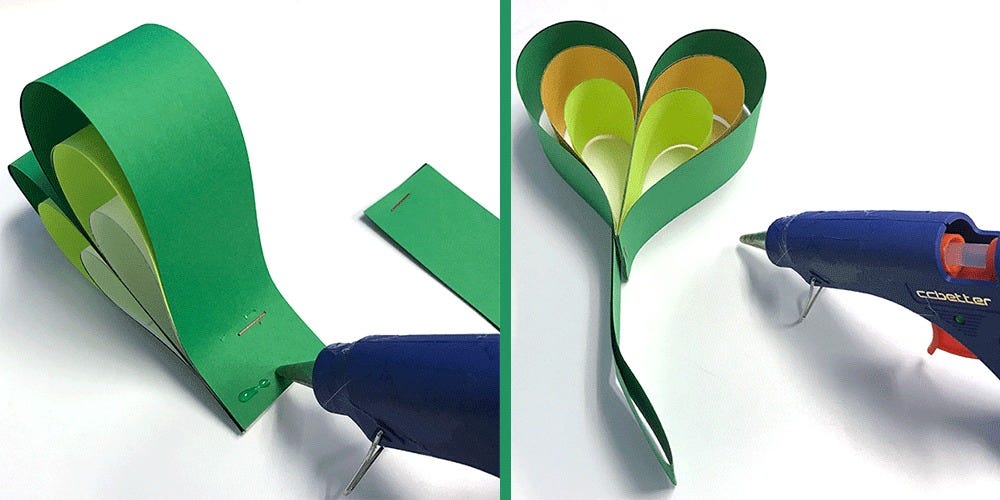
Now you’ll want to stack your paper strips in this order: small, medium, large, large, medium, small. You can also reference the picture above. Once you’re strips are stacked, you can staple at the bottom!

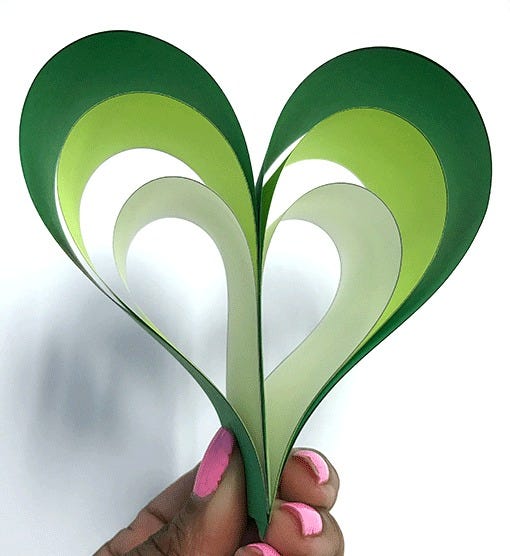
Step 3:
Holding the strips by the stapled part, one by one gently fold over the strips so it connects at the staple. Three going to the left and three going to the right – it should look like a heart – then staple again at the bottom. Don’t worry if one staple doesn’t do it! Sometimes I could staple them all together and other I needed to staple one side at a time.
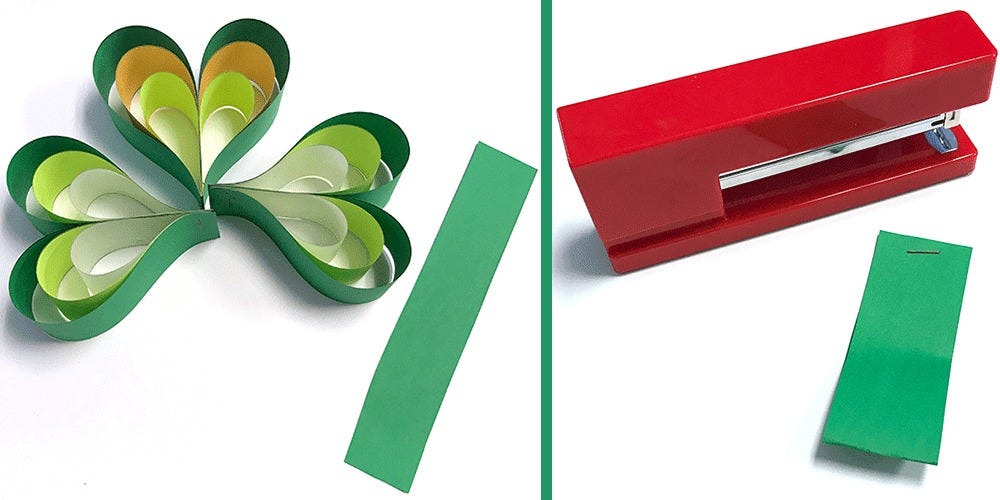
Step 4:
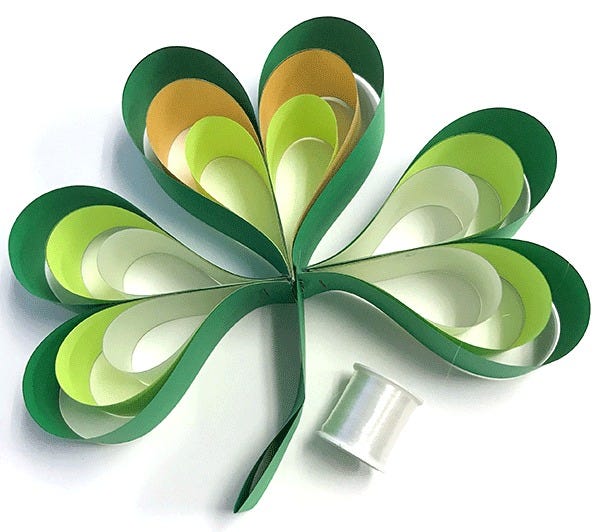
You’ll need three “hearts” to make one shamrock so repeat steps 1-3 until you have the amount you want! Take a large strip or just rectangle scrap that you may have t make the stem. Fold it in half and staple.
Hint: make a gentle fold in the stem to make the shamrock more realistic!
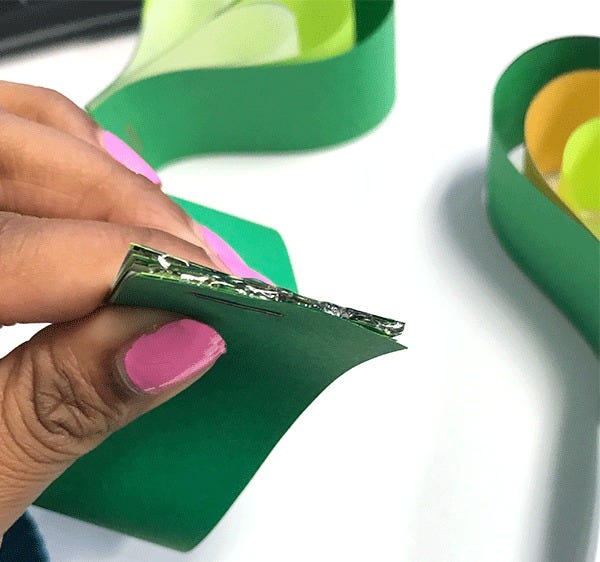
Step 5:
Almost done! This step is easy – just putting the shamrock together. With your hot glue gun, place glue on the side of one of the hearts then place the stem on top.
With the other two hearts , put hot glue on the end (bottom) of the heart and place it directly on either side of the stems and hold tightly for at least ten seconds. Then let dry- don’t worry this won’t take too long.
Step 6:
Now that you have your shamrock you can do anything with it! You can tape it directly to a wall or simply scatter them on the table! To hang it, use your thread and just string it through the two loops on the top of the shamrock so it stays even. Then you can hang it anywhere!
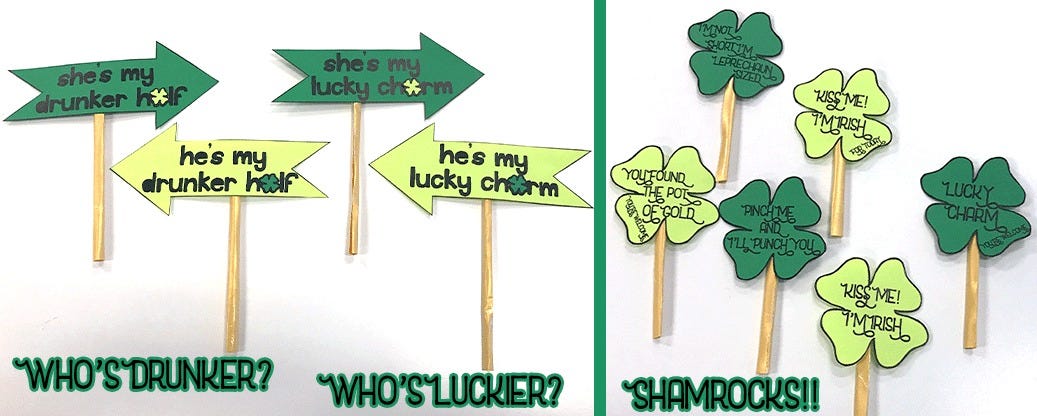
Pots of Props!
Supplies
Paddy’s Day Colored Paper or Cardstock
Tape
Scissors
Rainbow color ribbon (3/8 inch)

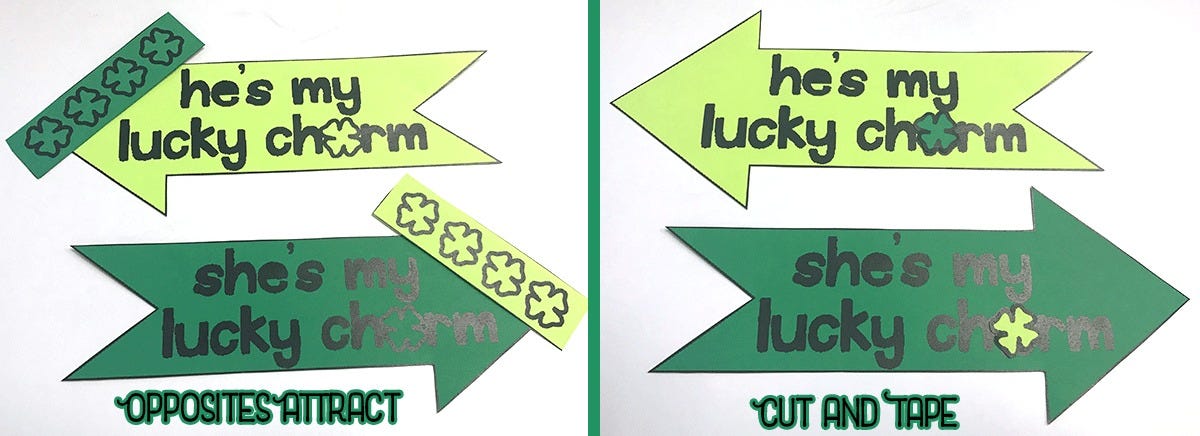
Step 1:
Download the prop templates and print them on your choice of paper or cardstock and cut! For the arrows I made a few extra shamrocks so you can glue or tape shamrocks to your partner’s arrow.
Step 2:
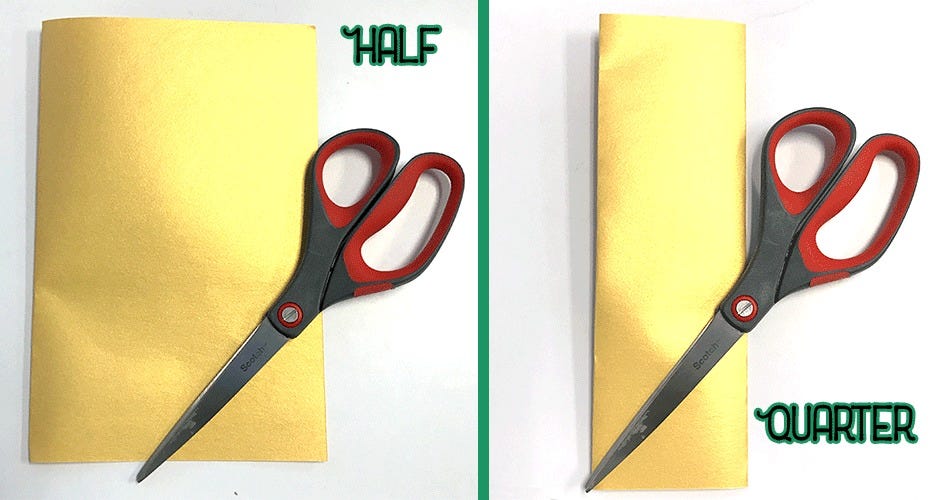
So for the prop sticks you have two choices! You can refer to the Valentine’s Day Props blog for the straw and ribbon method - wrapping ribbon around the straw and tape! This would actually look really cool and creative, especially with the rainbow color ribbon. Or you can roll paper into a prop stick. Take a piece of paper; I went with Gold Stardream Metallic, fold it in half or in quarters.
Step 3:
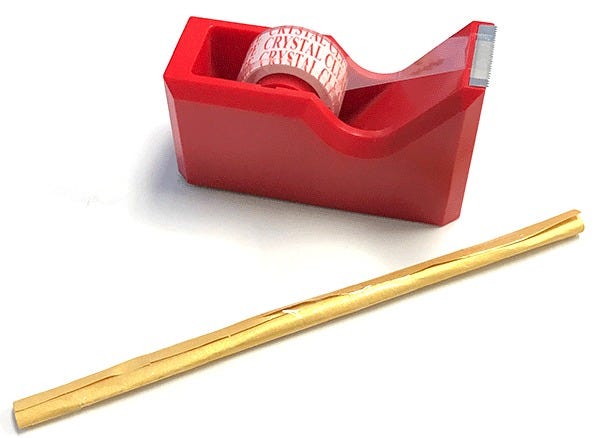
Now roll your paper and then tape! Super easy! To make it a little easier you can make a small fold and then roll. Then you just tape to the back of your props.
Step 4:
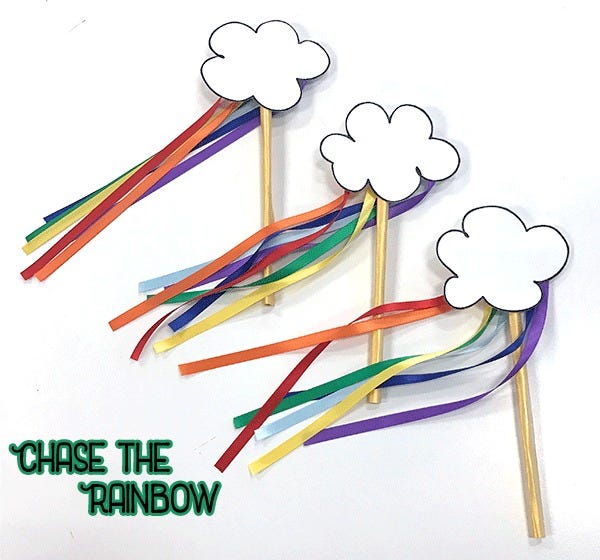
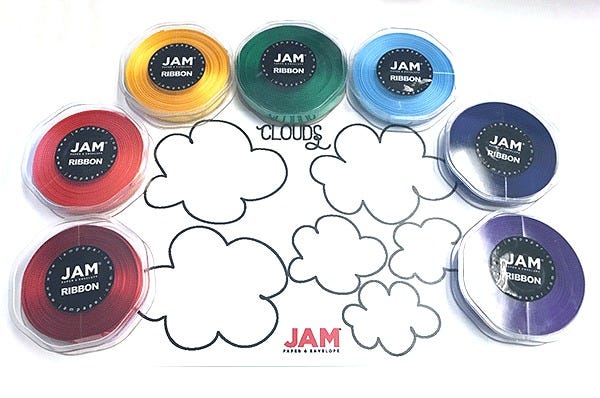
The cloud rainbow prop needs a few more steps – still quick and easy I promise!! Take your rainbow ribbon and don’t forget your ROYGBIV!! Cut out the clouds you want to use and then get your ribbon. I used red, orange, yellow, emerald green, baby blue, royal blue, and purple satin ribbon but sheer would work too. Then cut them to your desired length.
Step 5:
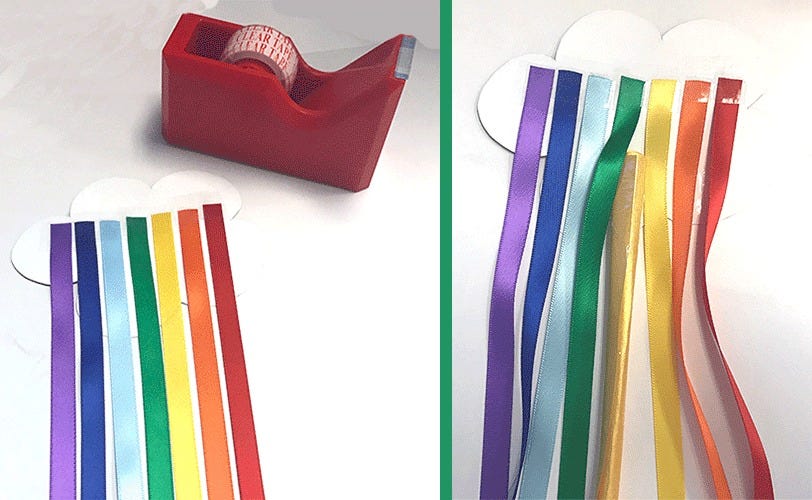
Last step! Line of the ribbon and tape to the back of the cut out clouds – I taped mine two by two. After that you can tape the prop stick to the back which I put between the yellow and green ribbon.
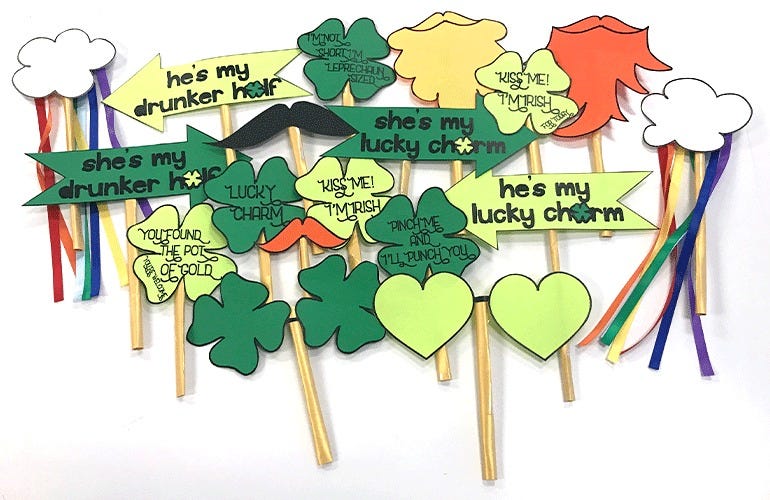
You’re all set!! DIY St. Patrick’s Day not only the JAM way but your way! You will be the luckiest one in the room with these DIY St. Patrick’s Day hanging shamrocks and props – who needs a pot of gold when you can craft?! Don’t forget to wear green today, pinching sucks! Share how you DIY St. Patrick’s Day on Instagram, Twitter, and Facebook. However you decide to celebrate St. Paddy’s day have fun and most importantly be safe! Happy St. Patrick’s Day!!