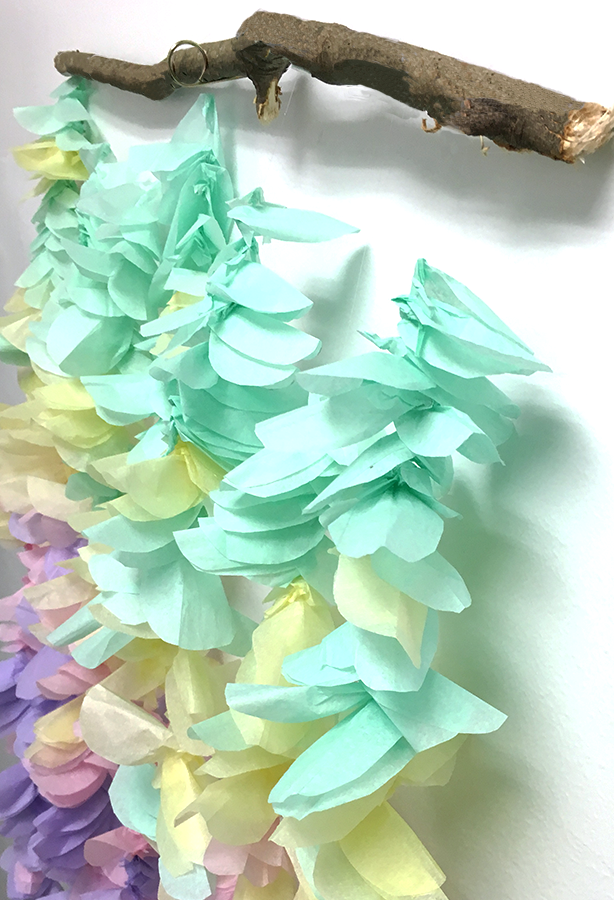
DIY Tissue Paper Flower Garland
- By Andrew Jacobs
- Aug 30, 2016
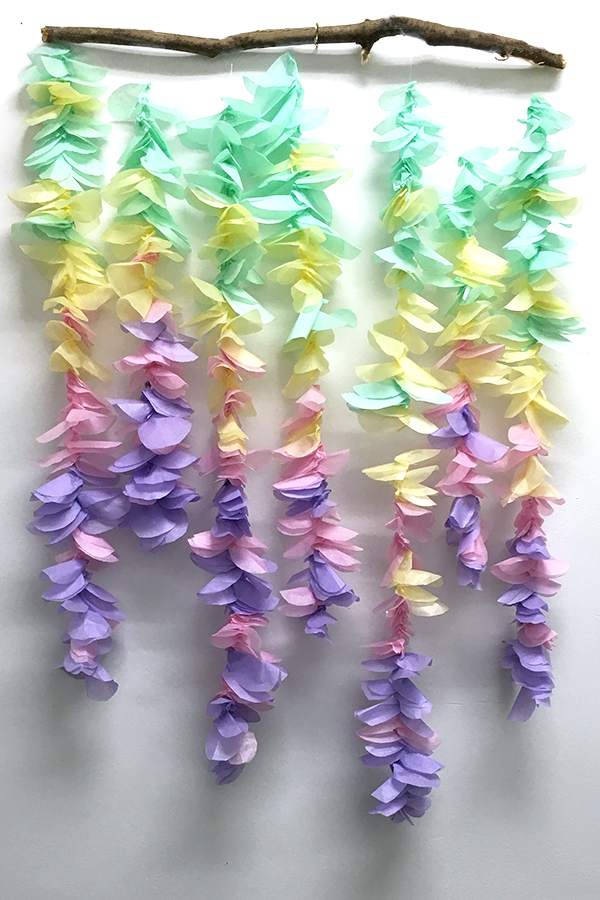
So, you’ve been scouring Etsy for some new wall art and you totally love all of that paper garland out there. From flowers to geometric shapes, it seems like paper garland is a new up-and-coming decoration that’s not just for parties anymore. But…it can get a little pricey. Well, if you want to save some money and get a little crafty, look no further than this tissue paper flower garland!
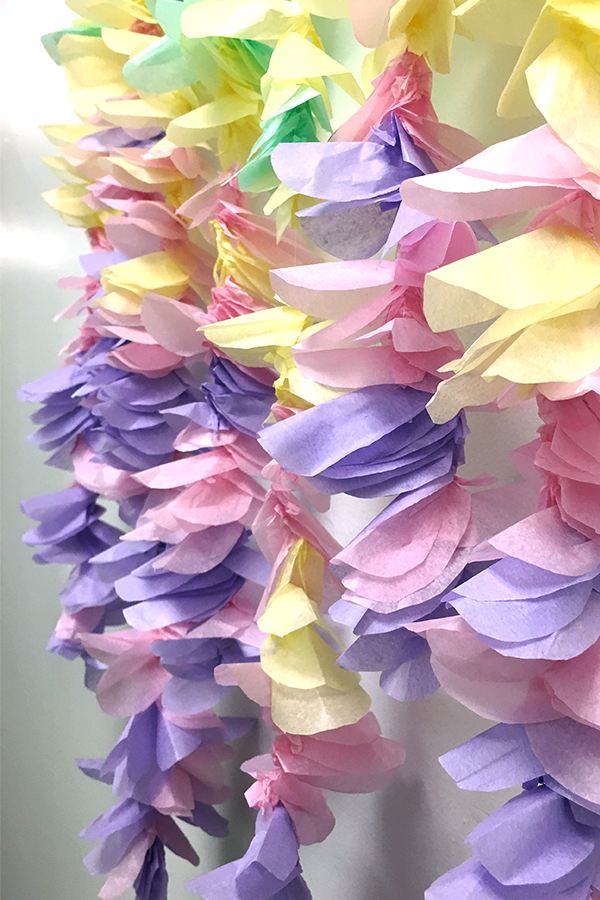
This tissue paper flower garland is gorgeous and eye catching and can be perfect to decorate wall space in your bedroom, centerpieces at a party, or if you get creative, you can hang it from the ceiling somewhere. The possibilities are really endless! But, depending on how big you want to make this, it does take a good amount of time, so make sure you’re ready to tackle it!
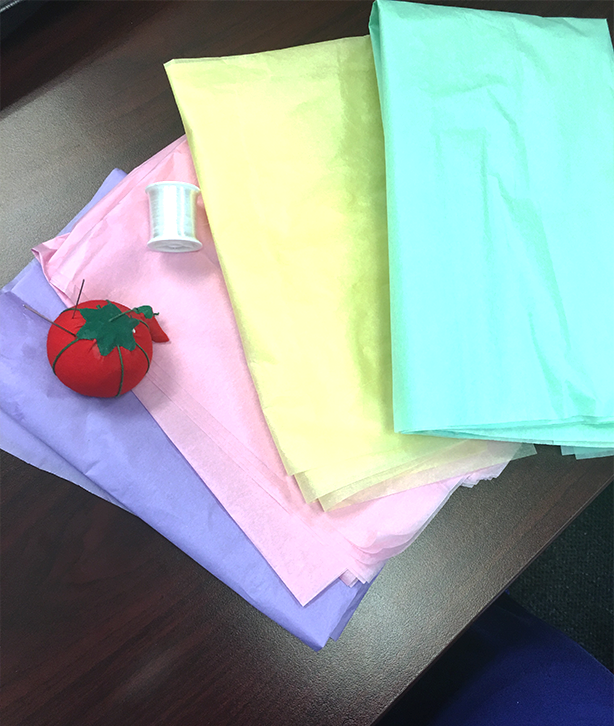
All this project takes is some of JAM’s beautiful tissue paper, some clear string and a needle and something to hang the strands from. We ended up attaching each strand to a branch, for a natural look, but feel free to tie them to whatever you wish!
Supplies:
Tissue paper in various colors
Needle
Clear string
Scissors
Pencil
 Step 1
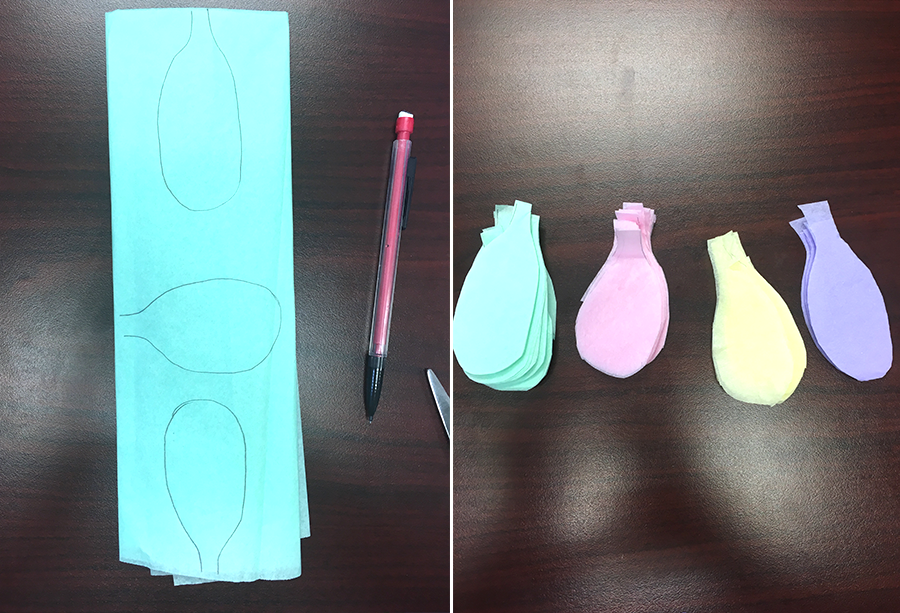
Time to make petals. How many you ask? A lot. I had to have made a few hundred. Told you this might take awhile! The good news is though, these are super simple to make. First, fold your tissue paper into a rectangle. I would do two sheets at a time to get the most petals I could out of each batch.
Step 2
Draw a balloon shape onto the paper. I was able to fit three shapes onto each rectangle. Cut these out to create multiple petals. Repeat with your other colors.
Step 3
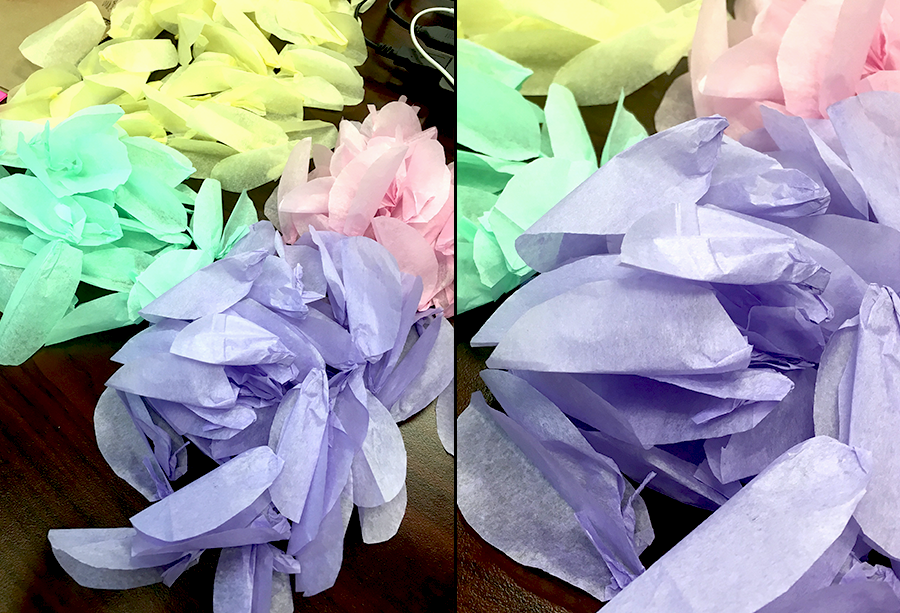
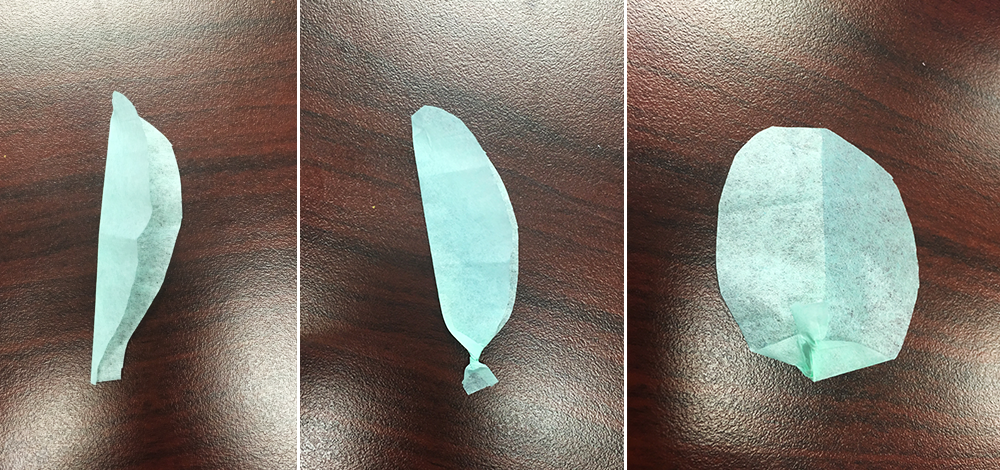
Next, take a petal and fold it in half. Twist the narrow part of the petal and then fold it up into the petal. Now repeat a few hundred more times!
Step 4
Whew! Done with your petals? Good. Time to get stringing. Thread your needle and tie a knot at the bottom of your string. I made a bunch of different lengths, alternating shorter and longer pieces on the branch. You can do this however you want.
After you thread your needle, start stringing petals on by piercing the bottom middle of the petal. Repeat with all of your petals in any design you please. I tried to do an “ombre” style by gradually fading from purple to green, but feel free to make it your own!
Step 5
When all of your strings are done, it’s time to attach them to whatever you’ve decided to use. Like I said, I decided on a branch but you could hang them from a metal rod, the ceiling, a plank of wood…anything you can think of!
Now hang that bad boy up somewhere because you definitely worked hard on it! If you made as many petals as I did, I know that you worked for awhile on it! Take a stab at this tissue paper flower garland and post it to social media! We would LOVE to see how others turn out!
Creating Your Own DIY Tissue Paper Flower Garland
DIY tissue paper flower garlands are a beautiful and cost-effective way to add a pop of color and charm to any event or space. Whether you're decorating for a party, wedding, or simply want to add a touch of whimsy to your home, making your own flower garland is a fun and rewarding project. By using vibrant and colorful tissue paper, you can create a stunning garland that will brighten up any room or outdoor space. Not only is this a great way to express your creativity, but it also allows you to customize the garland to match your specific color scheme or theme. With just a few simple materials and some creativity, you can create a stunning decoration that will impress your guests and add a personal touch to any occasion.
The Benefits of DIY Tissue Paper Flower Garlands
One of the main benefits of creating your own tissue paper flower garland is the cost savings. Purchasing pre-made garlands can be expensive, but by making your own, you can achieve the same beautiful look for a fraction of the cost. Additionally, DIY garlands allow for complete customization, so you can create a unique decoration that perfectly suits your style and preferences. Another benefit is the satisfaction of creating something beautiful with your own hands, which can be a rewarding and fulfilling experience. Furthermore, making your own garland allows you to use high-quality materials and ensures that the final product is exactly as you envisioned.
Use Cases for DIY Tissue Paper Flower Garlands
DIY tissue paper flower garlands are versatile and can be used in a variety of settings and events. They are perfect for decorating parties, weddings, baby showers, and other special occasions. Additionally, they can be used to add a touch of color and charm to home decor, such as adorning mantels, doorways, or windows. These garlands are also a popular choice for outdoor events, such as garden parties or barbecues, as they add a festive and whimsical touch to the surroundings.
Alternatives to Tissue Paper Flower Garlands
While tissue paper flower garlands are a popular choice for DIY decorations, there are alternative options to consider. For example, you could create garlands using fabric, paper, or even artificial flowers. Each material offers a unique look and feel, so it's worth exploring different options to find the perfect fit for your event or space. Additionally, you could consider using pre-made garlands or other types of decorations to achieve a similar effect.
Tips for Using DIY Tissue Paper Flower Garlands
When creating and using DIY tissue paper flower garlands, there are a few tips to keep in mind. Firstly, consider the color scheme and theme of the event or space where the garland will be displayed, and choose tissue paper colors that complement the surroundings. Additionally, experiment with different flower shapes and sizes to create a visually appealing and dynamic garland. Finally, consider the length and placement of the garland to ensure it enhances the overall decor without overwhelming the space.
Adding a Personal Touch to Your DIY Tissue Paper Flower Garland
One of the best things about creating your own DIY tissue paper flower garland is the opportunity to add a personal touch. Consider incorporating unique elements, such as glitter, beads, or ribbons, to make your garland stand out. You could also experiment with different techniques, such as layering or folding the tissue paper, to create a one-of-a-kind look. By infusing your creativity and personality into the project, you can create a stunning decoration that reflects your individual style and flair.


