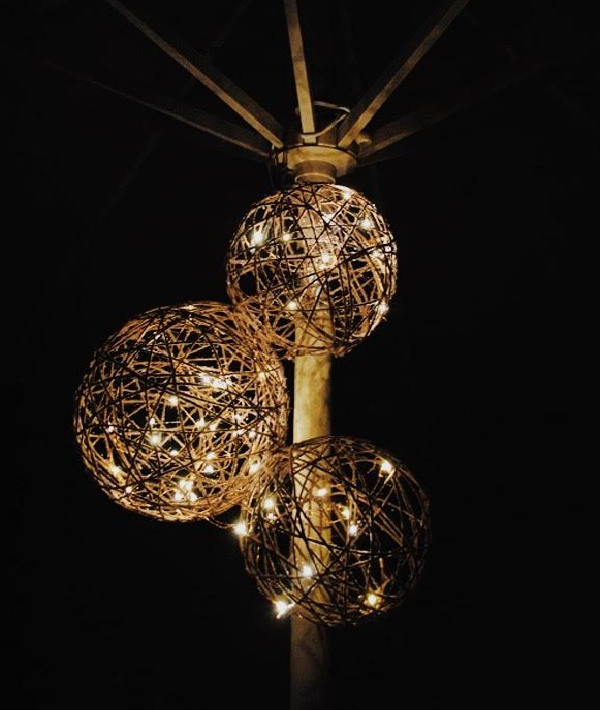
DIY Twine Lantern

A cutesy and crafty DIY twine lantern perfect for both indoor and outdoor settings. Requires some hands-on messy work, but overall a straightforward, inexpensive and fun project to do at home. Perfect for graduations, 4th of July, barbecues and more!
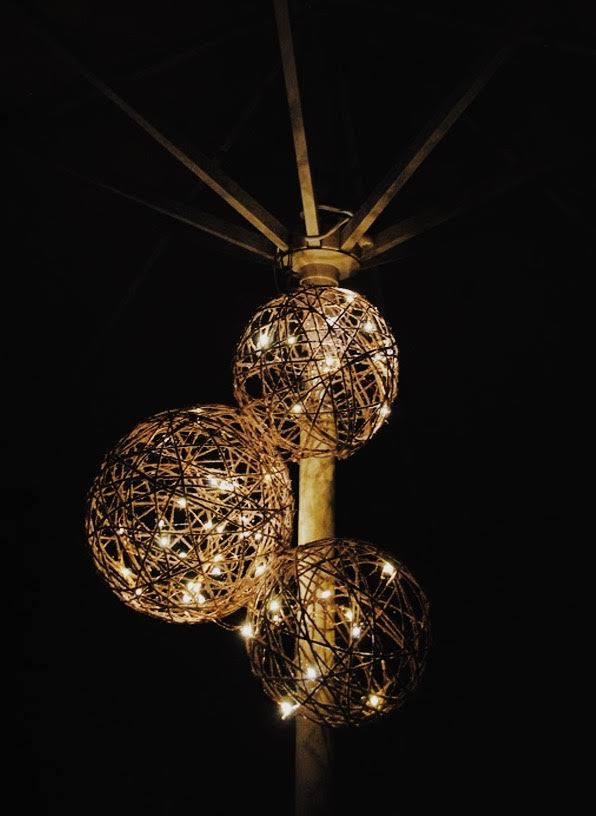
twine lanterns

Requirements:

  • 1 JAM Chocolate Brown Kraft Twine
  • 3-5 balloons (number varies on how many lanterns you would like)
  • Scissors
  • Drop cloth or newspaper
  • 4 ounces of Elmer's glue
  • 1/2 cup of cornstarch
  • 1/4 cup of warm water
  • Petroleum jelly
  • Clear, fast-drying spray paint
  • String lights

Now Let's Get Started..

 Lay a plastic drop cloth or some old newspaper down to keep your working area clean. It's gonna get a little sticky...

balloons on newspapers

 Blow up your balloons- the bigger your balloon is, the bigger your finished twine lantern will be! Try to stay away from fully inflating your balloon- the less air, the rounder your twine lantern will be.

After your Balloons are Inflated..

 Mix the (4 oz.) of Elmer's glue, (1/2 cup) of cornstarch and (1/4 cup) of warm water in a container until the mixture is smooth and free of lumps.

blue balloon Fully coat your balloons in Petroleum jelly- I would recommend doing this with some rubber gloves on to avoid sticky fingers. You want to have a thick coat of Petroleum jelly on these bad boys- this is going to keep your twine safe from sticking to the balloons when you pop them!

Than soak your twine in the sticky mixture, it's time to start laying the twine on the balloons!

red balloon, twine wrapped around it

Wrap your balloons vertically and than horizontally. Make sure to wrap the twine tightly to avoid any movement- leave some gaps at the top and bottom where you are going to push through your string lights.

Keep in mind that once your twine is wrapped around your balloons, they have to be hung overnight to dry. Pick a good place so the wrapped balloons can hang upside down, kind of like bats in a cave.8c6b987f2f11268032085a0d17c48376 balloons and twine hung to dry

Wrap some twine around the bottom tips of your balloons and hang them overnight to dry- I hung mine along my shower curtain's railing. Allow them to dry for 24 HOURS.

Once dried take your balloons twine fixtures down and take a thumbtack or something sharp to pop the balloon! BE GENTLE. Pull out the remains and here is your twine sculpture. Spray your sculpture with clear, fast-drying spray paint.

Feed your string lights through the round sculpture and viola! A lit up twine lantern perfect for any summer event... day OR night!
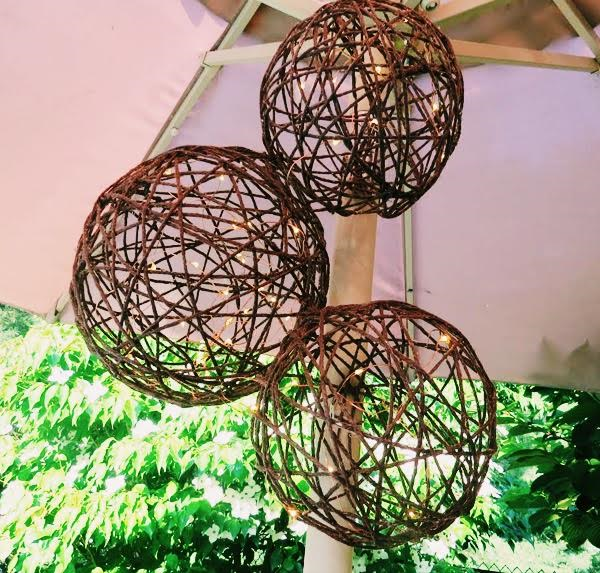
string lights through hardened twine completed DIY twine lanterns

Share:


DIY Twine Lanterns Tutorial

Twine lanterns are a popular DIY project that can add a unique and rustic touch to any space. By following this tutorial, you can create your own personalized lanterns using simple materials and techniques. Whether you're looking to decorate for a special event or just add some handmade charm to your home, twine lanterns are a fun and creative project to try out. Get ready to unleash your creativity and brighten up your space with these beautiful DIY twine lanterns!

Key Summary:

  • This article will provide a step-by-step tutorial for beginners on how to create stunning lanterns using twine.
  • Perfect for any occasion, these DIY twine lanterns are a great way to add a touch of creativity to your space.
  • Key findings will cover materials needed, step-by-step instructions, tips and tricks, real world use cases, and examples of the topic in action.

Materials Needed

Before you begin creating your twine lanterns, make sure you have the following materials on hand:

  • Twine: Choose a twine that is sturdy and will hold its shape well.
  • Balloon: This will serve as the mold for your lantern.
  • Glue: Use a strong adhesive that will dry clear.
  • Scissors: To cut the twine to the desired lengths.
  • LED light or candle: To illuminate your finished lantern.

Step-by-Step Instructions

  1. Inflate the balloon: Inflate the balloon to the desired size for your lantern.
  2. Cut the twine: Cut the twine into manageable lengths that are easy to work with.
  3. Wrap the twine: Dip the twine in glue and wrap it around the balloon in a crisscross pattern, ensuring full coverage.
  4. Dry the glue: Allow the glue to dry completely before moving on to the next step.
  5. Remove the balloon: Carefully pop the balloon and remove it from the twine structure, leaving behind a sturdy lantern shape.
  6. Insert the light: Place an LED light or candle inside the twine lantern to illuminate it from within.

Tips and Tricks

Enhance your twine lanterns with these helpful tips and tricks:

  • Use Different Colors of Twine: For a more colorful and vibrant lantern, experiment with using different colors of twine to create unique patterns and designs.
  • Experiment with Patterns: Get creative and try out different wrapping patterns and designs to give your twine lantern a one-of-a-kind look.
  • Hang at Varying Heights: For a visually appealing display, hang your twine lanterns at varying heights to create depth and interest in your space.

Who Should Consider Making Twine Lanterns?

If you enjoy DIY projects and want to add a touch of creativity to your space, twine lanterns are perfect for you. Whether you're a beginner looking for a fun project or an experienced crafter wanting to try something new, creating twine lanterns can be a rewarding and enjoyable activity. These lanterns are also great for those who love rustic and handmade decor, as they add a unique and personalized touch to any room.

When is the Best Time to Create Twine Lanterns?

Twine lanterns are versatile decorations that can be used for various occasions and settings. Consider making twine lanterns when:

  1. You want to add a cozy and rustic touch to your home decor.
  2. You're planning a special event like a wedding or party and need unique decorations.
  3. You're looking for a fun and relaxing DIY project to do alone or with friends and family.
  4. You want to create handmade gifts for loved ones that are both thoughtful and beautiful.

Examples of Twine Lantern Use Cases

There are endless possibilities for using twine lanterns in various settings and scenarios. Some common use cases include:

  • Wedding Decor: Hang twine lanterns as part of your wedding decor for a romantic and rustic touch. Use them as centerpieces on tables or as part of a backdrop for photos. Customize the lanterns with your wedding colors for a personalized touch.
  • Home Decor: Add twine lanterns to your living room or bedroom for a cozy and handmade feel. Hang them in clusters or at varying heights to create visual interest in your space. Switch out the LED lights for candles to create a warm and inviting ambiance.
  • DIY Project with Kids: Get creative with your kids by making twine lanterns together as a fun and engaging activity. Let them choose the colors and patterns to personalize their own lanterns. Display their finished lanterns in their rooms or around the house to showcase their creativity.

What Sets Our Twine Lanterns Apart

Our twine lanterns stand out from the rest due to their high-quality materials and attention to detail. Each lantern is carefully crafted using sturdy twine and a strong adhesive, ensuring durability and longevity. Additionally, our lanterns are designed to be versatile and customizable, allowing you to create a unique piece that fits your style and space perfectly.

Potential Use Cases for Our Twine Lanterns

Our twine lanterns can be used in a variety of settings and occasions, making them a versatile and practical decor option. Consider using our lanterns for:

  • Outdoor Events: Hang our twine lanterns outdoors for a charming and rustic touch at events such as garden parties, BBQs, or outdoor weddings. The soft glow of the lanterns will create a warm and inviting atmosphere for your guests to enjoy.
  • Indoor Decor: Add our twine lanterns to your indoor decor to create a cozy and handmade feel in any room. Whether you hang them in clusters or place them on tables, our lanterns will add a touch of creativity and charm to your space.

Maximizing Your Experience with Our Twine Lanterns

To get the most out of your adventure with our twine lanterns, consider the following tips:

  • Choose the Right Location: When hanging your twine lanterns, consider the location and lighting in the space. Opt for areas that will showcase the lanterns' beauty and create a warm and inviting ambiance.
  • Personalize Your Lanterns: Get creative and personalize your twine lanterns by experimenting with different colors, patterns, and designs. This will make your lanterns truly unique and reflective of your personal style.
  • Maintain Your Lanterns: To ensure the longevity of your twine lanterns, make sure to clean them regularly and handle them with care. Avoid exposing them to harsh elements or excessive moisture to preserve their quality and appearance.

Illuminate Your Space with DIY Twine Lanterns

Creating your own twine lanterns is a fun and creative way to add a touch of handmade charm to any space. By following the step-by-step tutorial outlined in this article, you can easily make stunning lanterns using simple materials and techniques. Whether you're decorating for a special event, adding a cozy touch to your home decor, or looking for a fun DIY project to do with kids, twine lanterns are a versatile and customizable option. So unleash your creativity, experiment with different colors and patterns, and brighten up your space with these beautiful DIY twine lanterns!

Copyrights © 2024, Jam Paper & Envelope. All rights reserved.