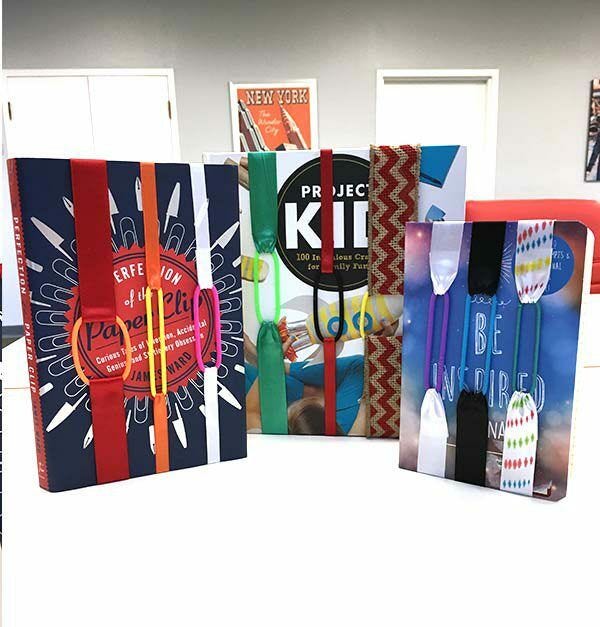
How to Make Colorful DIY Ribbon Bookmarks
- By Andrew Jacobs
- Aug 25, 2016
How to Make Colorful DIY Ribbon Bookmarks
School is right around the corner, sorry kids – congrats mom and dad, you made it! What I remember MOST about school (I’m seriously aging myself here) is books! In almost every class we had some sort of book to read and most likely had to write an essay about it. The biggest problem about reading is trying to find where you left off. What do you do? I’m infamous for folding the corner of the pages (which my mom hates – she doesn’t like when books get “ruined”). Or maybe you find a random, half bitten piece of paper by your dog Max. Or maybe you’re just super cool and think you can remember the page number like myself (page 62…or was it 78). So here’s a little DIY craft to help keep your place and make reading a little more fun – DIY ribbon bookmarks! They are really easy and you may have most of the items in your home. DIY Ribbon Bookmarks only require ribbon (JAM ribbon of course) and elastic hair bands, which you can find anywhere – unless you’re like me who have hair bands that act like Houdini and disappear. Let’s get started!
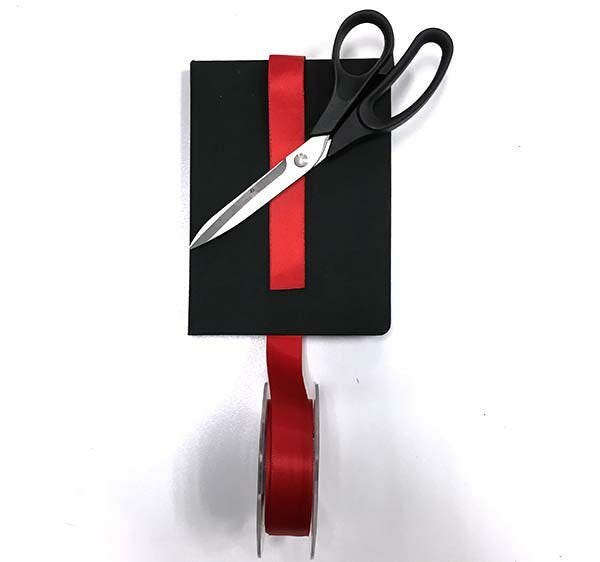
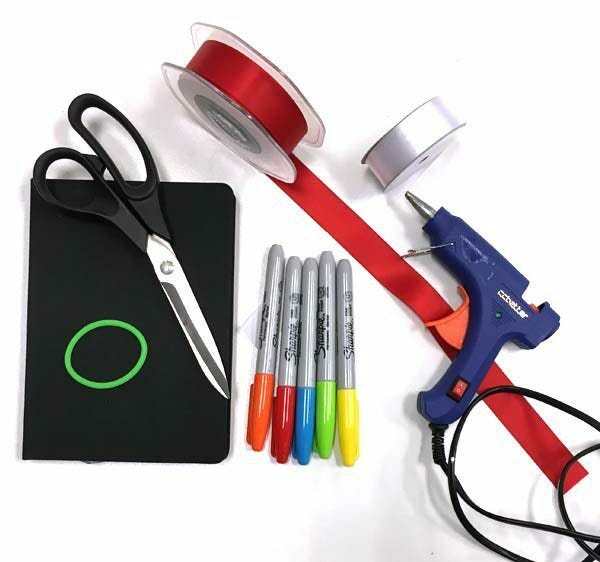
Requirements:- Spools of vibrant JAM ribbon
- Elastic hair bands
- Scissors
- Hot glue gun
- Sharpies (totally up to you)
Step 1:
Measure the ribbon for the book you are making the bookmark for (18 inches for an average size book) and cut. The longer the better – remember you can always cut it down to size.
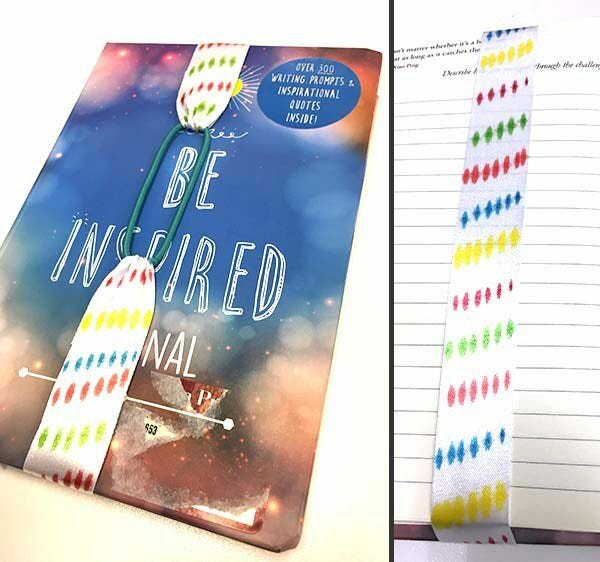
This is where you can utilize your Sharpies – I love these things! Before you go to the next step you can decorate your ribbon just to jazz it up a bit. Here I just used my handy dandy Sharpies and made little dots diagonally. It’s super easy since the marker spreads on the ribbon, but you can do any design you’d like. You have creative license here!
Step 2:
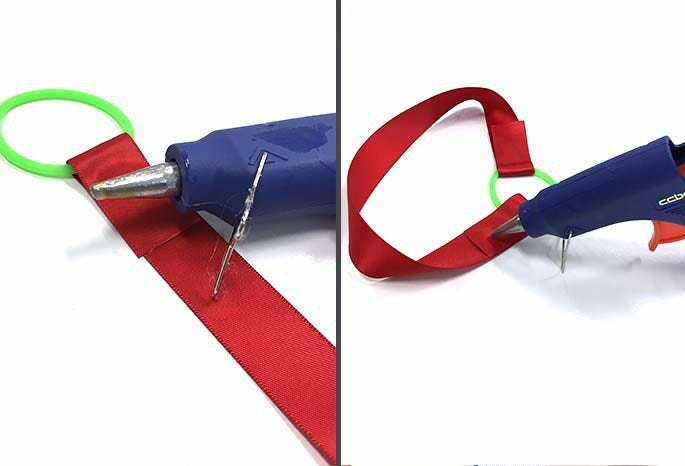
This next step I used a hot glue gun but if you have a little more time you could use a sewing needle and thread. Now you fold your ribbon over the elastic hair band and seal with the hot glue gun. It doesn’t matter how much ribbon you fold over, whatever makes you comfortable. Phew! You got one side done! Fun fact: if you don’t have any of those you can just use tape!
Step 3:
String the other side of the ribbon through the opposite end of the hair band and use your hot glue gun to seal. Make sure to glue on the same side you did the first one, I definitely made that mistake. Whoops!
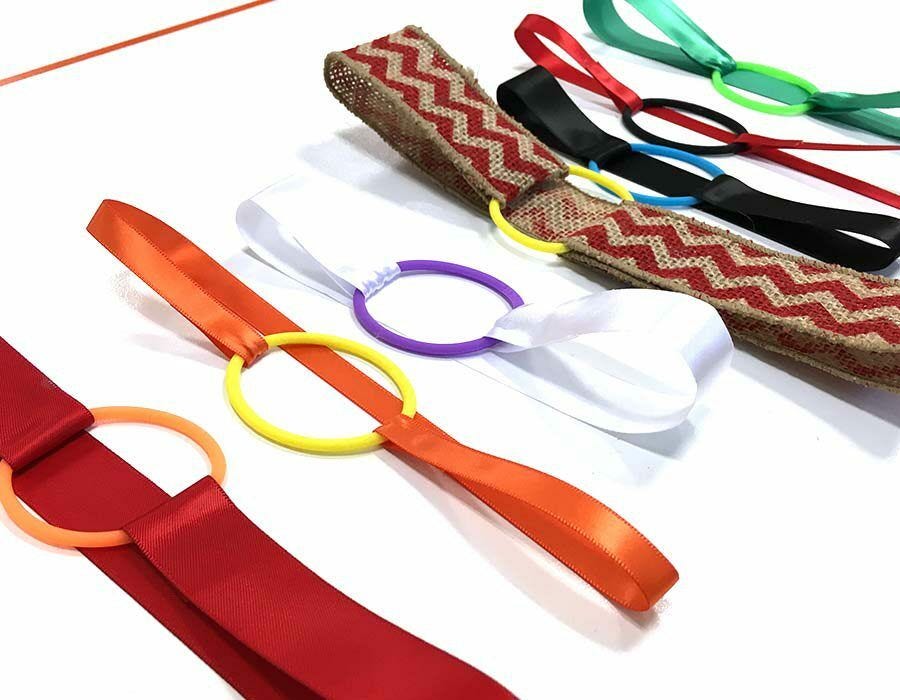
There you have it! Your very own DIY ribbon bookmark! Even if you don’t need bookmarks for school, they make great presents for anyone that loves to read. These ribbon bookmarks are so quick and affordable to make, you could create a bunch in just minutes.
You could pair them with any book and dress it up for a nice birthday gift for any bookworm you know. Like to be in the kitchen? You could even use them to keep your place in your recipe book. However you use them, have fun with your ribbon bookmarks!
And don’t forget to share your masterpiece with us by tagging @jampaper on Instagram or Twitter!
Creating Your Own Colorful DIY Ribbon Bookmarks
If you're looking for a fun and creative way to mark your place in a book, look no further than DIY ribbon bookmarks. These colorful and personalized bookmarks are not only practical but also make for a great craft project. Making your own ribbon bookmarks allows you to customize them to your liking, using your favorite colors and patterns. They also make for thoughtful and inexpensive gifts for friends and family who love to read. With just a few simple materials and a bit of creativity, you can easily create beautiful ribbon bookmarks that will add a touch of charm to your reading experience.
Benefits of DIY Ribbon Bookmarks
DIY ribbon bookmarks offer a range of benefits. They are a cost-effective way to create personalized bookmarks that reflect your unique style and personality. Additionally, making your own bookmarks allows you to repurpose leftover ribbon and fabric scraps, reducing waste and promoting sustainability. These bookmarks also make for a thoughtful and handmade gift option for book lovers. By creating your own ribbon bookmarks, you can add a personal touch to your reading experience and make it more enjoyable.
Use Cases for DIY Ribbon Bookmarks
DIY ribbon bookmarks can be used in a variety of settings. Whether you're an avid reader looking to add a personal touch to your reading experience or a craft enthusiast seeking a fun and easy project, making your own ribbon bookmarks is a great option. These bookmarks can also be used as party favors, gifts for book clubs, or even as a creative activity for kids. The versatility of DIY ribbon bookmarks makes them a popular choice for individuals of all ages and interests.
Alternatives to DIY Ribbon Bookmarks
While DIY ribbon bookmarks are a popular choice, there are alternative options available for marking your place in a book. Some alternatives include traditional paper bookmarks, magnetic bookmarks, and clip-on bookmarks. Each of these options offers its own unique features and benefits, so it's worth exploring different bookmark styles to find the best fit for your reading habits and preferences.
Tips for Making DIY Ribbon Bookmarks
When creating your own ribbon bookmarks, consider using a variety of ribbon widths and textures to add visual interest. Experiment with different knotting and braiding techniques to create unique designs. Additionally, consider adding embellishments such as beads or charms to personalize your bookmarks further. It's also helpful to use a lightweight and flexible ribbon material to ensure that the bookmarks don't damage the pages of your books. Lastly, have fun and let your creativity shine through as you craft your own colorful DIY ribbon bookmarks.
Adding a Personal Touch to Your Reading Experience
DIY ribbon bookmarks offer a simple yet effective way to infuse your reading routine with a personal touch. By creating your own bookmarks, you can express your creativity and individuality while enhancing your overall reading experience. Whether you're making bookmarks for yourself or as gifts for others, the process of crafting these colorful accessories is both enjoyable and rewarding. With endless possibilities for customization, DIY ribbon bookmarks are a delightful addition to any book lover's collection.


