DIY Paper Kites

Thinking back to my childhood, summers mainly consisted of playing outside with my friends, swimming, eating ice cream & flying kites on the beach. One of the best feelings as a kid was after constant trial and error, looking back during a run & finally seeing your kite soaring through the air!! Here are some some simple steps on how to make your own "DIY" paper kite- reminisce on childhood memories in addition to creating some new ones!

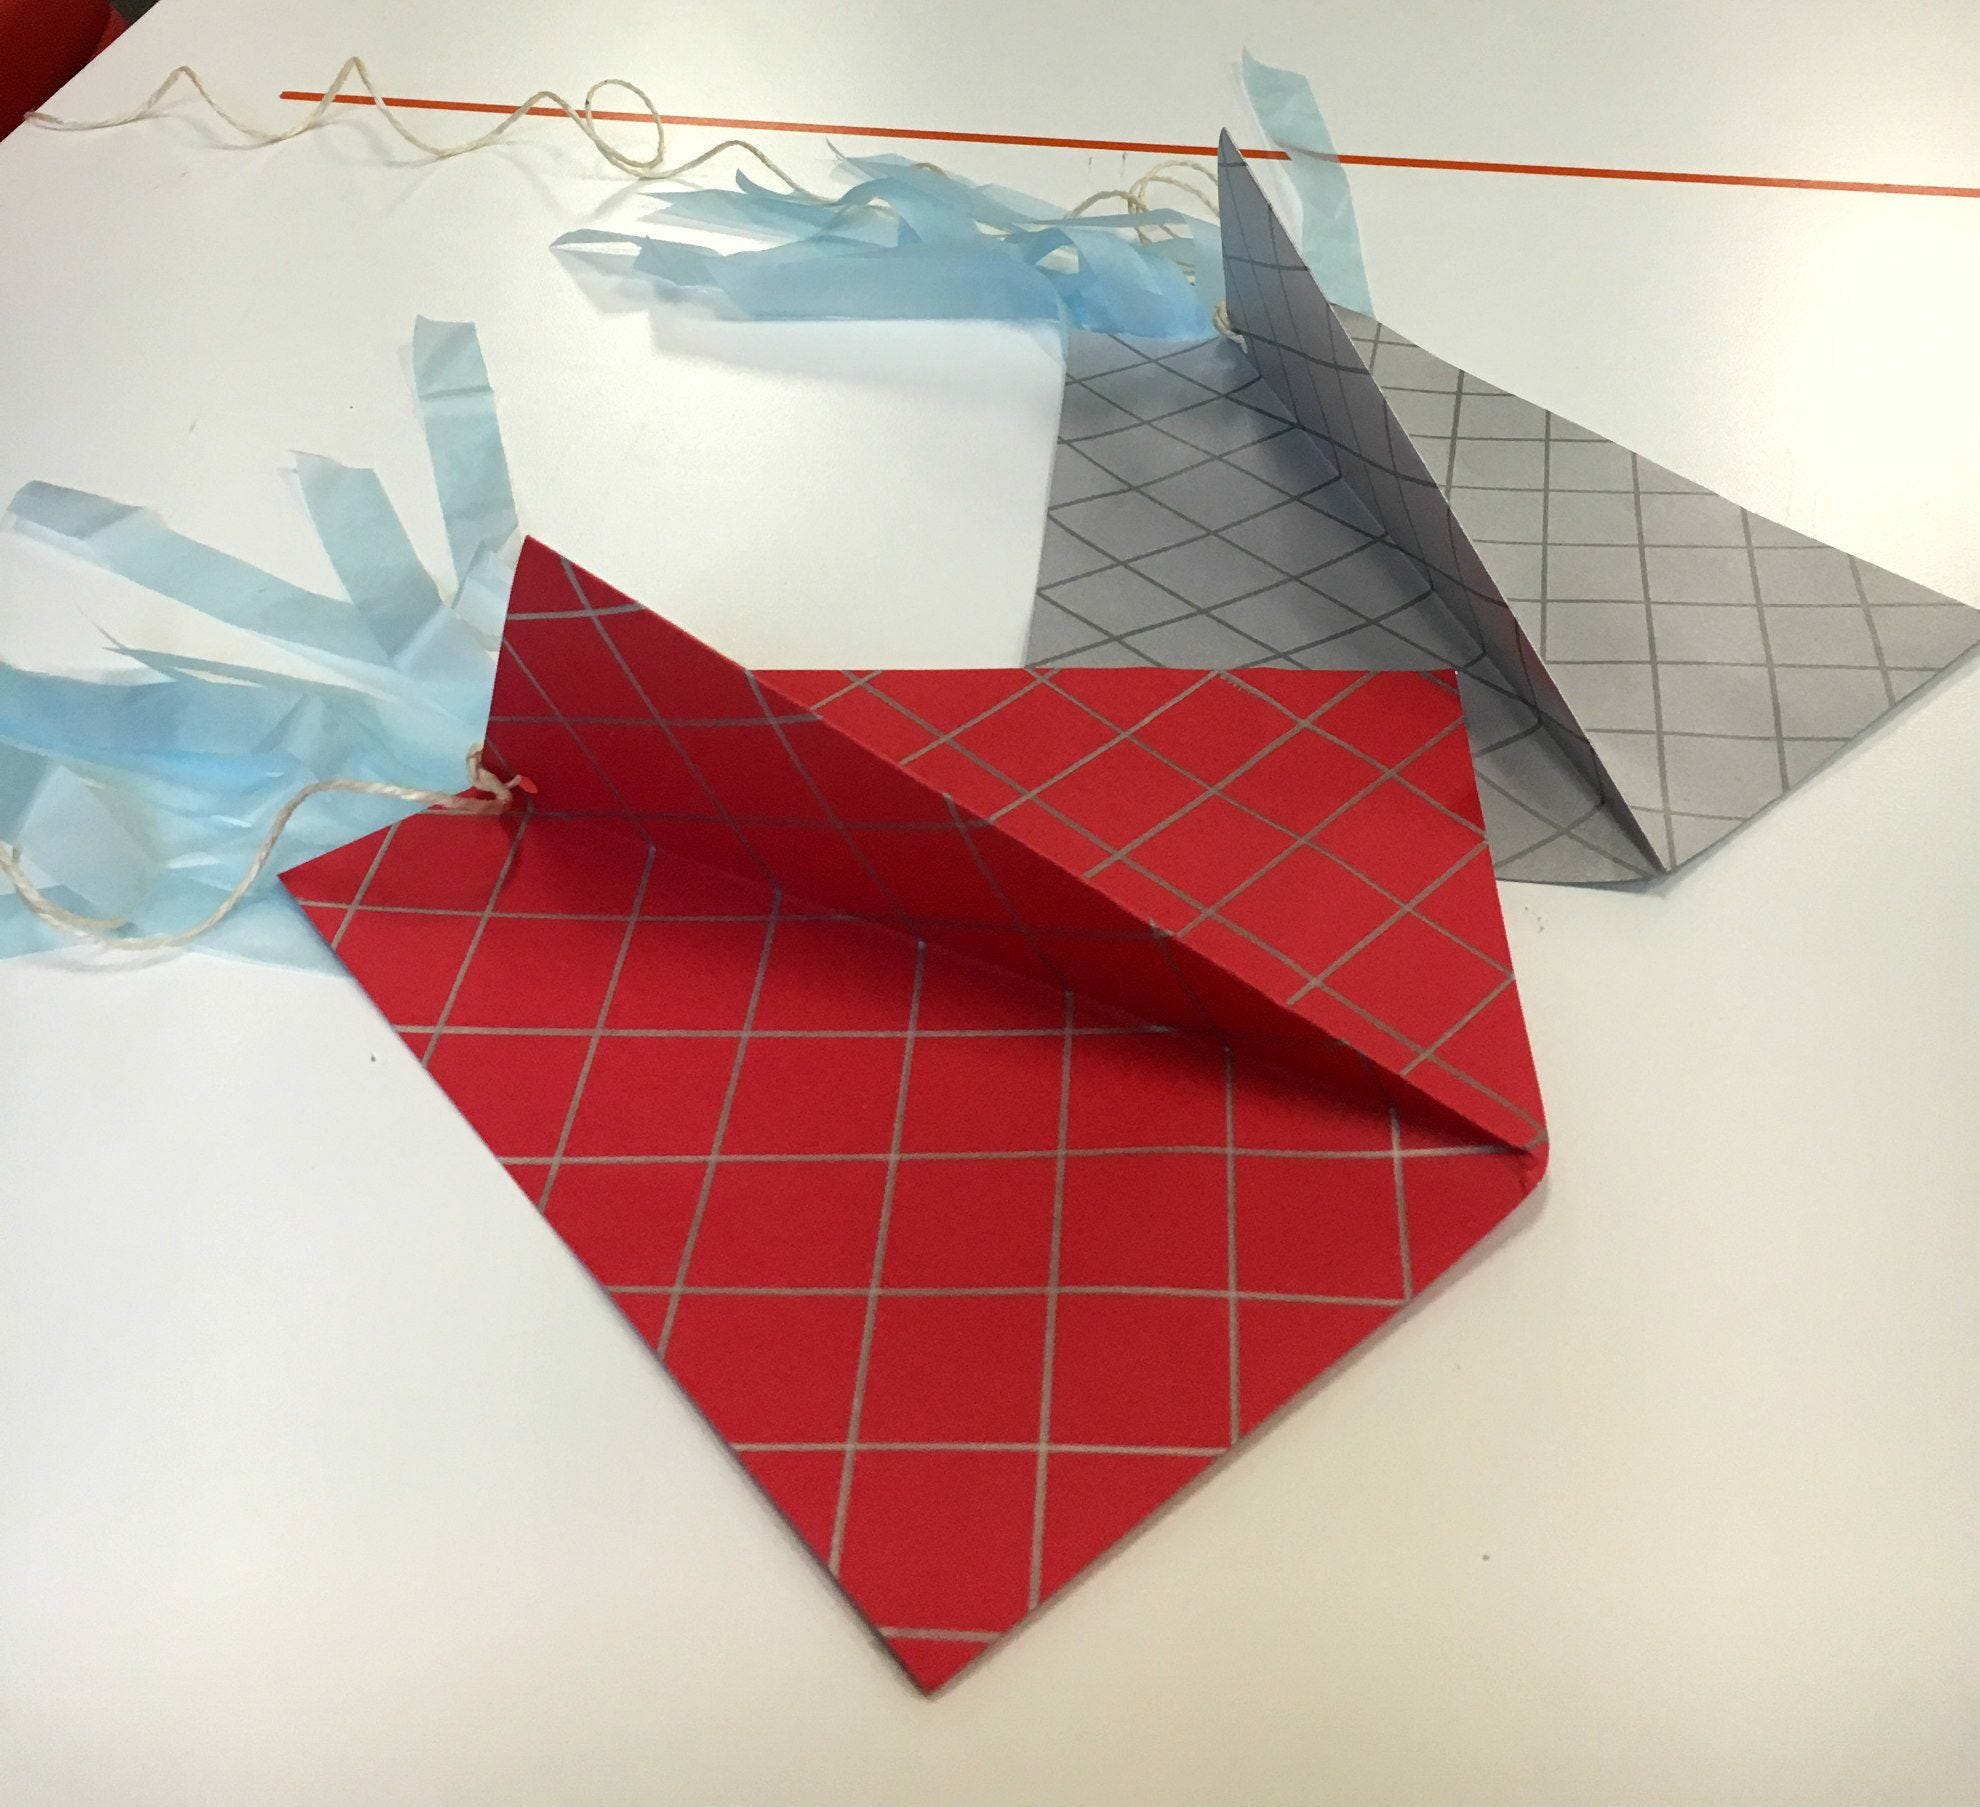
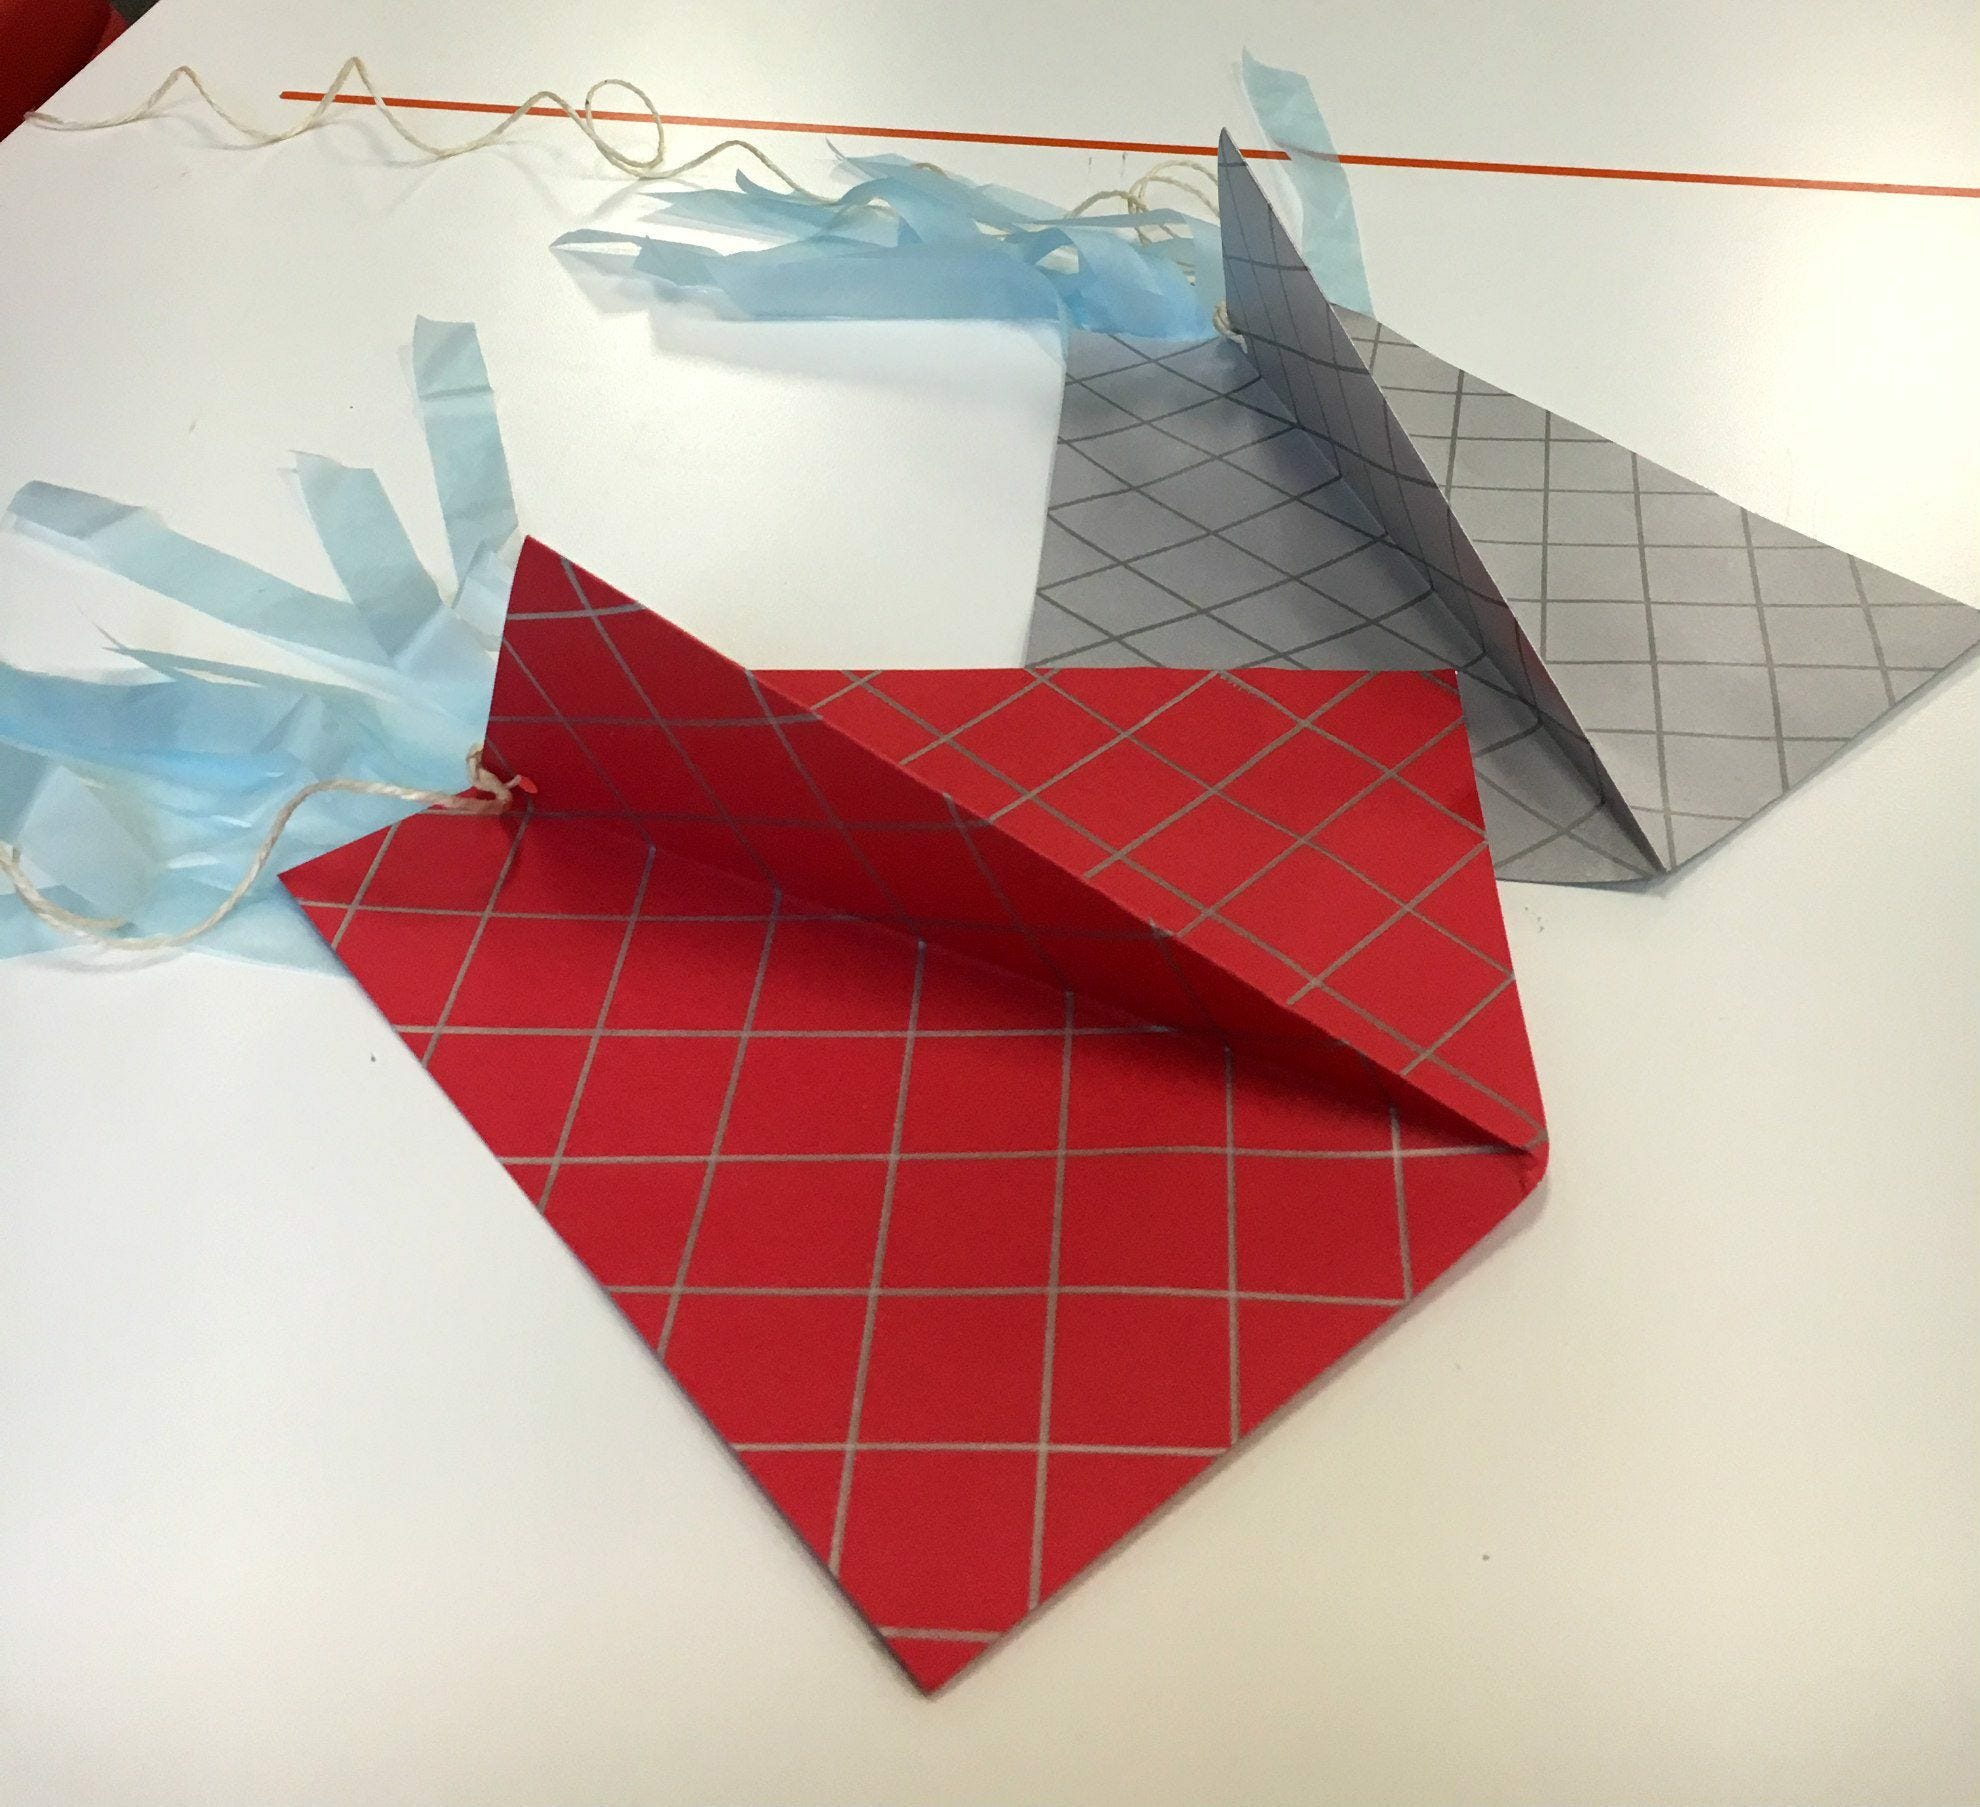
red and gray grid diy paper kites with blue streamers

Requirements:

Now Let's Get Started...

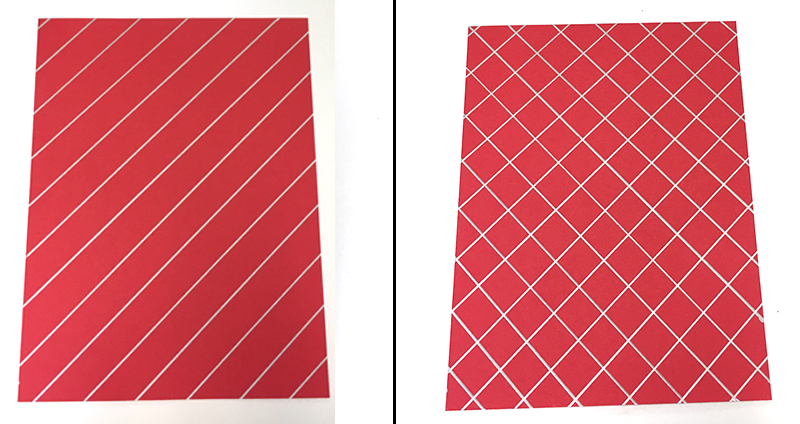
Take a sheet of red paper and a ruler, place the ruler diagonally from corner to corner on the paper. Make a mark at every inch with a pencil- this is where your lines and the basis of your pattern is going to be.

red paper with silver lines drawn in grid pattern

Draw lines across the paper where the marks are, with your metallic sharpie. Do the same on the opposite side of the paper to give it that "criss cross" effect.

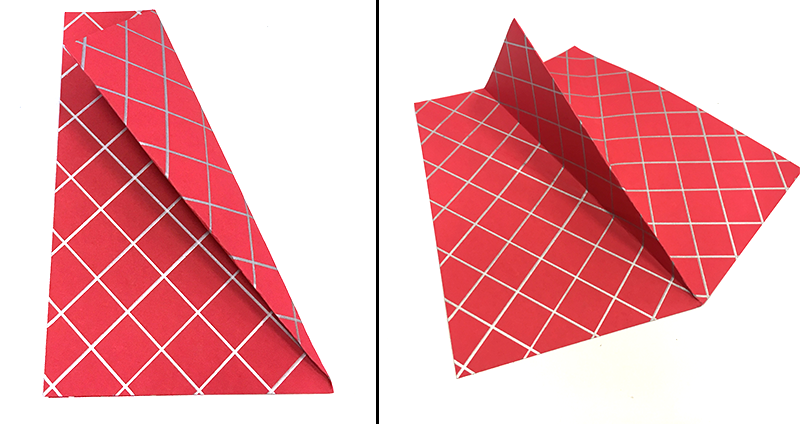
Fold your paper in half, horizontally.

folded red and silver paper for diy paper kites

Fold the top right corner in towards the other side of the paper (shown in the image on left). Fold that flap onto both sides of the paper and there is the shape of your kite (shown in the image on the right).

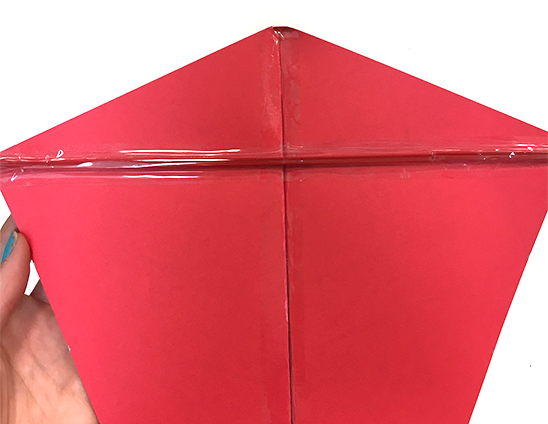
red coffee stirrer taped to underside of red paper kite

Place tape down the center of the kite to meld both sides together. Tape a coffee stirrer on horizontally to give your kite some support.

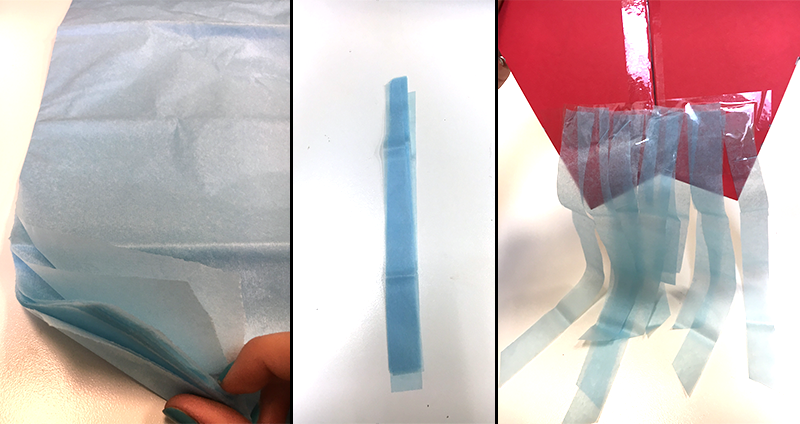
blue tissue paper cut into strips and taped in a row on tail end of red paper kite

Using your JAM Baby Blue Tissue Paper cut pieces for the tail of your kite. Tape the pieces of the tail on to the bottom of your kite.

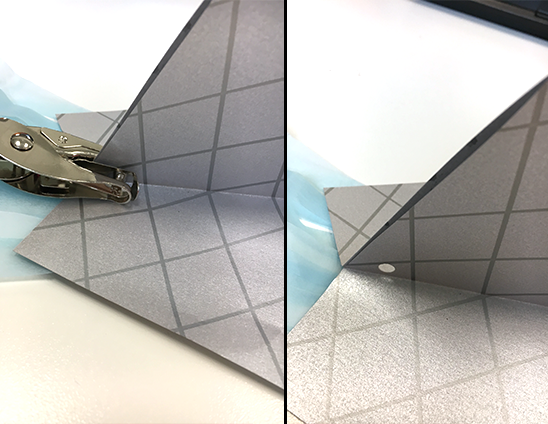
tail end of diy paper kites hole-punched

Finally, hole punch the tail end of your kite. This is where you are going to tie your twine in to the kite!

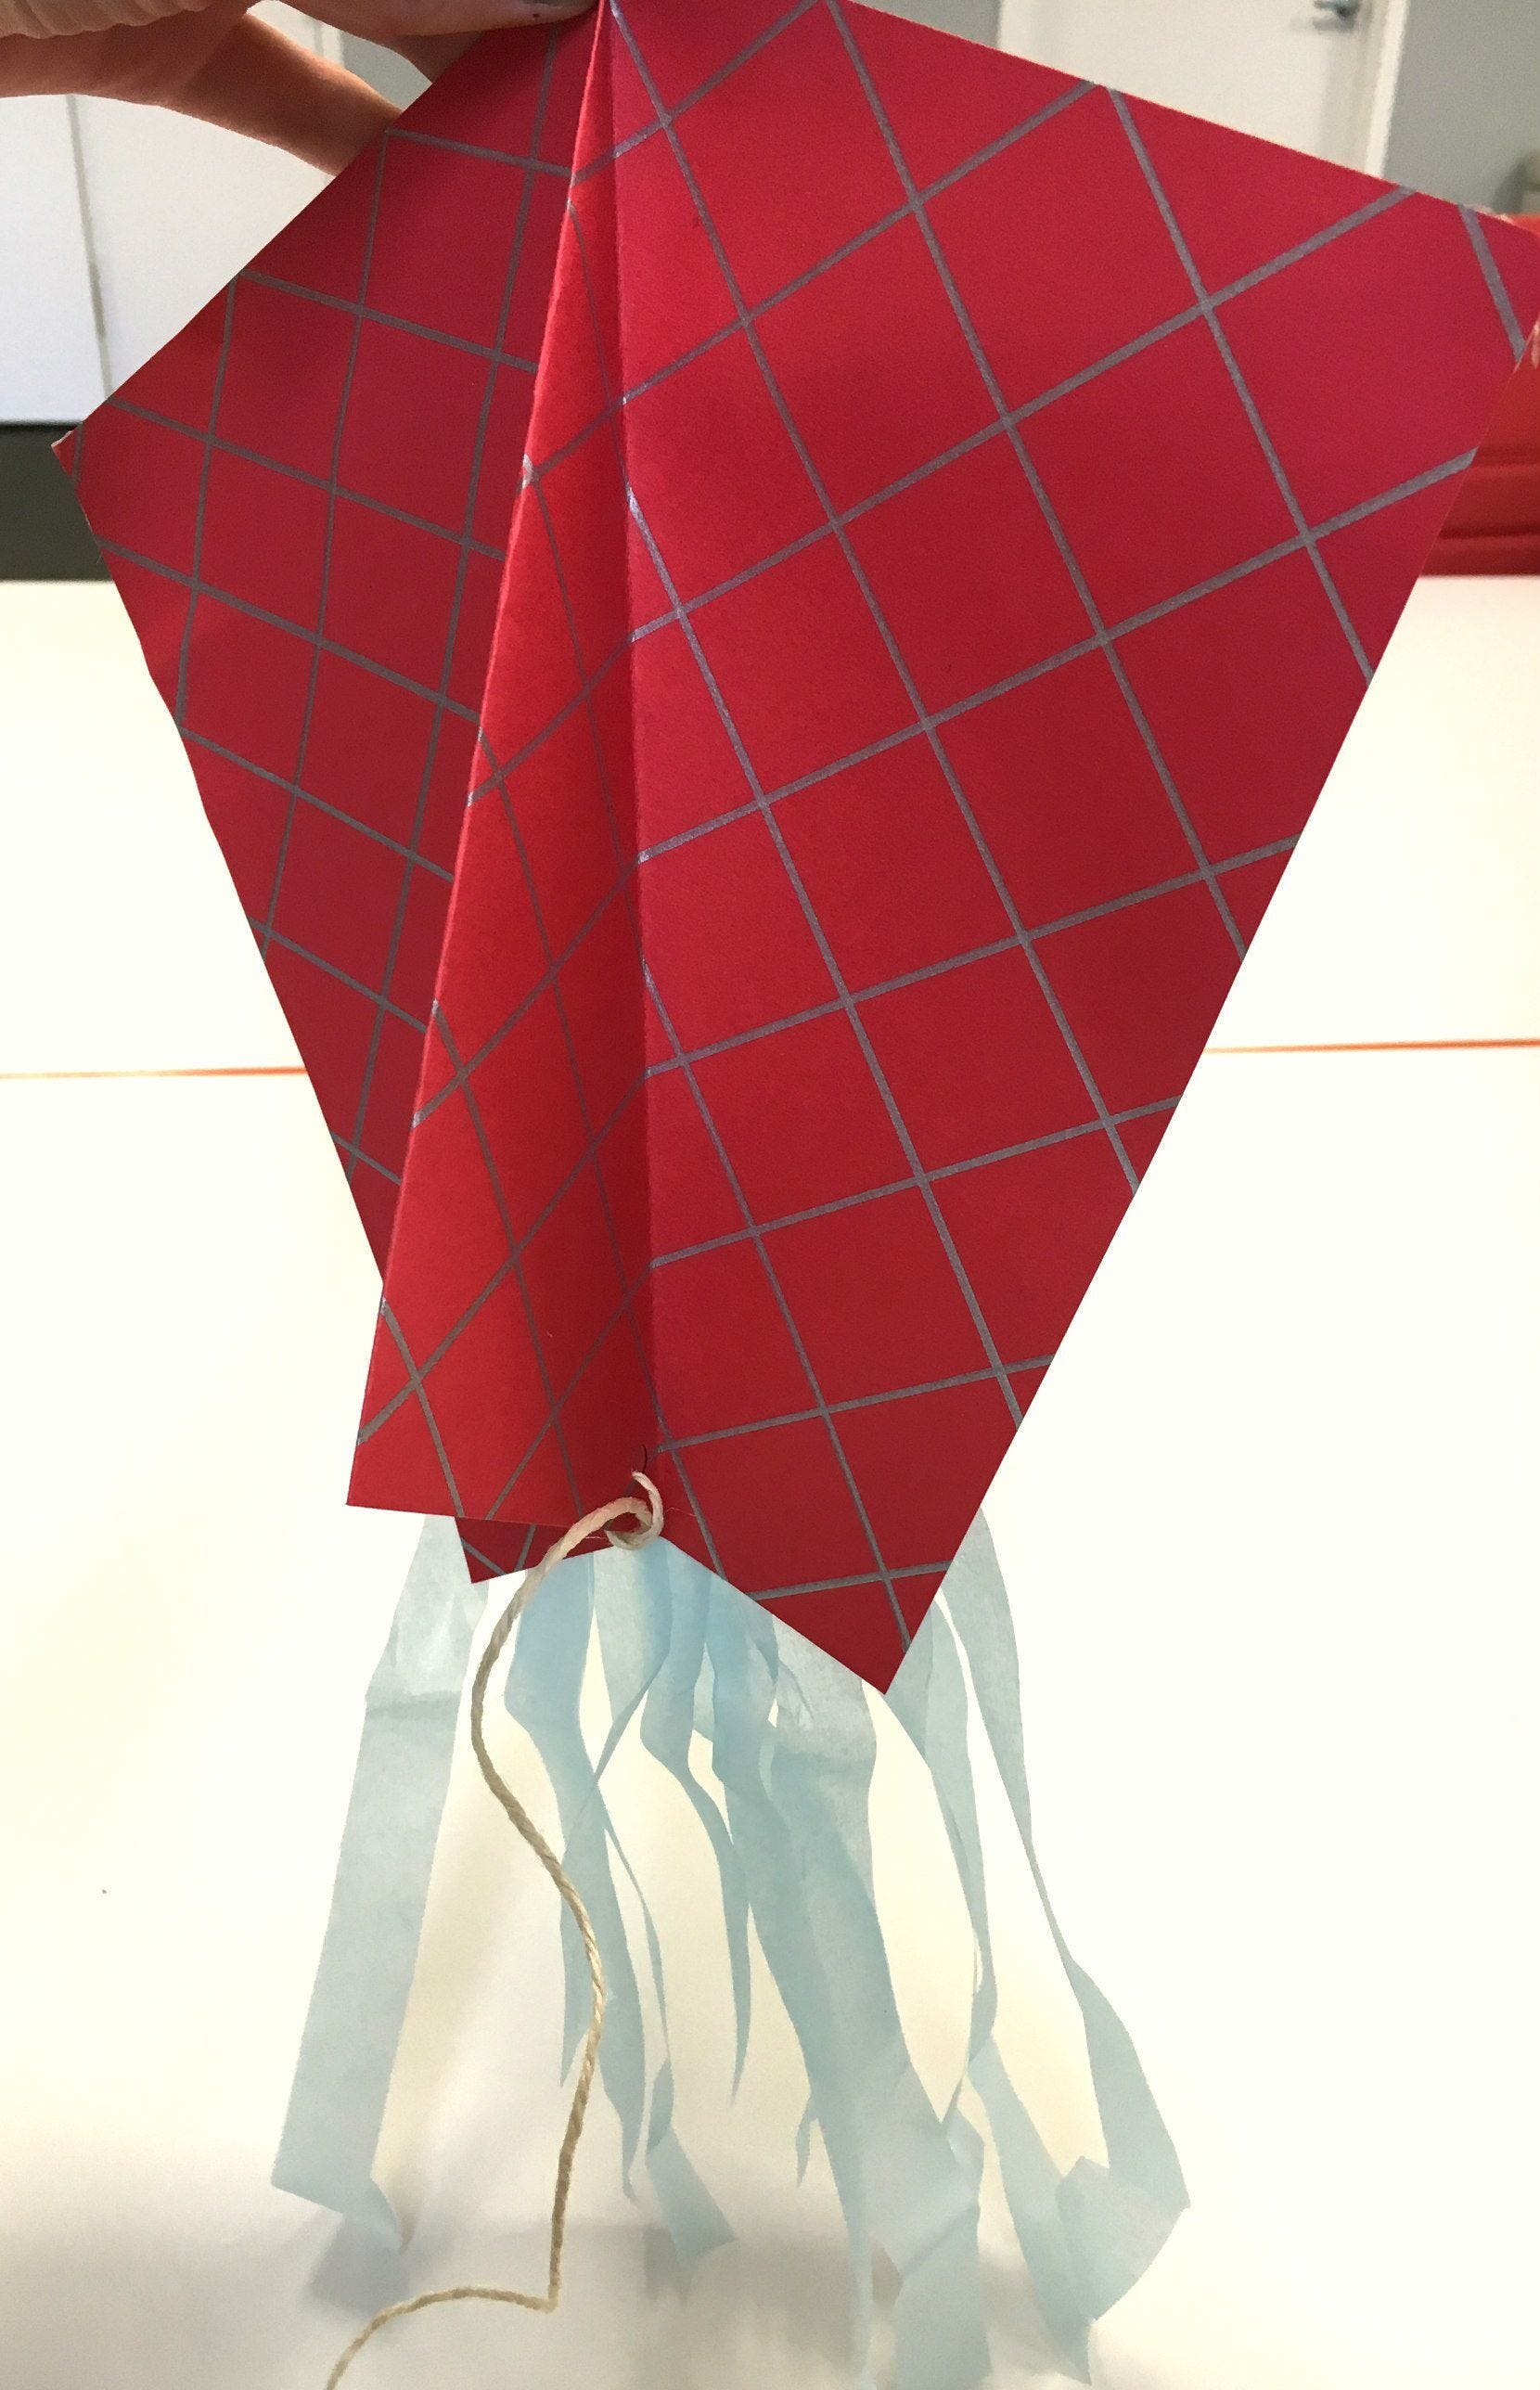
brown twine threaded through tail of red paper kite

completed red and gray diy paper kites

And there you have it! DIY Paper Kites that are simple and fun to make- and they really do fly, I promise!!

Creating Your Own DIY Paper Kite


DIY paper kites are a fun and creative way to spend time outdoors with your family or friends. Making your own kite allows you to personalize it with unique designs and colors, and it's a great way to teach kids about aerodynamics and the science of flight. With just a few simple materials like paper, string, and glue, you can create a beautiful and functional kite that will provide hours of entertainment. Whether you're an experienced crafter or just looking for a new hobby, making DIY paper kites is a rewarding and enjoyable activity that anyone can try.


The Benefits of DIY Paper Kites


One of the main benefits of making your own paper kite is the sense of accomplishment and pride that comes with creating something from scratch. DIY paper kites are also a cost-effective alternative to buying pre-made kites, and they can be customized to suit your personal style and preferences. Additionally, making and flying a DIY paper kite is a great way to spend time outdoors and enjoy the fresh air and sunshine. It's a fun and wholesome activity that can be enjoyed by people of all ages, and it's a great way to bond with family and friends.


Use Cases for DIY Paper Kites


DIY paper kites can be used in a variety of settings, from a day at the park to a beach vacation. They're perfect for outdoor gatherings, picnics, and parties, and they can provide hours of entertainment for kids and adults alike. DIY paper kites are also a popular choice for school projects and science experiments, as they provide a hands-on way to learn about the principles of flight and aerodynamics. Whether you're looking for a fun weekend activity or a unique way to decorate your outdoor space, DIY paper kites are a versatile and enjoyable option.


Alternatives to DIY Paper Kites


If you're interested in making your own kite but want to explore alternative materials, there are plenty of options to consider. For example, you could try making a kite out of fabric, plastic, or even recycled materials like plastic bags or newspaper. Each material has its own unique properties and benefits, so it's worth experimenting with different options to find the best fit for your needs and preferences. Additionally, there are many different styles and designs of kites to explore, from traditional diamond kites to more modern and innovative shapes.


Tips for Making and Flying DIY Paper Kites


When making a DIY paper kite, it's important to choose lightweight and durable materials that will withstand the wind and weather. Consider using materials like tissue paper, thin cardboard, or lightweight fabric for the kite itself, and strong string or fishing line for the flying line. Additionally, it's important to consider the weather conditions when flying your kite, as strong winds or rain can damage the kite and make it difficult to control. Finally, have fun experimenting with different designs, colors, and shapes to create a unique and eye-catching kite that will stand out in the sky.


Enjoying the Outdoors with DIY Paper Kites


Whether you're a seasoned kite enthusiast or a beginner looking for a new hobby, making and flying DIY paper kites is a fun and rewarding activity that can be enjoyed by people of all ages. It's a great way to spend time outdoors, get some fresh air and exercise, and bond with family and friends. With just a few simple materials and a little creativity, you can create a beautiful and functional kite that will provide hours of entertainment and enjoyment. So why not give it a try and see where your imagination takes you?


Share:


DIY Paper Kites: Fun and Easy Kite Making Tutorial


Key Summary:

  • Learn how to make your own colorful paper kites with this easy step-by-step guide.
  • Perfect for a fun outdoor activity.
  • This article will provide detailed information on materials needed, step-by-step instructions, tips and tricks, real-world use cases, and examples of DIY paper kites in action.

Kite flying has been a popular pastime for centuries, bringing joy and excitement to people of all ages. In this article, we will explore the world of DIY paper kites, offering a fun and creative activity for anyone looking to enjoy the outdoors. From materials needed to step-by-step instructions, tips, and real-world use cases, this guide will help you create your own colorful and unique paper kites for hours of entertainment.


Materials Needed

When making DIY paper kites, you will need the following materials:

  • Colorful paper or tissue paper
  • Bamboo sticks or dowels for the frame
  • Scissors
  • Glue or tape
  • String

Each of these items plays a crucial role in the kite-making process. The paper provides the design and color, while the frame made of bamboo sticks or dowels gives the kite its structure and stability. Scissors are essential for cutting the paper to the desired shape, and glue or tape is used to attach the paper to the frame securely. Finally, the string is necessary for flying the kite.


Step-by-Step Instructions

Creating a DIY paper kite involves several steps, including:

Creating the Kite Frame

To start, you will need to create a sturdy frame for the kite using bamboo sticks or dowels. Follow these steps to build a durable frame:

  1. Measure and cut the bamboo sticks or dowels to the desired length for the frame.
  2. Arrange the sticks in a cross shape and secure them together at the center with glue or tape.
  3. Extend the sticks to form the kite shape, securing the ends with additional glue or tape.

Attaching the Paper

Once the frame is complete, you can attach colorful paper to create the design of the kite:

  1. Cut the paper to the size and shape of the kite frame.
  2. Secure the paper to the frame using glue or tape, ensuring it is smooth and wrinkle-free.

Adding Tail and String

Finally, add a tail to the kite for stability and attach a string for flying:

  1. Attach a long, lightweight tail to the bottom of the kite for stability in flight.
  2. Tie a string to the top of the kite frame, making sure it is long enough for flying.

Tips and Tricks

For a successful DIY paper kite-making experience, consider the following tips:

  • Choose lightweight paper for easy flying.
  • Add embellishments like stickers or glitter for a personalized touch.
  • Test the kite in an open area with steady wind for optimal performance.
  • Adjust the tail length to improve stability during flight.
  • Have fun experimenting with different designs and colors to create unique kites.

Who Can Benefit from this Product

DIY paper kites are perfect for:

  • Children looking for a fun and creative outdoor activity
  • Families wanting to spend quality time together in nature
  • Art enthusiasts who enjoy crafting and designing unique creations
  • Teachers looking for a hands-on project for their students
  • Anyone seeking a relaxing and enjoyable hobby

When to Engage with this Activity

You can make DIY paper kites:

  • During sunny days with a gentle breeze for optimal flying conditions
  • At outdoor parties, picnics, or family gatherings for added entertainment
  • As a creative project on weekends or holidays to unwind and have fun
  • As a team-building activity for groups or organizations to foster collaboration
  • As a therapeutic activity to reduce stress and promote mindfulness

Examples of How to Utilize this Product

Here are some use case examples for DIY paper kites:

  • Hosting a kite-making workshop at a children's birthday party
  • Decorating a backyard with colorful paper kites for a summer BBQ
  • Engaging in a friendly kite-flying competition with friends at the park
  • Incorporating paper kites into a school project on aerodynamics or art
  • Creating personalized kites as gifts for loved ones on special occasions

What Sets Our Product Apart

Our DIY paper kite tutorial stands out because of its easy-to-follow instructions and creative design options. Unlike traditional kites, our paper kites allow for endless customization and personalization, making each creation unique. Additionally, our guide includes helpful tips and tricks to ensure a successful kite-making experience every time.

Various Ways to Enjoy Our Product

There are numerous ways to enjoy our DIY paper kites, including:

  • Organizing a kite-making party with friends or family for a fun group activity
  • Using the kites as decorations for outdoor events or celebrations
  • Teaching children about aerodynamics and creativity through kite-making
  • Engaging in a relaxing solo activity to unwind and de-stress
  • Participating in kite-flying competitions to showcase your unique designs

Maximizing Your Experience with Our Product

To get the most out of your adventure with our DIY paper kites, consider the following tips:

Choosing the Right Materials

Opt for high-quality paper and sturdy frame materials to ensure durability and longevity.

Experimenting with Designs

Don't be afraid to get creative and try out different patterns, colors, and shapes for your kites.

Flying Techniques

Learn the proper way to launch and control your kite to maximize its flight time and performance.

Sharing Your Creations

Showcase your paper kites to friends and family, or even participate in kite festivals to share your unique designs with a wider audience.

Staying Safe

Always fly your kite in open areas away from power lines and trees, and be mindful of wind conditions to prevent accidents.

Take Flight with DIY Paper Kites

Creating your own colorful paper kites is a fun and engaging activity that brings joy and excitement to people of all ages. From gathering materials to step-by-step instructions, tips, and real-world use cases, this guide has everything you need to get started on your kite-making adventure. So grab your supplies, unleash your creativity, and experience the thrill of flying your handmade kite in the open sky!

Copyrights © 2024, Jam Paper & Envelope. All rights reserved.