


DIY: Christmas Crafts for Kids
-
 By
Lauren DiPalma
By
Lauren DiPalma
- Dec 10, 2020
DIY: Christmas Crafts for Kids
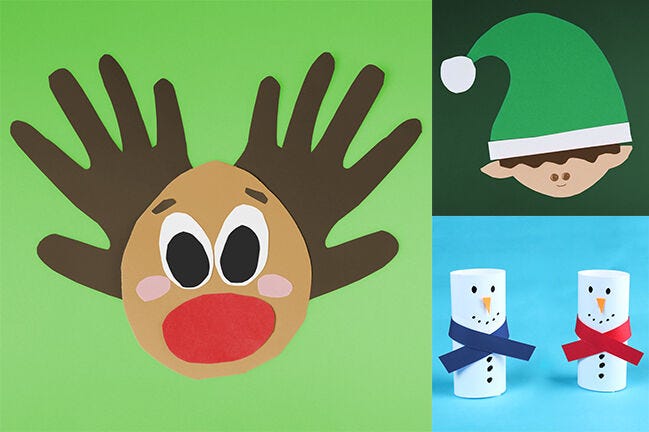
Looking for a way to decorate your house, but don't want to stick to basic store bought items? Than this is the article for you! Today we are going to walk you through three super fun and easy DIY: Christmas Crafts for Kids! They will be sure to brighten up your children's faces and the room. Perfect for a holiday party, fridge, or Christmas card, you'll have the time of your life putting these cute creations together. So grab yourself a cup of hot cocoa and let's start!
Things You'll Need:
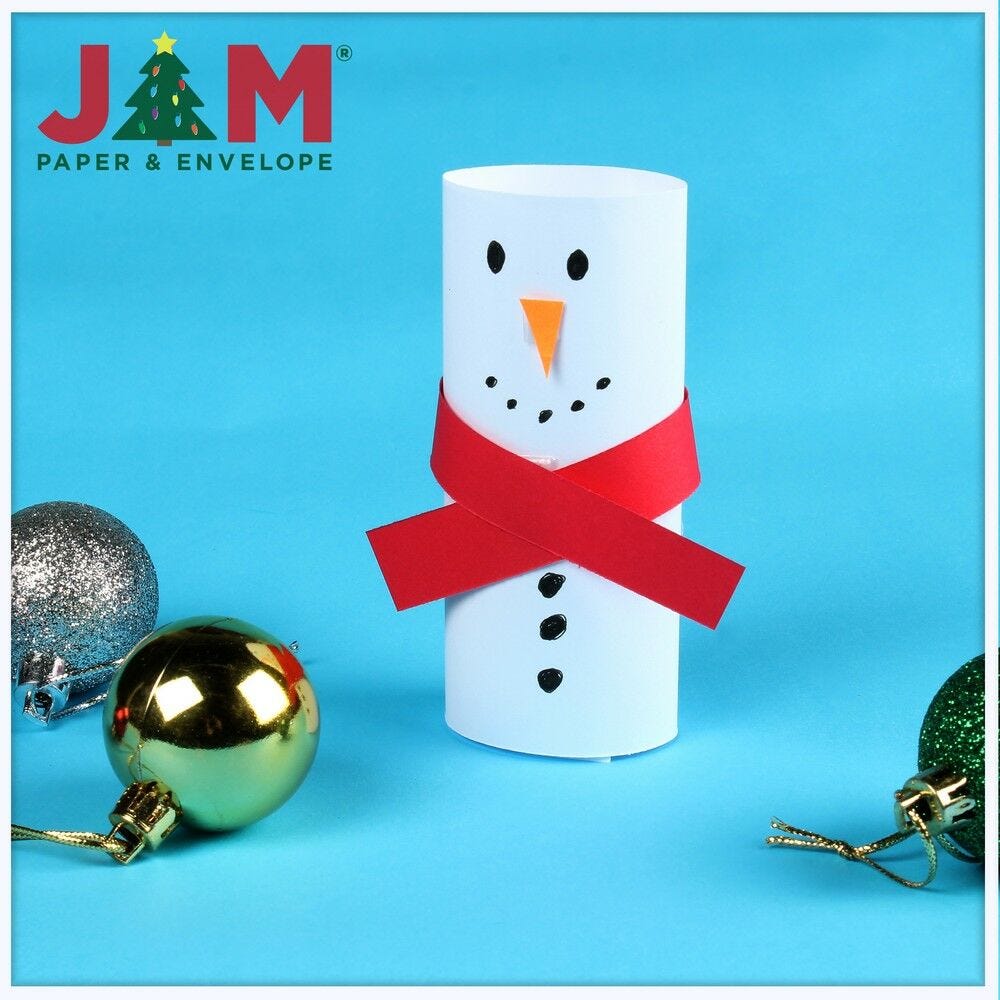
Snowman
Steps
- Cut a piece of white paper into a short rectangle (5x7 inches).
- Roll up the paper hamburger style and tape it in the back to form your snowman body.
- Now grab a colored piece of paper, it can be any color you want, and cut a long skinny strand out for the scarf.
- Wrap the scarf around and glue into place!
- For the nose, cut a very small triangle from orange paper and glue it on the face.
- For the finishing touches, take a marker and draw on his face and buttons!
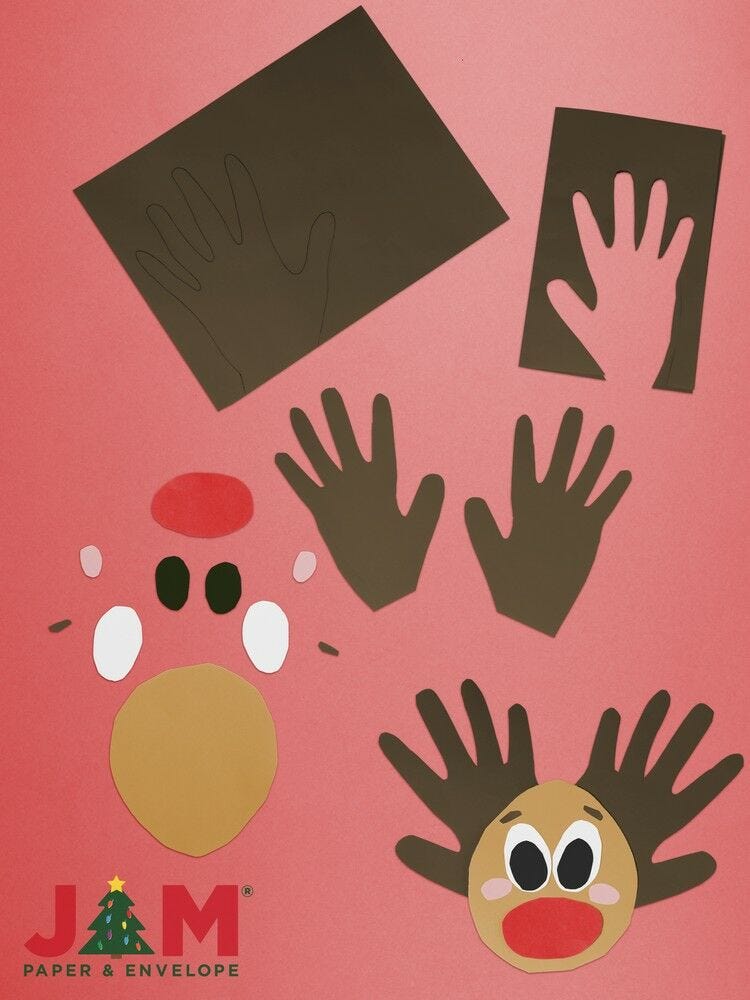
Reindeer
Steps
- Take light-brown paper and cut out a medium sized egg shape.
- Now trace your hands on a dark piece of paper and cut them out for two antlers.
- Glue the antlers on the back of the head so they peak out the top.
- For the nose, you're going to want to trace a red oval that is almost the width of the head and glue it towards the very bottom.
- To give your Rudolf a nice rosy blush, cut two small ovals from light pink paper and glue them on either side of the nose.
- Next, take white paper and cut out two long ovals for the eyes. To make the pupils, do the same thing but make the ovals smaller out of black paper.
- Glue the eyes into place, make sure the black ovals are on top of the white ones.
- Last but not least, cut our two skinny eyebrows and place them however you want above your eyeballs to give him a customized expression!
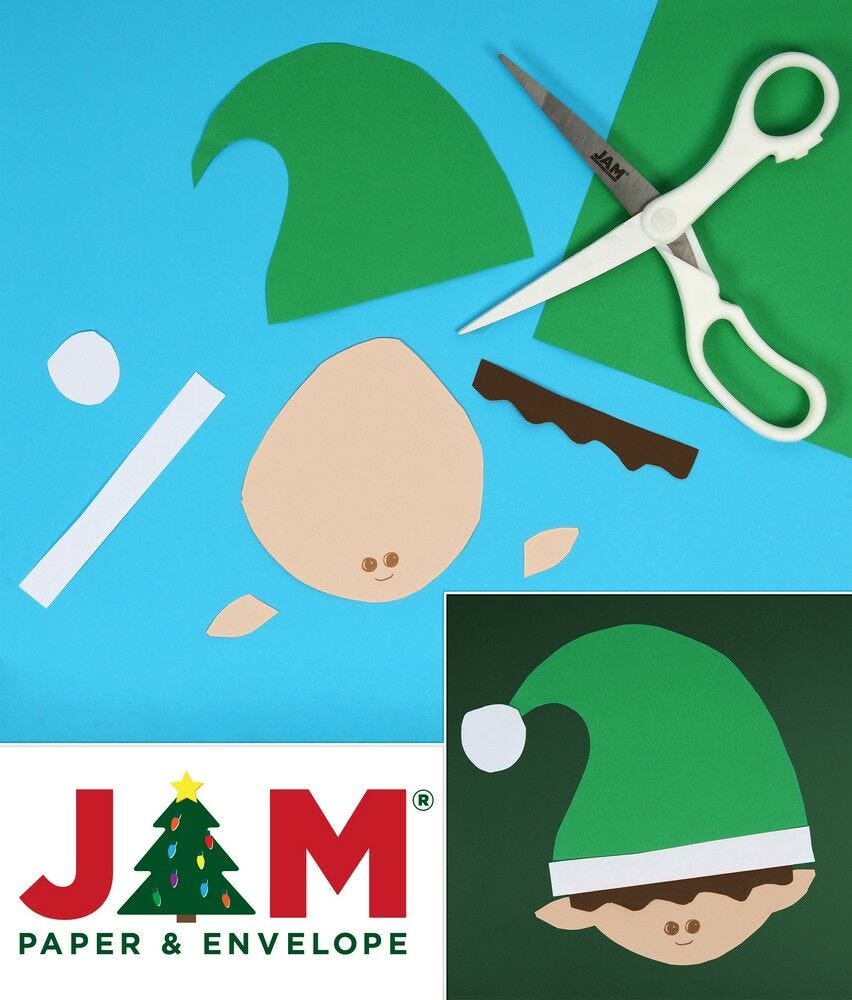
Elf
Steps
- Take any form of skin colored paper (there are so many to choose from!) and cut out an oval.
- Next, take a nice green colored sheet of paper and as best as you can, trace and cut out a drooping hat shape.
- For the bottom of the elf hat, cut a long skinny rectangle and glue it to the bottom of the elf hat.
- Before gluing the hat to the face, you're going to want to add hair. So use any color you like and cut out what would be a rectangle the size of the bottom of the hat, but make one side squiggly.
- Glue the hair towards the bottom of the face and then the hat on top, so it sticks out.
- Then cut out some pointy ears and glue them on the back towards the sides.
- Finally take a marker and draw on any type of face you want to give him/her.
We hope this tutorial brought you smiles this holiday! It’s JAM’s goal as a company to provide you with quality products and amazing ways to use them. Make sure to follow our blog, Instagram and Pinterest to get the scoop on our latest new crafts and items! Don’t forget to leave comments down below. We’d love to hear how these DIY: Christmas Crafts for Kids worked for you this year! And if you have any suggestions don’t be shy, we’re all ears!
Fun and Easy DIY Christmas Crafts for Kids
If you're looking for creative and budget-friendly ways to keep your kids entertained during the holiday season, DIY Christmas crafts are the perfect solution. Not only are these crafts a great way to bond with your children, but they also provide an opportunity to create lasting memories. From handmade ornaments to personalized stockings, there are endless possibilities for festive projects that will bring joy to your home. With a little imagination and some basic supplies, you can transform simple materials into beautiful decorations that will add a special touch to your holiday decor. Get ready to unleash your creativity and spread some holiday cheer with these delightful DIY Christmas crafts for kids.
The Benefits of DIY Christmas Crafts
Engaging in DIY Christmas crafts with your kids offers a wide range of benefits. Not only does it provide an opportunity for quality family time, but it also encourages creativity and imagination. Crafting can also help children develop fine motor skills and improve their hand-eye coordination. Additionally, creating homemade decorations fosters a sense of pride and accomplishment in kids, boosting their self-esteem. By involving children in the crafting process, you can instill a sense of tradition and create cherished keepsakes that will be treasured for years to come.
Use Cases for DIY Christmas Crafts
DIY Christmas crafts are perfect for a variety of occasions, from decorating your home to creating personalized gifts for friends and family. Whether you're hosting a holiday gathering or simply want to add a festive touch to your living space, handmade decorations and ornaments are a wonderful way to infuse your home with holiday spirit. Additionally, crafting with kids provides an opportunity to engage in meaningful activities that promote creativity and bonding. These crafts can also be used as educational tools, teaching children about the joy of giving and the importance of handmade gifts.
Alternatives to Traditional Christmas Crafts
While traditional Christmas crafts are always a hit, there are plenty of alternative options to explore. Consider incorporating natural elements like pinecones, twigs, and dried flowers into your crafts for a rustic and organic feel. You can also experiment with unconventional materials such as recycled paper, fabric scraps, or even upcycled household items to create unique and eco-friendly decorations. Thinking outside the box and embracing non-traditional materials can result in one-of-a-kind creations that will impress your friends and family.
Tips for Using DIY Christmas Crafts
When embarking on DIY Christmas crafts with kids, it's important to keep a few tips in mind to ensure a successful and enjoyable experience. First and foremost, choose projects that are age-appropriate and safe for children to handle. Be sure to provide clear instructions and guidance, but also allow room for creativity and personal expression. It's also helpful to set up a designated crafting area with all the necessary supplies readily available. Finally, don't forget to have fun and embrace the imperfections – after all, it's the thought and effort that count the most.
Creating Lasting Memories with DIY Christmas Crafts
Engaging in DIY Christmas crafts with your kids is a wonderful way to create lasting memories and traditions that will be cherished for years to come. Whether you're making handmade ornaments, crafting personalized stockings, or creating festive garlands, the time spent together will be filled with laughter, creativity, and joy. These crafts provide an opportunity to slow down and savor the holiday season, allowing you to connect with your children in a meaningful and memorable way. The end result may be beautiful decorations, but the real treasure lies in the moments shared and the memories made.