DIY Card for Father's Day
- By Andrew Jacobs
- Jun 14, 2016
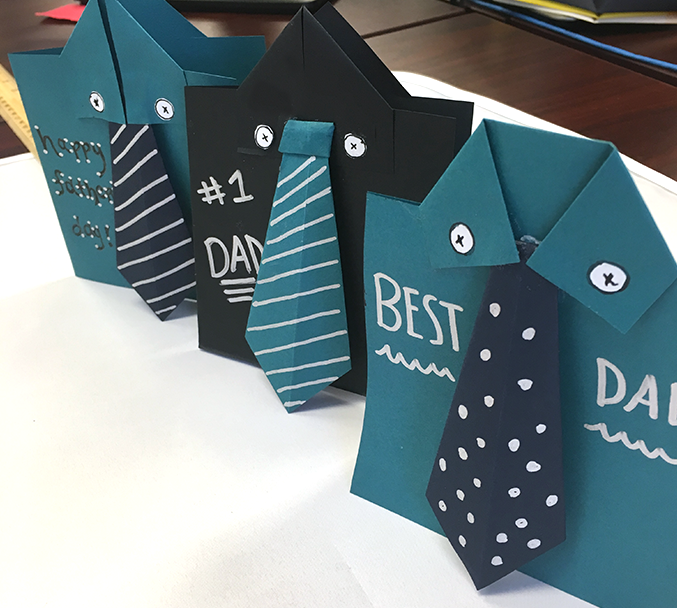
Father’s Day is quickly approaching and I bet you’re starting to scramble to find the perfect gift and of course, the perfect card. Why don’t you try this DIY card for Father's Day to show Dad how much you care! Instead of getting him a boring old tie, impress him with your origami skills and get folding!
Supplies:
1. Two different colors of paper or cardstock
2. Scissors
3. A ruler
4. A glue stick
5. Pens, markers, crayons, buttons, etc. to decorate with
Step 1
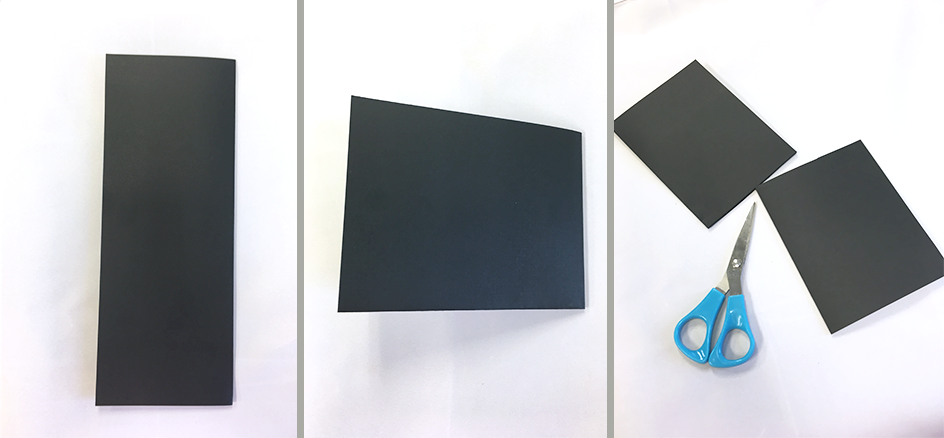
Pick your color paper or cardstock that you want to use for the shirt. Holding your paper vertically, fold it from left to right. Fold again from top to bottom and then cut right down the middle. You should have two equal size cards, so you can actually make two cards out of this! Or, if you’re like me, you have a spare to use when you mess up.
Step 2
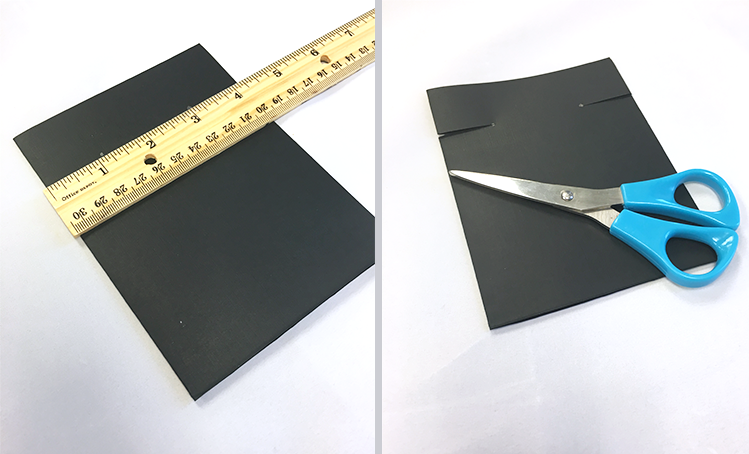
Hold the fold to the left and make two cuts an inch down from the top and an inch from each side of the paper. That sounds confusing, so just use the picture as a guide:
Step 3
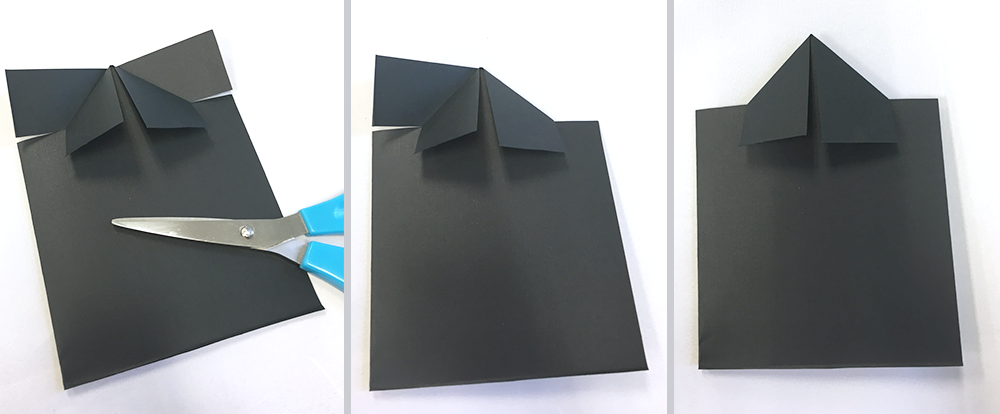
Fold the flaps inward to make the collar. After you fold them down, you’re going to have to cut the back flaps off. Cut the right one off, and then cut the fold of the left one to create two flaps. Cut the back one of that side off too. Now you can open the card!
Step 4
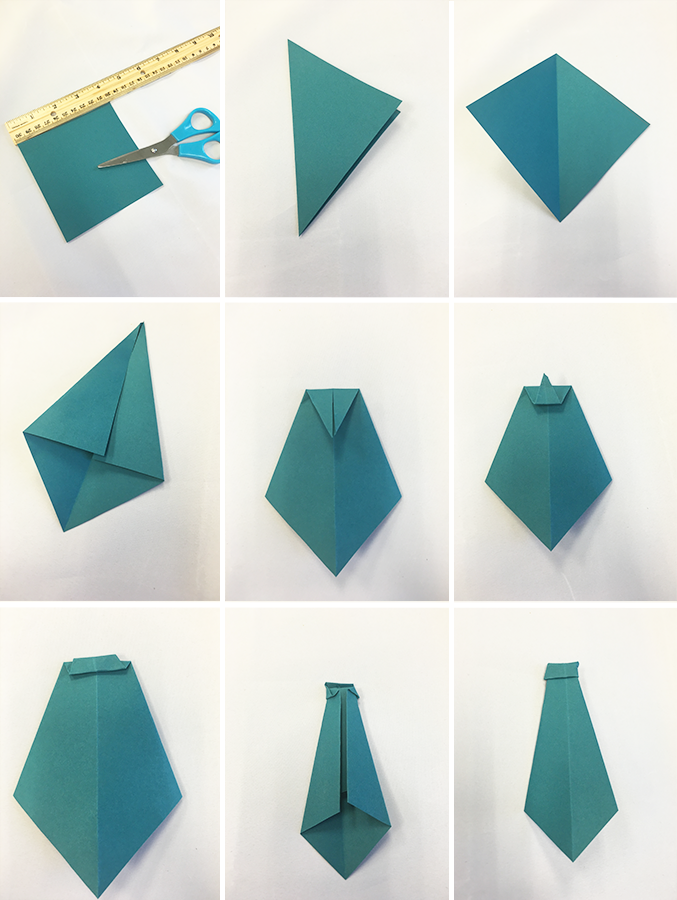
Now it’s time to make the tie! Using your other color paper or cardstock, cut a 4” x 4” square. Fold that square diagonally.
Turn your paper over and fold each side in on a diagonal. Your paper should sort of resemble a paper airplane.
Flip your paper back over and fold the top point about halfway down the front of the tie. From there, you’re going to fold that tip upwards to the top and fold any excess over the top of the tie. Again, that sounds confusing, so hopefully these reference pictures help!
Flip your tie over one again, and you’re going to fold the sides in on a diagonal again, just like you did before. Ta-da! You now have your tie. But you’re not done just yet!
Step 5
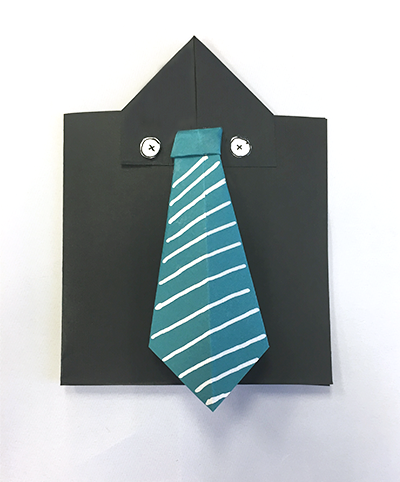
Now it’s time to attach your tie to the shirt. First, glue down the collar, and then glue your tie right on top! I cut out some white circles and made them buttons for the collar, but that’s totally optional. I also decorated the tie and the card when everything was glue down, but again, that’s optional.
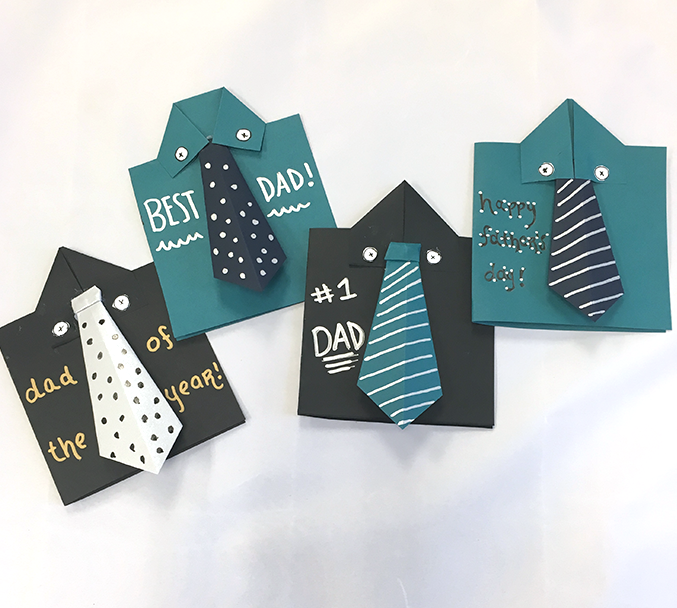
And there you have it! A cute, little shirt and tie DIY card for Father's Day for your #1 Dad! We love it, hope you love it, and know that Dad will totally love it! Happy Father’s Day!
DIY Card Ideas for Father's Day
Looking for a special way to show your dad how much you care this Father's Day? DIY cards are a thoughtful and personalized way to express your love and appreciation. Whether you're a crafting pro or just starting out, creating a handmade card adds a personal touch that can't be replicated with store-bought options. From simple designs to more intricate creations, there are endless possibilities for DIY Father's Day cards that will make your dad feel extra special on his big day.
Benefits of DIY Father's Day Cards
DIY Father's Day cards offer a range of benefits that go beyond just the act of creating them. Not only do they allow you to customize the design and message to perfectly suit your dad's personality, but they also provide a meaningful and heartfelt keepsake that he can cherish for years to come. Additionally, crafting the card yourself can be a therapeutic and enjoyable experience, allowing you to express your creativity while showing your love for your dad.
Use Cases for DIY Father's Day Cards
DIY Father's Day cards can be used in a variety of ways to celebrate the special occasion. Whether you're presenting the card alongside a thoughtful gift, using it as a standalone gesture, or incorporating it into a larger celebration, the personal touch of a handmade card adds an extra layer of sentiment to the occasion. You can also use DIY cards as a fun activity to do with your kids, creating lasting memories and teaching them the value of handmade gifts.
Alternatives to Traditional Father's Day Cards
If you're looking for alternatives to traditional Father's Day cards, consider exploring different DIY card-making techniques and materials. For example, you could experiment with pop-up cards, interactive designs, or unconventional materials to create a unique and memorable card for your dad. Additionally, you could explore digital options, such as creating a personalized e-card or video message, to add a modern twist to your Father's Day greetings.
Tips for Making DIY Father's Day Cards
When making DIY Father's Day cards, it's important to consider your dad's preferences and interests to create a design that resonates with him. Incorporating personal touches, such as inside jokes, favorite colors, or meaningful quotes, can make the card even more special. Additionally, don't be afraid to experiment with different techniques and materials to create a one-of-a-kind card that reflects your creativity and thoughtfulness.
Adding a Personal Touch to DIY Father's Day Cards
One of the key benefits of DIY Father's Day cards is the ability to add a personal touch that reflects your relationship with your dad. Whether it's through handwritten messages, custom illustrations, or incorporating sentimental elements, the card becomes a unique and meaningful expression of your love and appreciation. By infusing your personality and creativity into the design, you can create a card that truly captures the essence of your bond with your dad.


