


DIY: Geometric Paper Wall Art
- By Andrew Jacobs
- Feb 12, 2016
You walk into Pottery Barn looking for something to hang on your wall. You browse through the store falling in love with pillows, desks, dining room sets, and then you turn the corner. You see the art piece you’ve always wanted, one you immediately fall for. You run to the sculpture/painting/photograph and admire, jaw dropped.
When of all of a sudden, you see $399.00.
You walk out of the store with slumped shoulders, your head is down … basically you look like Charlie Brown after a ‘good grief’ moment.
And then after you get some ice cream to cheer your up, you come home, and start searching the internet. You magically find this blog.
And now you’re very thankful.
And now you feel lucky.
But you’re still wondering why you’re feeling that way…
Well, it's because we’re giving you some immaculate paper wall art that is solely done with …
PAPER.


That’s right folks. All you need are four packs of JAM Paper for our DIY Paper Wall art, and you have made a beautiful art piece. Well, at least you have the materials for it (steps are coming right up).
We decided to go with a blue theme and picked out our Aqua Paper, Teal Paper, Navy Blue Paper, and our Platinum Translucent Paper. But you can use any four colors you want. Currently I’m making a co-worker his own Brite Hue Red, Dark Red, Burgundy, and Stardream Silver version!
Here are some pictures I took to get you all inspired to make your own.
But also so you can send your own version to JAM's Facebook so we can share it with the world.
Everyone wants to be famous ... right?


That convinced you ... didn't it?
Yeah, I know it did. So here are the steps to make your own Geometric Paper Wall Art Piece:
I've been asked to make a video, which might make it easier to see! But I still have the picture steps down below for reference. Just click the picture below!
Also ... sorry for the rotation being off. If needed, I'll try to make another soon! Love you guys!
Step 1:
 I wanted to make sure that my pieces were big enough to make a statement. Make a square with a standard sheet of paper by cutting the longer side to 8 1/2 inches. Don’t worry if it’s not perfect, you can always cut the uneven sides along the way.
Step 2:
 Now we're digging in to the substance of actually making this paper wall art. Fold the one side in half making it look like the second box. Flip it the other way and fold that part down too. You should have four equal squares by the end of it (like you see in box 4).
Step 3:
 Next, fold the bottom section to the center and then the top section to the center. This should make the flat piece of paper now have 8 different sections.
Step 4:
 The paper should be folded again so that the inside has the two latest folds and the outside is smooth. After that, work with each square box you see. You want to fold one side of the first box to make a triangle. Make sure that the tip of the corner touches the end of the crease. Then make another triangle so that the other corner touches the other end of the crease. Repeat this with the other box. It should end up looking like the fourth picture above ... hopefully.
Step 5:
 Fold the triangle on the corner of one end inward. The triangle on the opposite (or diagonal) side should be folded inward too.
Step 6:
 Bring the two top corners together. Make sure you’re folding inward like the left picture above! When you put the two together, they should not end up on top of the triangle as seen in the right picture.
Step 7:
 The three sections of paper that I have shown in the first picture should go under the folded triangle you made in step 5. You may lift the folded section to tuck in the three pieces if needed.
Step 8:
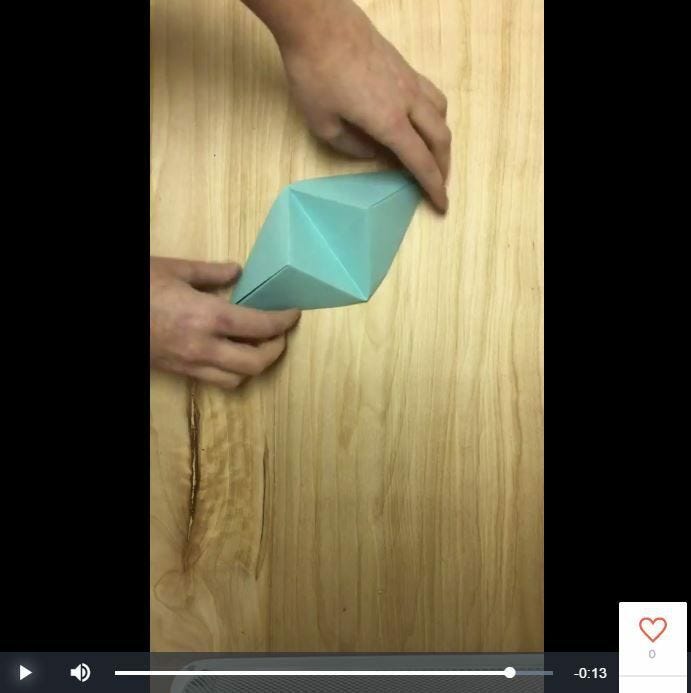
 Pop in the middle crease, put the two newly made triangles together, place it down, and you are done! Well … at least with the first shape. Now just make 26 more to make some JAM approved paper wall art!
But really, you can do whatever you want with these double triangles! Make them smaller if you're looking for a smaller art piece, make them bigger (with our Tabloid Sized Paper) for a bigger one. Or use a standard sheet and just keep adding and adding and adding to make your own shape!
And when you really just want a holder for your phone, just place it in the crease.

Bada-bing, bada-boom! This shape is so cool that people in the office are starting to ask for them! One person chose Navy, another Dark Red, and I picked Aqua. Another co-worker is still trying to figure out what color he wants, since JAM has wayyyy too many options to choose from.
I used regular tape to make my triangles stick to the paper. It worked for the time being but ...
**If you want to really make your shapes stick, I would suggest foam mounting tape! Cut out thin strips and place it on the middle crease or punch out circles of the mounting tape on the ends!
I bet you already forgot about that super expensive Pottery Barn art piece didn't you?
Wait ... did I just remind you?
CHECK IT OUT!
Some peeps were SO inspired, they made their own paper wall art!
Want to be featured on our blog too? Send us your creation via Instagram/Facebook/Twitter!


Creating Stunning DIY Geometric Paper Wall Art
Looking to add a touch of modern flair to your home decor? DIY geometric paper wall art is a fantastic way to showcase your creativity and add a unique, personalized touch to any room. By using simple materials like colorful paper, scissors, and adhesive, you can create eye-catching geometric designs that will impress your guests and add a pop of color to your walls. Whether you're a seasoned crafter or just starting out, this project is a fun and rewarding way to express your artistic side. With endless possibilities for customization, you can tailor your designs to match your home's color scheme and aesthetic.
The Benefits of DIY Geometric Paper Wall Art
One of the main benefits of creating your own geometric paper wall art is the ability to customize it to your exact specifications. Unlike store-bought wall decor, DIY art allows you to choose the colors, shapes, and sizes that best suit your space. Additionally, crafting your own wall art is a cost-effective way to decorate your home, as you can create stunning pieces using affordable materials. Not to mention, the sense of accomplishment and pride that comes with showcasing your own handmade art is truly priceless.
Use Cases for DIY Geometric Paper Wall Art
DIY geometric paper wall art can be used in a variety of settings, from living rooms and bedrooms to offices and dorm rooms. These versatile pieces can serve as a focal point in a room or complement existing decor. Whether you're looking to add a pop of color to a neutral space or create a bold statement, geometric paper wall art offers endless possibilities for enhancing your home's aesthetic.
Alternatives to DIY Geometric Paper Wall Art
If you're not keen on creating your own geometric paper wall art, there are alternative options available. You can explore purchasing pre-made paper art from local artisans or online marketplaces. Additionally, you may consider other DIY wall decor projects, such as canvas paintings or fabric wall hangings, to achieve a similar effect.
Tips for Creating DIY Geometric Paper Wall Art
When embarking on a DIY geometric paper wall art project, it's important to start with a clear vision of the design you want to achieve. Take the time to gather high-quality materials and invest in a good pair of scissors for precise cutting. Experiment with different color combinations and geometric shapes to find a style that resonates with your personal taste. Lastly, don't be afraid to think outside the box and let your creativity shine through in your designs.
Adding a Personal Touch to Your Space
DIY geometric paper wall art is a wonderful way to infuse your living space with personality and creativity. By incorporating your own handmade art into your decor, you can create a warm and inviting atmosphere that reflects your unique style. Whether you're a seasoned crafter or a novice, the process of creating and displaying your own geometric paper wall art is a fulfilling and rewarding experience.